Last year, much to our own delight, UncommonGoods began offering free, printable downloads. Our assortment currently includes party kits, cheese tasting tags, birthday cards (the Cat Tao birthday cards are my favorite) and diy paper fortune cookies.
Now, we have some pretty, printable paper flowers you can print and fold to make 3D decorations for wedding and anniversary gifts–or any gifts, really. Below are our Printable Paper Roses and Wildflowers templates and a step-by-step, illustrated how-to.

I consider myself a pretty decent gift wrapper, but my grandma’s 90th birthday is coming up, and I thought it might be nice to go all out on her gifts this year by adding a little something extra. She still does a little gardening, so I think she will really appreciate receiving gifts topped with little DIY paper flowers. With that in mind, I decided to give the latter two a try, starting with the paper roses.
As the instructions suggested, I changed my printer settings to print as many copies of each page I needed. That way, I avoided printing multiple copies of the instruction page. First, I printed the roses on card stock and wildflowers on regular printer paper. Next, I cut out all the components for my flowers and made sure I had my quick-drying glue handy.
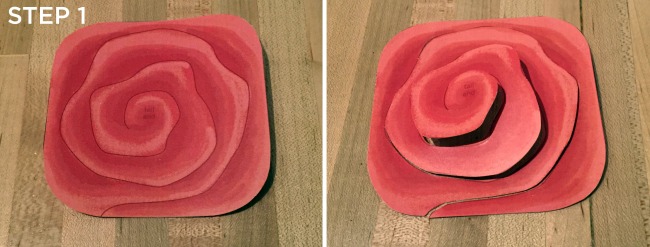
Step 1. Cut out the rose template on the black line. Continue cutting the template in a spiral fashion, starting with the outer edge.
Note: On the dark red rose, the black line blends in with the flower. But it’s okay if you can’t see/cut on the line because these templates are really forgiving, and you’ll still end up with a great looking flower whether you follow the template exactly or cut your own path.

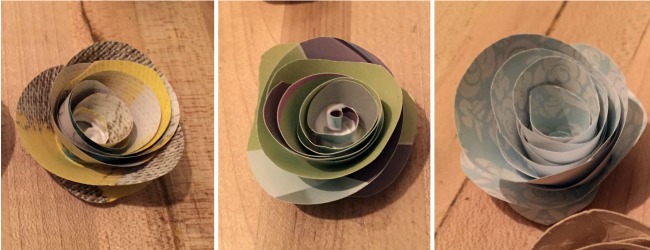
2. Using the outer edge as a starting point, roll the paper with the printed side facing in. You can roll it tightly or loosely, depending on the desired effect.
I tried to keep the bottom of the roll aligned as I went. Once I got to the end, I realized I had rolled a little too tightly, but quickly saw that after gluing the roll to the tail end of the strip, it was easy to unroll the flower and fluff it out a bit.
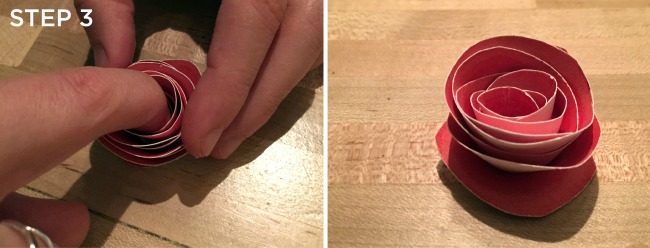
3. Secure the rolled bottom to the tail end of the template with some glue.
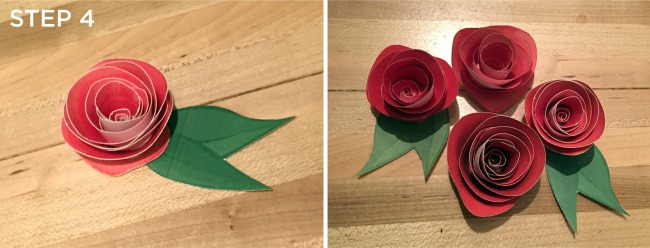
4. Finish your rose by gluing a leaf to the bottom. Fill out the “to” and “from” leaf to top a present as a gift tag or use the blank leaf as a decoration.
I think the hardest part of this process was figuring out how to hold the rolled flower in place while the glue dried. I would suggest gently holding the outer edges with one hand and using your forefinger on the other hand to hold the center of the flower as the glue dries. Don’t worry about getting it perfect. Each flower will come out looking a little different, which is great if you’re making a bunch of them.
I’m not a huge fan of red and pink, so I decided to experiment a little and see if I could make roses in different colors. I found some card stock scraps and patterned magazine pages and traced the templates onto my now-recycled paper. I’m happy to report that these little roses look good in a variety of colors, patterns and materials. I think three or four of them, made in a bright color, look beautiful on the corner of a gift, with twine and kraft or newspaper as the wrapping paper. The plain background really sets off the colorful 3D roses. “Growing” DIY paper flowers: an awesome new way to recycle paper!
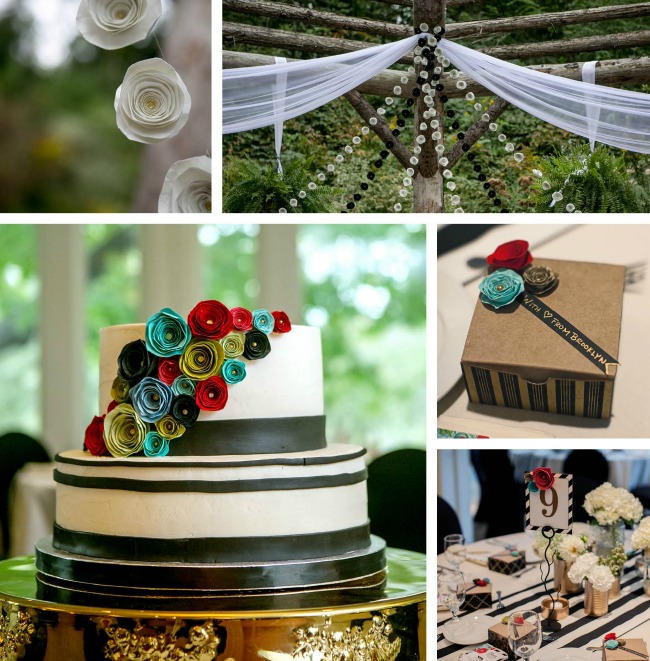
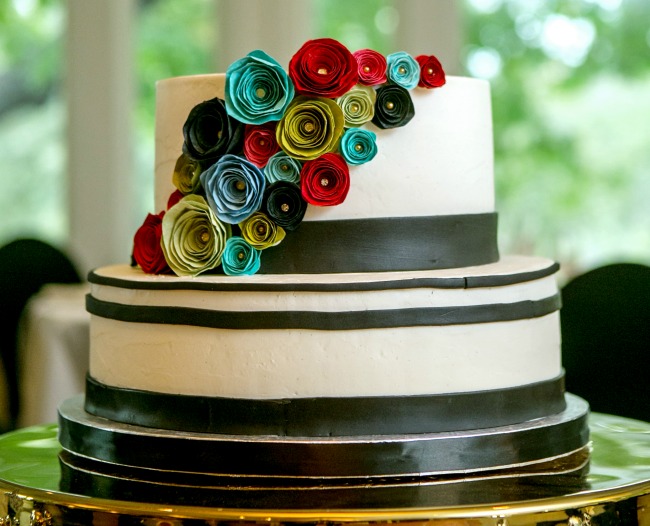
Part of the inspiration for this project came from one of my coworkers, who decorated her wedding with roses just like these. They were used as a garland, as place cards, and even on the cake. By adding a small detail, like putting a bead in the center, or by using a textured card stock, you can really get some gorgeous results.
Next, on to our second DIY paper flower template: the wildflower.
 1.
1.
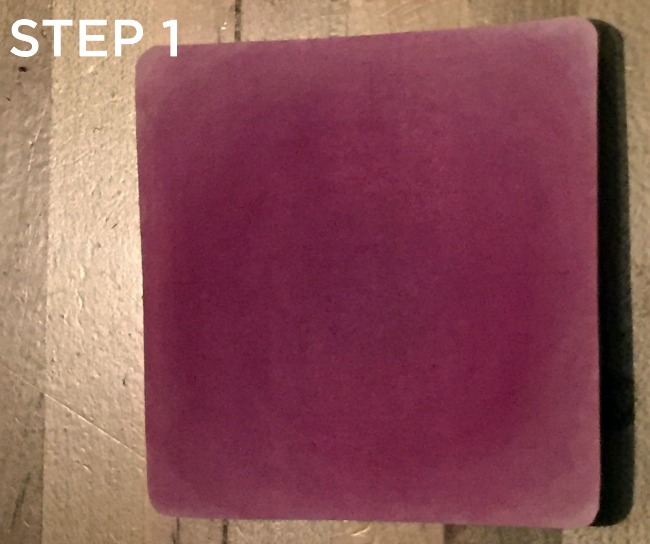
Cut out the templates on the black lines.
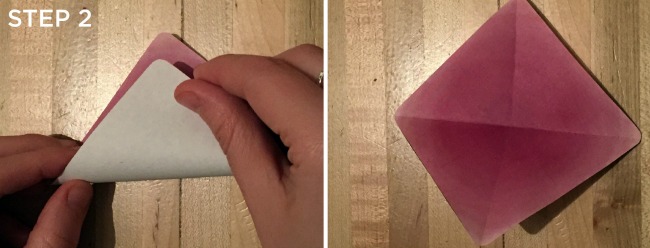
2. Orient the template so it is in a diamond shape with the printed side facing up. Fold the bottom corner to meet the top corner. Unfold. Fold the left corner to meet the right corner. Unfold.
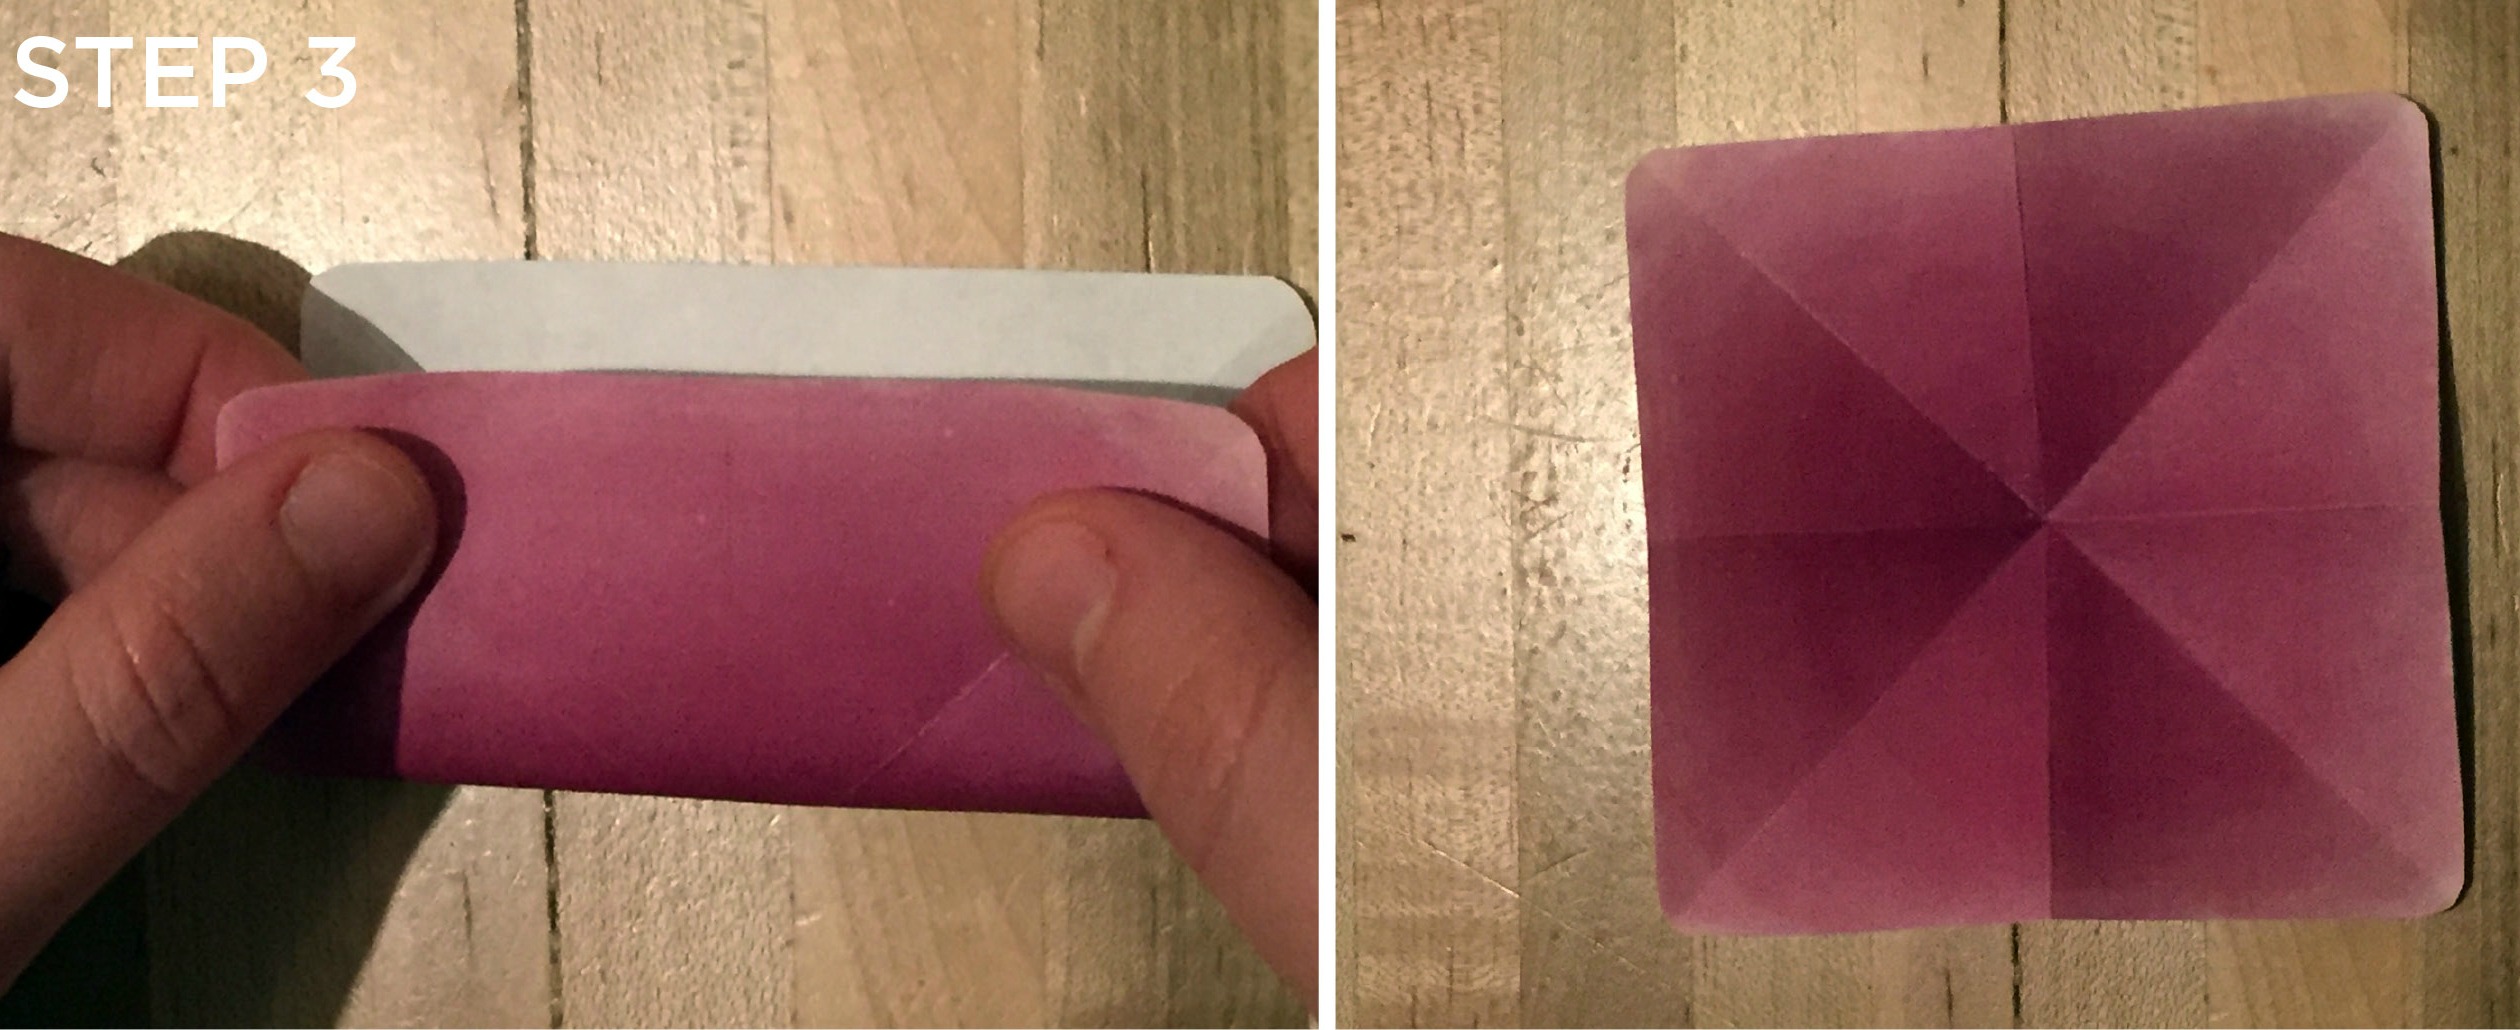
3.Orient the template so that it is a square and turn it over so that the printed side is facing down. Fold in half and unfold. Repeat in the other direction. See above image for what your our folds should look like.
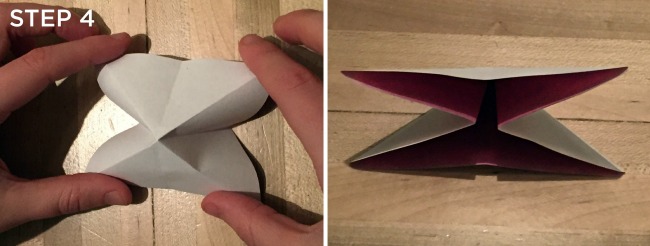
4. Hold the template in both hands with the print side down and your thumbs and middle fingers each on a corner. Gently press the middle sides in with your forefingers so that the template folds in on itself.
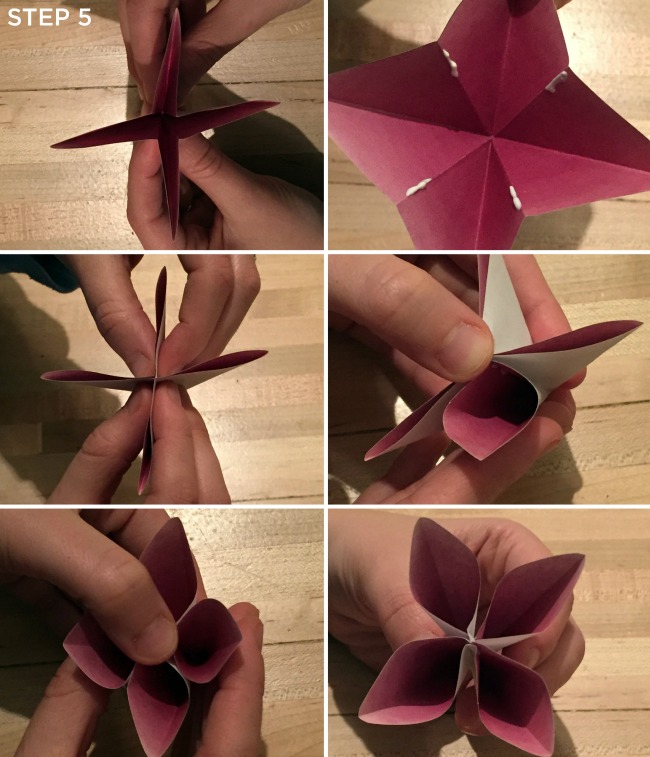
5. Turn the template over so that the print side is facing up. Carefully glue the center edges together using the dotted lines as a guide and fold the edges in to make an “X” (quick-drying glue is recommended for this step). Once the glue is completely dry, open and fluff each petal.

6. Finish your flower by attaching leaves to the back bottom of the flower. Fill out the “to” and “from” leaf to top a present as a gift tag or use the blank leaf as a decoration.
Some tips for this DIY paper flowers: The directions look like a lot, but some of the steps are repetitive, so it wasn’t actually hard to make. I made all my folds and they were super easy. The tricky part was gluing the edges together. The solution is to use thin lines of glue; globs of it will make the edges stick together too far into the petal. It’s also helpful to wait just a little longer to make sure the glue is completely dry. I got antsy on my first try, tried to open the petals before the glue dried, and everything came undone.
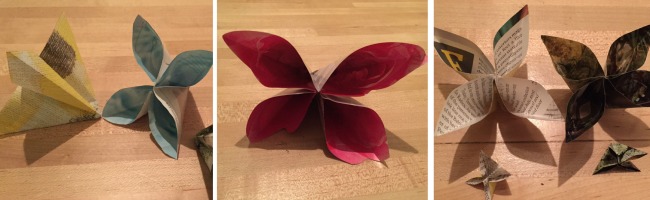
As with the roses, I was curious to see what these flowers would look like in other materials and patterns. Because of the nature of the folds, card stock wasn’t a good option (the thickness and rigidity of card stock makes it too difficult to open the petals after they are glued). I tried magazine pages but I think these would look better in a thin, double sided paper, or even newspaper.
While I was looking through magazines for different types of images to try, I came across an image of a large pink flower that was just the right size and shape. Instead of cutting it in the square shape of the template, I followed the curved edges of the flower, which gave it a more organic edge. It kind of turned into a butterfly shape, so not a bad experiment. I also cut off the bottom of the flower to get it to “stand up” similar to the roses. In doing that, I ended up with some cute little star shapes. (I was so enthused about cutting the flower shape that I forgot to take a “before” photo.)
Overall, these DIY paper flowers were easier to make than they looked. I would recommend printing an extra template or two to do a test run. I had a few “Aha!” moments the first time I tried each template (like, that I should glue the “outer edge” of the rose template after one roll to get the center of the rose to look the way I wanted, and that I should use thin lines of glue on the wildflowers). Don’t be afraid to experiment! These templates are easy to transfer to other materials – if I had scrap fabric, that would have been my next experiment. You don’t know what you’ll create if you don’t try. Making DIY paper flowers is fun and super satisfying – even therapeutic!

5 Comments
Wow, fun site, thanks for the flowers!
These are really pretty, I had to laugh because I’ve been doing this with fabric for years. Have trimmed many a wedding dress, veil, etc., with satin roses & they always look awesome!!
Oooh, great idea, Wendye. Our customers are so often ahead of us. We fully admit it!
Thanks for reading our blog.
Would love the printables but it wants my credit card info and it’s a free item. Also I have signed up for an account 3 times and went through the entire process and when I try to log in it states I’m not a customer and to register.
Hello, Jennifer! We can see how you could be confused, because those items have “add to your cart” capability, but that’s not really how you get them. You have our sincere apologies for all the hassle.
At the bottom of the item pages for all of our free printables, you’ll find a link that says, “Click here for your free download of the Printable [whatever it is – roses, wildflowers, etc.].”
We emailed you these instructions privately, but wanted to also post them here for anyone else who wonders about this. Thanks for being interested in our DIY printables, and for reading our blog.