Browsing Category

Maker Resources

Maker Resources

How to Take the Leap from Maker to Entrepreneur

October 15, 2014

Emilie Shapiro | UncommonGoods

Where do I sell my work? Is retail or wholesale better? How do I make work that will sell?

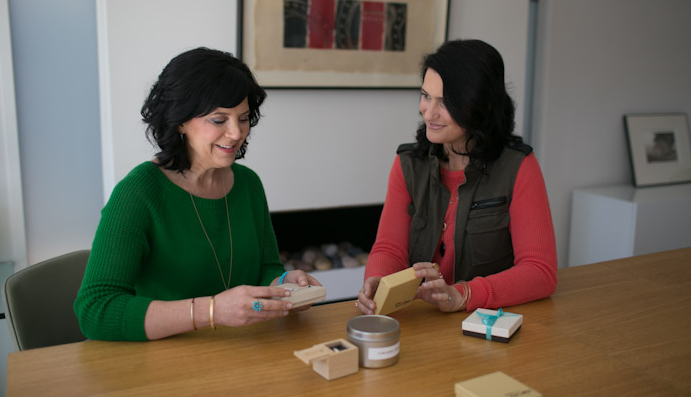
These are the questions I hear all of the time as a jewelry instructor. My students at Liloveve Jewelry School, 92Y, and Brooklyn Museum range from making their first piece to running successful businesses, but all have one thing in common–the need to create something tangible that didn’t exist before.

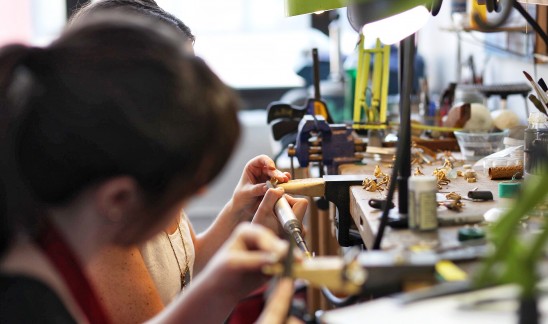
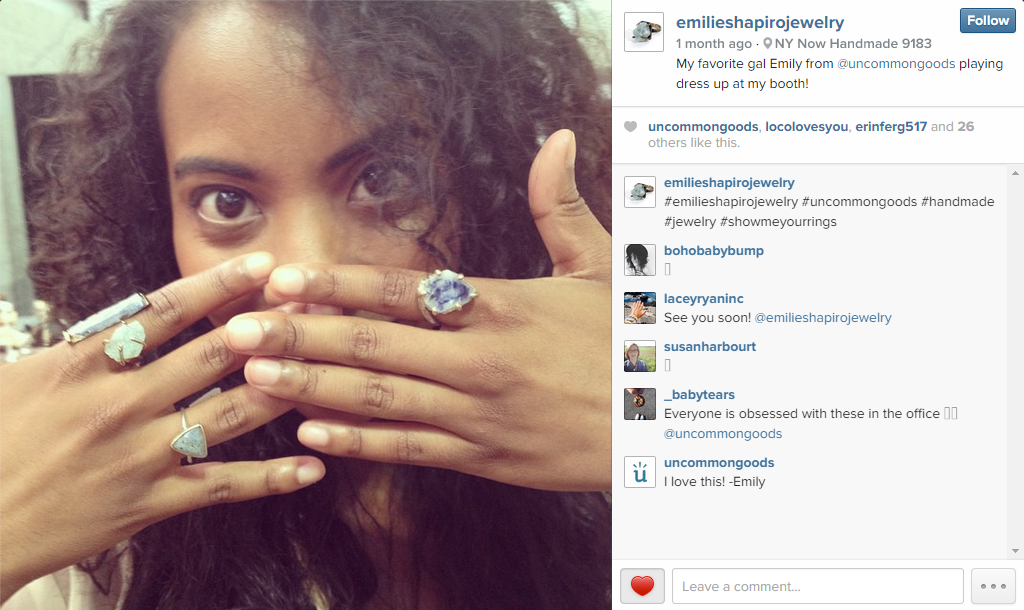
During my time as the production manager at Pamela Love Jewelry and Allforthemountain, I learned how the jewelry industry works inside and out from handmade one-of-a-kind pieces, small scale in-house production and outsourcing work with United States based factories. Through the years of designing my own collection which is sold at over 50 boutiques Worldwide, I’ve found what works for me.

Emerald Mosaic Ring | UncommonGoods

Where will I Sell My Work?

  • Directly from your studio. The Holidays are a great time of year to have a sample sale in person and/or online to get rid of some inventory to make room for new work.
  • Have a jewelry (or other item) party! Ask a friend or family member to host you and your work at their home or office. Bring snacks and wine and gift your host a piece for having the party.
  • Online – Etsy, bigcartel, your own Squarespace, site and so many more! There are tons of ways to make an inexpensive online presence or website that someone can shop from.
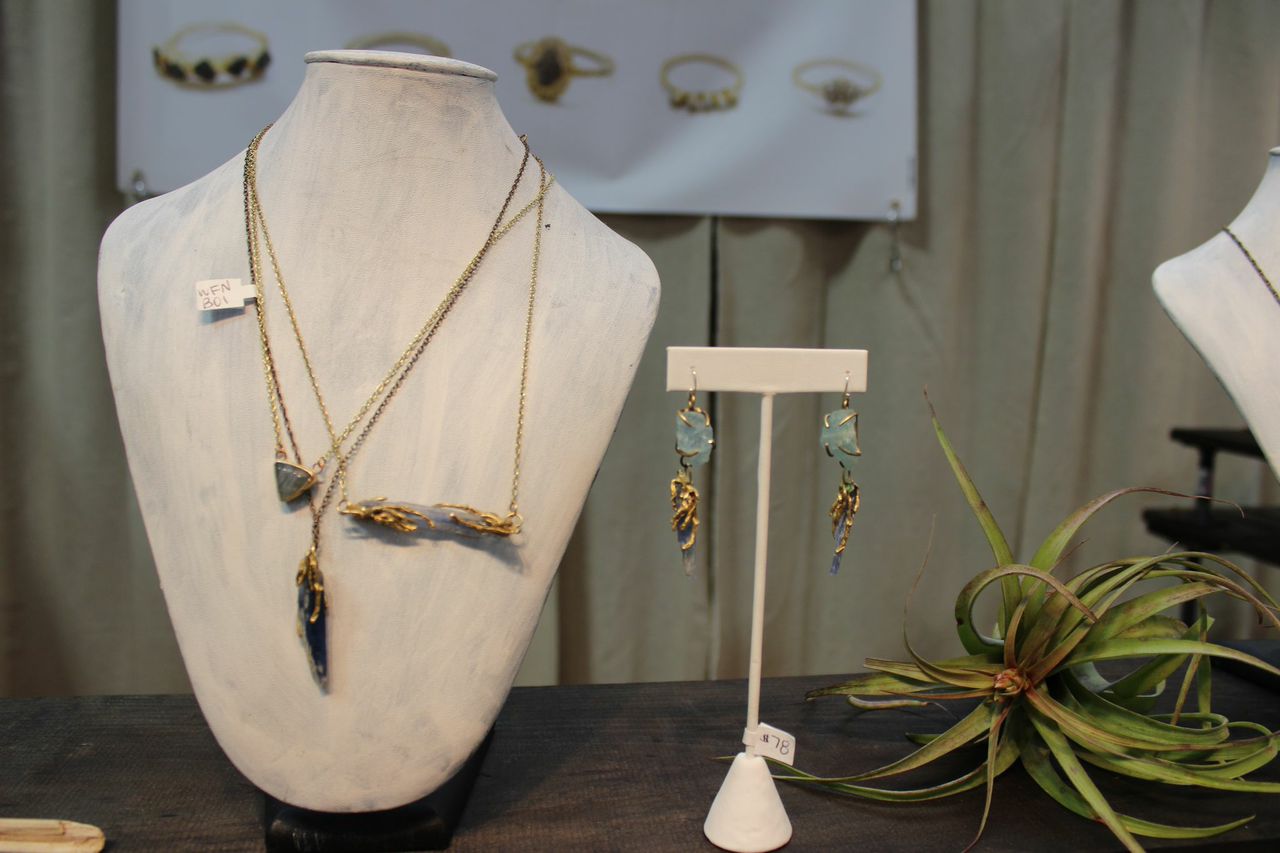
  • Retail Shows – Retailing is selling your goods directly to the public from a fixed location or online. Check out local craft shows in your area. The Holidays are great because people are looking for gifts. Be sure to ask the what the median price point is and what other vendors will be there to make sure you’re a good fit. Also, make sure to have a sign and a cohesive display for your work. Good lighting is a must, especially for jewelry, so make sure to ask about electricity. Don’t forget your business cards or postcards and packaging. (Some of these Trade Show Tips go for retail shows as well.)
  • Wholesale – Wholesaling is selling your goods in large quantities to be resold by other retailers. Set a minimum price or piece order to make it worth your time and so a retailer has a good selection of your work represented. Check out local stores you think your work would fit in with. Who else do they sell and for what prices? Would your work look good next to them? Walk in wearing your work (or pictures of your objects), be very friendly and ask who is the buyer and get in touch. Don’t waste your time or buyers time if it’s not a good fit or price point.

Production

How Can I Streamline My Production?

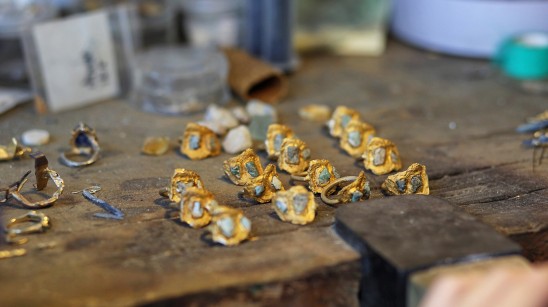
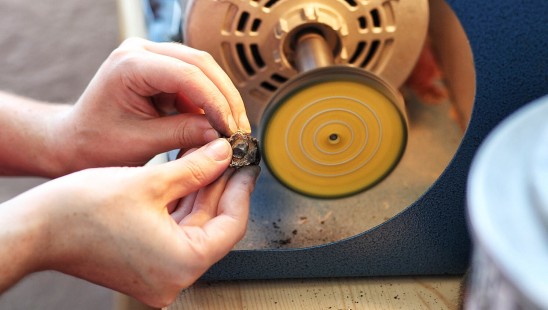
  • Focus on efficiency of creativity while you’re producing. Perfect your first piece (your model) on design and craftsmanship and then break down each step. Work in an assembly line fashion instead of making one piece start to finish, even if you’re by yourself. You work faster while your body gets in the rhythm.
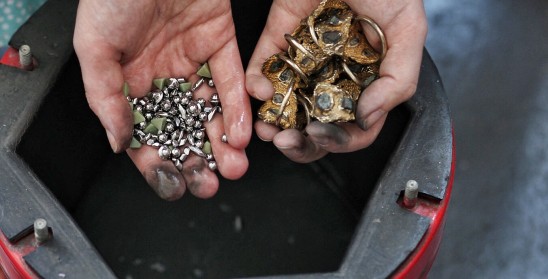
  • Buy in bulk when possible. Stock up on supplies and materials like chains and findings. Go in with other artists to get the best prices possible.

Materials

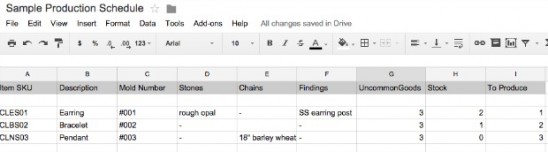
  • Develop a clear track for your orders from the second you receive it from when it ships out your door. I use a production schedule which I find really helpful. This helps me keep track of the items I have to make for stores and clients, what I have in stock, and what I have to make.

Production Schedule

  • Think about what you’re great at, and what someone else can do for you. As an artist you want to follow your heart on how you make something, but as a business owner you need to use your brain on the most cost effective way. Try to find the balance and make your work efficiently without lowering your quality.

Jewelry Assembly

What are the Best Tips for Success?

  • Make your own decisions; you’re the boss! Whether you’re hiring an employee, deciding whether a new store is a good (or bad) fit, telling the owner of a store they can’t change your designs (this happens to me once a week – you are the designer), there are tons of big and day-to-day decisions with running a craft business.
  • Find a middle ground. As an artist, you will have the tendency to make decisions based on feelings and intuition. As a successful businessperson, you will need to make decisions based on rational calculation. I like to find a happy medium between the two.
  • When you need help, ask for it. Use the resources of friends, family, and local businesses around you. No one can do everything! Know when to delegate.
  • Be thoroughly professional.
  • Accept nothing less than the highest standards of your work. Never cut corners to make a deadline; your work will suffer and people will notice. Customers buy handmade for good quality products. The goodwill of your customers if your most valuable possession! Don’t jeopardize it by delivering late or shipping work that’s not high quality.
  • Never stop learning!
Maker Resources

5 Tips On How To Conquer Trade Shows

September 19, 2014

Whether you’re planning to go to your first trade show soon or you’re a trade show pro – check out the five detailed tips below on how to take advantage of these events to help your business prosper!

5 Trade Show Tips | UncommonGoods

1. Make connections with other vendors: Networking at a trade show is no big secret. Essentially, that’s the whole point of trade shows! But be sure to not only get the attention from prospective companies you’d like to see your products represented by, but also that of other vendors. It’s important to make connections with like-minded small businesses, and yes, even your competitors. Many vendors are happy to tip others off about interesting events, great contacts, or must-see websites to check out — and it’s always beneficial to see how other businesses work and to take a peek at their products in person.  You might even be inspired to collaborate in some way or join forces together!

5 Trade Show Tips | UncommonGoods

During downtime, make an effort to introduce yourself to the booths and tables next to you – and if you can – venture to other category areas to spark different ideas. If you do make a great connection with another vendor, show appreciation by letting them know about the great tips that you have hidden up your sleeve! #SharingIsCaring

2. Join social events before and/or after the trade show: Being present at the big trade show is, of course, crucial. But sometimes you can make stronger and more natural connections with others in a more intimate setting. (Mix and mingle parties, lunch or dinner dates, or networking events/conferences.) People tend to open up more when there’s food and drinks involved and when a more carefree vibe has settled in. You can find interesting events by asking other contacts, actually reading the newsletters you’re subscribed to, checking out meetup.com, or using the power of Google.

5 Trade Show Tips | UncommonGoods

5 Tradeshow Tips | UncommonGoods

Extra tip: If you think you have a pretty promising contact list – maybe you can even throw a small gathering yourself! This would illustrate authority on your part and will strengthen the important relationships you already have. Don’t be scared to mix your vendor contacts with your merchant contacts, this will only encourage your invited guests to join.

5 Tradeshow Tips | UncommonGoods

3. Be sure you and anyone helping you knows your collection:   Nothing is worse than asking questions at a booth and having someone who can’t talk about their own line! One thing I’ve learned here at UncommonGoods is that buyers tend to stray away from unorganized or flighty vendors, no matter how great the product is. Know the product name, pricing, materials, and any other important information that someone might ask you right on the spot. If you have any friends or family helping you at your booth, prep them with information about your designs and provide them a cheat sheet if you can. Even if the potential merchant knows that the person helping you isn’t the direct designer, they are still a reflection of your business.

5 Trade Show Tips | UncommonGoods

Extra tip: Be sure to give out information beyond pricing to beef up anyone’s interest.  What makes your product special? Is it where it was made, how it was made, or who made it? Does it give a cut of its proceeds to a certain charity? Are there multiple uses of your designs? Think outside the box, because this is how a buyer will pitch any of their potential items to their team. The more powerful and interesting the story is, the better. Sure, the buyer can dig through your website to find this information you’ve probably already beautifully explained in detail. But I still suggest to hook them on the spot when you can, because there’s no guarantee they’ll visit your website once they float off to the next booth. (Even if you give them a business card!)

5 Trade Show Tips | UncommonGoods

4. Show appreciation and send follow-ups on social media platforms: The reality of trade shows is that merchants, buyers, and companies are looking at hundreds of booths for hours, days, and for some – the entire week! Your goal? Have them remember yours! Even if your product is amazing, it’s hard to stand out against hundreds of other innovative products. Besides following this display advice, you have to do more than just depend on your great products and hope that you’ll receive an email in the next few days. Take charge of the contacts you’ve made not only with a follow-up email, but also with giving them a shout out on social media a few days later, something short and sweet with a bit of personality will do.

Example: @prospectivebuyer – It was great meeting you and I’m so happy you enjoyed our new line. Let me know if you’d like me to send a sample! 

When you and the potential contact are saying your goodbyes at your booth, ask if they are on Twitter, Instagram, or LinkedIn and write down their personal handle name so you know the message will go directly to them. If you’re feeling bold, ask to snap a photo with them (or them wearing/holding your designs) and share that photo when you send your tweet or post. Not only will this jog their memory of who you are, but that prospective buyer will feel extra special.

5 Tradeshow Tips | UncommonGoods

Extra tip: Be sure that your feed has some type of recent activity before contacting anyone. Post a few photos, retweet/post a couple of articles, and write out personable comments. A “dead” social media platform won’t exactly work in your favor.

5 Trade Show Tips | UncommonGoods

5. Project energy and be positive: We all know trade show days are long! A constant smile on your face and an upbeat personality at all times might not be super realistic, but keep in mind that carrying positive energy is vital. It’ll make your day a lot more bearable and you’ll be more on your toes and alert. Think of it like you’re hosting a party – invite the buyers and your contacts, welcome them into your space, and keep them engaged! Also, remember to be supportive of your fellow artists and designers. Buyers love it when designers suggest other booths to check out, it shows a collaborative spirit and buyers have told me that it makes them love you even more. (And it’s good Karma!)

5 Trade Show Tips | UncommonGoods

Maker Resources

How to Make It: 5 Product Photography Tips

August 16, 2014

So, you’ve just created an awesome new product and you really want to sell it. Presentation is everything, which makes the photography of your item very important. Because we all don’t have a fully equipped studio on our hands at all times, here are some easy tips that almost anyone can master!

Light It Up

The number one most important factor is lighting. You don’t need a lot of lights; all you really need is a great sunlit window and a white fill card. A fill card is simply anything you use to reflect light, which allows you to fill with light for darker, shadowy areas in a photograph.  Fill cards are traditionally white, made of foam core or poster board, but can also be silver or gold depending on the quality of light you want to reflect.

When picking which window to use, pick one that allows diffused, soft light to shine through. What you don’t want is really harsh sunlight. If the light is too hard, it can make one part of your image too bright in comparison to the rest. What you are looking for is nice, even light.

How to Make It: Product Photography Tips

How to Make It: Product Photography Tips

Setting the Stage

The second step is creating your set. White poster board (or any large piece of white paper) and some tape is a cheap and easy way to get a clean backdrop. Find a small table and place the white background so that the window light comes from the right or the left. Allow the poster board to curve in the back, creating a sweep. Then place your fill card on one side.

How to Make It: Product Photography Tips

How to Make It: Product Photography Tips

Camera Ready

Whether you’re using a high-end camera or a simple point and shoot, the most helpful hint I can suggest is to turn off the flash. If you can’t turn it off, cover it with tape. Then, set your camera’s white balance setting to daylight—or auto if that isn’t available. If your photo shows up with a strange colorcast, you’re probably using the wrong white balance.

White balance is the general hue of your photograph.  For example, you could have a warm balance, where everything looks orange, or a cold balance where everything looks blue.  Most cameras allow you to pick which white balance you want to use.  You do this by picking the white balance that matches your light source.  Extra tip: If you are using natural light, you should pick the icon on your camera that looks like a sun.  If you are using tungsten light, you should pick the icon that looks like a light bulb.

Taking Shots

At UncommonGoods, we crop most of our photos into a square, so when you are composing, make sure you leave enough space around your product to easily crop. You can use almost any basic photo program to do this. I personally like to use Photoshop.

How to Make It: Product Photography Tips

When composing your shot, keep into account that you may not get the whole thing in focus. Your main priority is to make sure the selling feature is in focus. For example, let’s say you are shooting jewelry. If the pendant or charm has interesting detailing, make sure that’s in focus and let the chain go out. Decide which aspect you would most like the potential buyer to see, and then hone in on that.

How to Make It: Product Photography Tips

How to Make It: Product Photography Tips

While composing, use your fill card to fill in the shadows on your product. It’s usually nice to leave some shadow, as it will lend some shape, but you don’t want the shadows to go too dark.

Time to Edit

After you’ve shot the photo, use whatever photo-editing program you have (iPhoto, Photoshop, Lightroom, etc.) When you are done, save it as a high res (meaning 300 dpi) .jpg or .tiff.

In general, my editing advice is to be subtle in your treatment. Some amateur mistakes include using too much contrast, over saturating the colors or using too much sepia tones.  Subtly enhance your photos but don’t make them look unnatural, which is especially important in product photography because you don’t want to misrepresent what you are selling.

And you’re done! Have a good shoot!

Maker Resources

Videos from How To Make It: Pricing Your Designs

June 16, 2014

Videos from How To Make It: Pricing Your Designs for Retail | UncommonGoodsLast month we hosted another How To Make It design panel event at Brooklyn’s Union Hall where Seth Walter from our Purchasing Team and Jason Feinberg, the CEO & Creative Director of FCTRY, discussed the decisions you should make while pricing your designs for retail. We got a little off-topic as the guests in our audience had really great questions, but we think you might get some great advice from our answers. Check out clips from the event and the conversation it its entirety below!

How much should you pay yourself for a handmade design?

MAP (Minimum Advertised Price)

Should a wholesale price be fixed?

How to price a collection of designs.

Is scaling up always the best idea?

How does UncommonGoods find new artists?

Two common mistakes made in pricing handmade designs.

FULL VIDEO COMING SOON!

Maker Resources

The Four Most Important Steps for Starting Your Jewelry Business

May 2, 2014

Do you ever wonder why some designers are a huge success and able to seamlessly grow while others struggle to scale their business? Or maybe you’ve worked really hard to get a big sale, but have no plan for production? Creating a road map for business success can sometimes be a challenge for creative people. That’s why it’s even more important to set up and build your jewelry business (or any creative business) the right way from the get go.

Building a strong business platform, especially for a jewelry or product based business, is essential in helping you multiply your profits and scale up. There is a big difference between the companies that easily scale and grow and those that implode when they get their first big order. Those that succeed have used these 4 steps below to build their business.

Jewelry Business Advice | UncommonGoods

Step #1: Step into the Role of CEO
Successful designers who know how to grow their business discover early on that it is important to run their business like a CEO and ditch the “maker” mindset. You may have started your business as a designer or a maker. That’s all fine and dandy. However, if you are serious about growing your brand, you need to work on your business rather than in your business.

BKMW

Step #2: Create Systems for Freedom
The second step successful designers do is create systems for freedom in their business. Every aspect of your business should be systematized including the sales process, production process, HR process, marketing process and everything in between. Effectively systematizing your business allows for more freedom because you can bring just about anyone in to take on any position in your business. When you have well documented systems, you can be flexible with scalability and your staffing needs. This holds true even it you are a one-person show currently. Take the time to document!

image6

Step #3: Set Up Production that Can Scale
Having production that can scale is directly related to Step # 2. You must systematize your production so that anyone can step in and make your product. For jewelry designers who are making everything themselves, it is important to eventually be stepping out of the maker role. The only way you can do that effectively is to either hire a team to do this for you, find a factory or hire piece workers or contractors who work outside of your office. When you are just starting out, it’s ideal to have local production outsourcing capabilities so if you do get a large order you can produce it on time. Using contractors and piece workers also allows for the flexibility of hiring production help on an “as needed basis.”

c6f826b536af39d1c45f707f9ffd3b47

Step #4: Understand How Cash is Flowing
Cash flow is the one aspect of a business that is key to keeping it afloat. Having a strong grasp on how your cash is flowing is essential to growing your business and staying healthy financially. Managing your cash flow cycle will help you keep your business going so you can snap out of the feast or famine cycle that many designers experience in business. Paying attention to where the cash is coming into your business also allows for further clarity on business modeling and direction. You can cut offerings that are dead weight and expand on those that are bringing home the bacon. Abundant cash flow or lack thereof will make or break your jewelry business.

Flourish & Thrive

Acting like a CEO, creating solid systems, setting up your production for scale and managing your cash flow are key to success in biz. By starting with these 4 Steps, you’ll build a business with a strong foundation to multiply your profits. We want to hear from you! In the comments below, answer the following:

 1. How are you building a strong business platform and stepping into the role of CEO?

2. What do you struggle with the most on the “business” end of things?

If you haven’t checked it out yet, make sure you enroll on our free training series called The FREEDOM Method. Learn how to create more cash, clarity and FREEDOM in your business.

Maker Resources

How To Make It: Instagram and Your Creative Business Videos

April 9, 2014

On March 25 we invited Ronen Glimer of Artists & Fleas, Ronda J Smith of In the Seam, and local members of our design community to a panel discussion about using Instagram to market your designs and build a following. The event was hosted at Union Hall in Park Slope and guests stuck around afterwards to swap business cards, meet our marketing and buying teams, and make connections.

If you’re ever in the hood you should check out one of our events, but watching the highlights are always a great back-up plan.

Maker Resources

12 Tips For Making Your Instagram Great

February 19, 2014

Love it or hate it, we definitely live in a hashtag world. As a company who supports emerging artists, we know that most designers know that maintaining a professional website alone just isn’t quite enough these days. Building your brand or showcasing your designs on a social media platform is becoming more of a must than an option.  

Instagram

The beloved photo app, Instagram, is a social media favorite among designers and creative gurus. It has the strong effect of being able to bring your brand and designs to life through lifestyle shots and personable captions. (Captions that need to appeal to people other than just your mom.)  We know that reaching out to potential followers who have an interest in your work can be pretty tough. It definitely starts with engaging content, relatable topics, and let’s face it, beautiful snapshots — but that’s all easier said than done.  We decided to collect 12 great tips from a couple of our favorite Instagrammers, Mandi Johnson and Mark Weinberg, to help you take your Instagram content to the next level. Read on to #BecomeAnInstagramNinja.

1.  Take advantage of daylight. Improve the quality of your photos by primarily taking them during daylight hours. Natural-lit photos are oftentimes the prettiest. If you’re working on amping up the beauty-factor of your stream, but still want to be an active poster in the evening, try saving up photos from earlier in the day and posting them later as a #latergram. Helpful tip: I usually turn my poorly lit snapshots into black and white photos. -Mandi

Instagram

2. Frame up and wait.  I am always looking. When I find a scene I want to photograph, especially in the city or when traveling, I will frame up and take a few photos, but then I’ll wait. I’ll hold the camera in the same spot and wait for a person, a taxi, a plane, or something to show up. This can add a unique and dynamic element to your photos and take them beyond the basic snapshots.         –Mark

mark1

3. Remember: quality not quantity. Limit your posts by sharing an image, at most, once or twice an hour. Posting  ten pictures all within ten minutes can come across as annoying as spam in an e-mail inbox. If you’re updating your shop and want to give people an enticing preview, select one or two of your best images and upload them with a bit of time in between.  Spacing out your posts also gives you some time to be productive or enjoy life without always having your eyes constantly glued to your phone. -Mandi

Instagram

4. Move closer vs. zooming in. Camera phone resolution is truly remarkable. But, zooming in digitally degrades the quality instantly. If you can, take a step closer instead of using the zooming option. Helpful tip: Also try to take a step back and see how it looks. Doing this forces me to move and interact with the scene and see it differently.  -Mark

mark6

5. It’s okay to Instagram photos from your fancy camera. Using beautiful camera photos will not only beef up the visual appeal of your stream, but can be a good way to give a sneak peek of a photo shoot you’re editing or to showcase a nice photo that didn’t quite make it onto your website.  When I do this, I’ll usually edit a photo and resize it to an 800px square on my computer and then e-mail it to myself so I can open the e-mail and save the image to my camera roll on my mobile device. Just don’t upload too many DSLR camera photos onto your stream, or you may come off as overly styling your life, which makes you appear inauthentic. Helpful tip: Instagram etiquette suggests that you should use tags that will let your followers know why your photos are bangin’ and theirs aren’t. Try using #frommycamera or #notiphone. -Mandi

instagram3

6. Dabble with different angles. Phones are small and can often fit where a traditional SLR can’t. Put the phone on the ground. Hold it up over your head. Hold it out the window (very carefully). Hold it directly against the glass of a window. Trying different angles doesn’t only enhance your creativity for future posts, but it also creates a visual balance on your photo stream altogether. -Mark

mark5

7. Download an editing app. Filters are often extremely overdone on Instagram, especially when using the built-in filters that the app itself offers. You can actually edit your mobile phone photos with a more tasteful touch by using editing apps like Afterlight or VSCO Cam. Those are my two favorites because you can adjust the strength of each filter and adjust the coloring, tones, brightness, and contrast. Look at it as a light version of Photoshop, but just on your phone. -Mandi

instagram2

8. Breaking the “Rule of Thirds.” I’m always on the lookout for “existing framing” or in other words, real world elements that frame an object or cut the scene in half. Just as good light is important, shadows and contrast are essential. Yes, the “rule of thirds”  (where the frame is split into a grid of three vertical lines and three horizontal lines, creating 9 quadrants) is often a good rule to keep in mind when framing up. But you can also produce successful images by breaking this rule whether it’s centering your object or placing your horizon line just right above the bottom of the frame. –Mark

mark2

9. Tread lightly on hashtags. They can be a great way to engage with other users and perhaps find new followers, so I can understand their appeal, as annoying as some Instagram users might find them to be. Try limiting yourself to using hashtags as a way to gain visibility for a less broad term or to connect with a niche audience. For instance, if you’re trying to gain exposure for a holiday craft, #holidaycraft would be an appropriate hashtag, but you’ll be sure to get mega eye rolls if you also include a bunch of inane tags like, #glue #crafts #ornaments #paint #makestuff #ilovechristmas #hashtagsforever. Pick one or two hashtags that will get you the most mileage, and maybe consider creating a unique tag so your followers can cut to the chase and check out precisely what they want to see in your stream. -Mandi

instagram1Caption: I’m selling this #midcenturymodern #plycraftchair to anyone who can make it to Canton, Ohio to pick it up! Asking $175 for it.

10. Make use of negative space. Be willing to leave some air in the frame. It can help your viewer focus when you leave negative space around your subject. Take it to the extreme and make 90% of the frame negative space, you may be surprised with what you find. -Mark

mark3

11. Interact with your followers. Always show courtesy and respect as your following grows. Even if you only become moderately popular, don’t let the fame go to your head. It can be difficult to notice every comment on every photo when new notifications are constantly popping up, so don’t be too hard on yourself if you miss comments on month-old photos. But please do check out your most recent uploads to see if people have asked questions about where you got your fabulous shoes or if you’re from Cleveland too. You don’t need to respond to every compliment or friendly comment, but if people ask you questions, be decent and answer them. There’s nothing more eye-roll-worthy than a popular Instagrammer who frequently ignores his or her friendly followers who ask simple questions. -Mandi

instagram8

12. Post what you like and don’t worry about what people think. It’s your Instagram account and this is reflecting who you are creatively. If there’s an everyday (or odd) object that you find to be interesting, cool, or funny — go for it! If you find yourself in a creative rut, take the time to be inspired by other Instagram accounts.  Don’t force yourself to photograph a popular concept (aerial shots of meals, text on top of images) if that isn’t your style. When you find an idea you like, give it a try and add your own personal touch to it. -Mark

mark4

These 12 awesome tips were written by Mandi Johnson | Making Nice in the Midwest and Mark Weinberg | Mark Weinberg Photography. Follow them on Instagram @mandimakes + @markweinbergnyc.

mandimark


Maker Resources

How to Write Your Artist Bio

February 10, 2014

How to Write Your Artist Bio | UncommonGoodsWhen I was first asked to write a blog post about writing about yourself, I got really excited because, like any 20 something year old girl who majored in writing, I’m pretty well versed in writing about myself/thinly veiling mortifying moments from my adolescence and calling it fiction.

Thankfully, the kind of bio-writing we’ll be discussing doesn’t require you to reveal that you wore braces to your senior prom. It has a lot more to do with selling yourself to potential vendors, sites that sell your goods, and customers who want to know all about you. Much less awkward for all of us.

You really are an extension of the product you’re asking people to buy or sell. When it comes to unique, handmade goods, people love being able to put a face with their new gift. People want to know:

  • where you’re from
  • what you do
  • how you got in to what you do
  • what inspires you to do that thing that you do
  • your plans for continuing to do these things in the future

In addition to being an excellent checklist, this is also a good order to put them in.

You don’t have to start with the fact that you were born in a barn on a balmy Tuesday morning under a double Pisces moon. However, the fact that you grew up in the country could say a lot about your influences. Can you remember any early inklings that you could become an artist? Who were your inspirations?

Now that we have the early stuff covered, how did you start your life as an artist? Did you start of with a 9-5 and then gradually turn your craft into a full time business? Did you start working with a local collective? How have you seen your style change throughout the years? What was a favorite project of yours?

If you want some extra personality, a short and sweet anecdote can complete your written image. When writing my own bios, the quirky facts that come to my mind are 1. I’m very scared of goats. And 2. I was the girl who wore braces to prom. These facts might not have anything to do with my craft, but it does give a little insight into the type of person I am–something a customer would be able to garner if they were able to talk to you at a craft fair or chat with you at the register.

Whatever you do decide to highlight, just remember to keep it relatively short–epic tales of heroism and metaphors on life are best suited for your memoirs (and preferably written from a small cabin in the woods, Thoreau-style.)

With these basic guidelines, you’ll be able to create a friendly, readable bio that will give your creations a more personal edge. Happy writing!

Here are some of our favorite artist bios:

Etta Kostick

Etta is compelled by glass in its many different forms and applications. She grew up in the woods and by the seashore in Massachusetts, in a family of glassblowers. After moving to Chicago in 2007 she started experimenting with stained glass, attracted to the many colors, textures, and its relationship to light.
Over the years Etta’s fascination with glass has grown and has lead her to pursue and experiment with different methods of manipulating glass. Torch fired enameling, fusing, and incorporating intricate solder work are some of the techniques that Etta uses. She loves the transformative properties that occur when integrating these materials and techniques into her glass work.

Etta’s love of jewelry was initially inspired by tribal jewelry and adornments she had collected from South Asia. Strong shapes and the feeling of empowerment they give to the wearer are elements that inspire her. Her jewelry incorporates bold designs as well as more delicate and organic elements that emulates things she sees in nature. Etta is constantly exploring and developing new visions for her work in glass and jewelry.

Dolan Geiman

Dolan Geiman is a nationally recognized mixed media artist known for his Contemporary Art with a Southern Accent. Born and raised in the Shenandoah Valley of Virginia, Dolan Geiman’s formative years were defined by outdoor adventures in his bucolic surroundings. Twenty-plus years later, the flora and fauna, found curiosities, and fading Appalachian culture still define Geiman’s contemporary-folk creations. Trained in printmaking and sculpture, Geiman’s mediums span painting, collage, silk screen, drawing, and 3-D assemblage. An advocate for green design and sustainable business, Geiman and his wife Ali Marie currently work from a green warehouse in Chicago’s Bridgeport neighborhood.

Fred Conlon

Raised in Colorado, Fred Conlon lives now in Salt Lake City, Utah, where he makes garden sculptures out of recovered objects. For his helmet sculptures, he uses real recovered World War II helmets. “It is very satisfying to transform something once used in war into a peaceful garden decoration,” he says. His work has been featured in Niche Magazine, the Salt Lake Tribune and HGTV. What would he be if he weren’t an artist? “Happy…just kidding!” he answers. “I can’t imagine doing anything else.”