Browsing Tag

DIY

The Uncommon Life

DIY Bridal Survival Kit

June 8, 2012

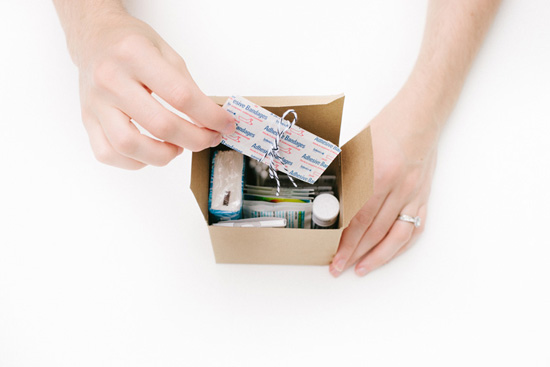
Hello Uncommon Goods blog readers! I’m Laura from A Girl Who Makes. I am here to share an easy yet necessary wedding day survival kit with you. Wedding days are memorable and can also be hectic. A survival kit for brides and/or bridesmaids will be a helpful gift to keep everyone calm and prepared. I’ve put together a little survival kit of some much needed essentials, but these kits can be customized easily by the contents put in the box.

MATERIALS: Gift Tag Stamp Set, twine or string, hole punch, card stock, scissors, and a box to hold items for the kit.
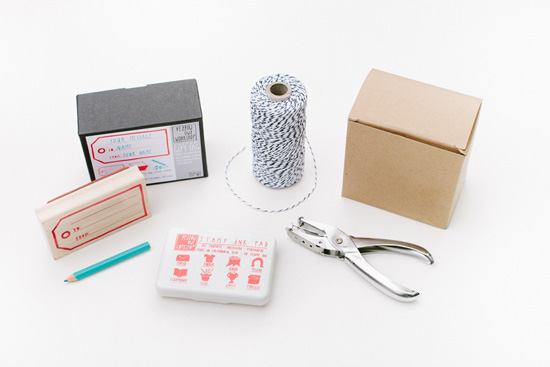
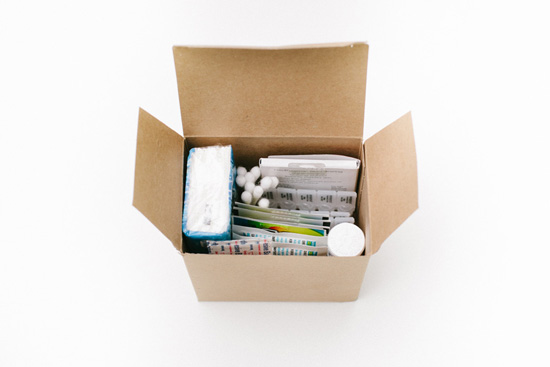
STEP 1: Fill the box with the chosen essentials. I included tissues, stain remover, cotton swabs, mints, bandages and some lip gloss.
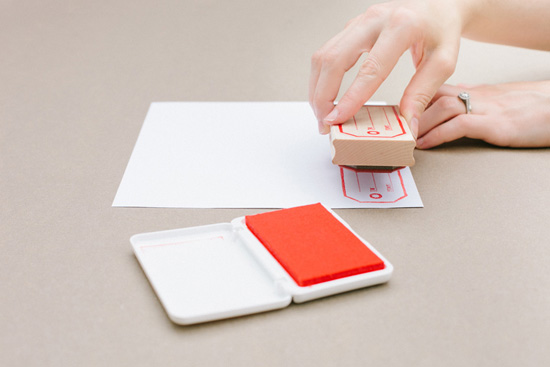
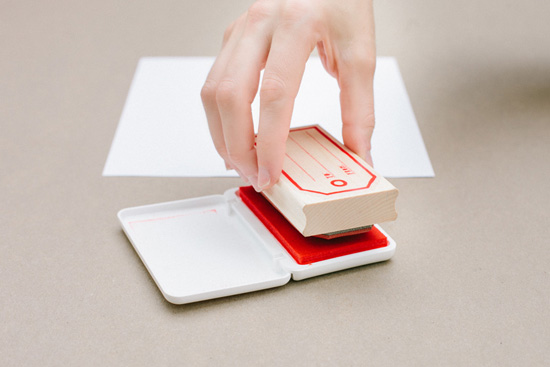
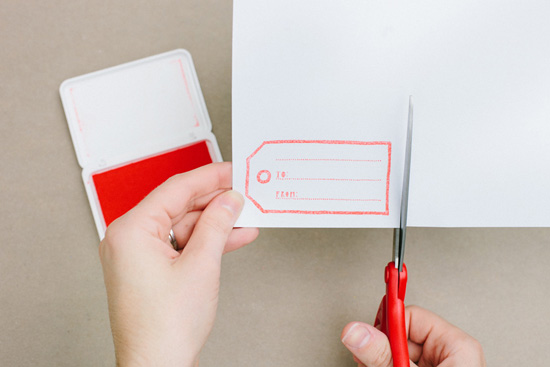
STEP 2: Using the stamp set, ink the stamp and press it onto the card stock, making sure to have full coverage on the stamp. Press evenly when the stamp is on the ink pad as well as when the stamp is on the card stock. When lifting the stamp, be sure to lift straight up so you don’t smudge the paper.
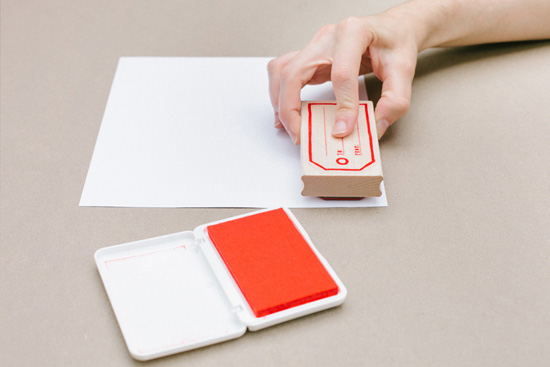
STEP 3: Trim the gift tag using scissors to the size you would like. Also using a hole punch, make a hole in the tag as well.
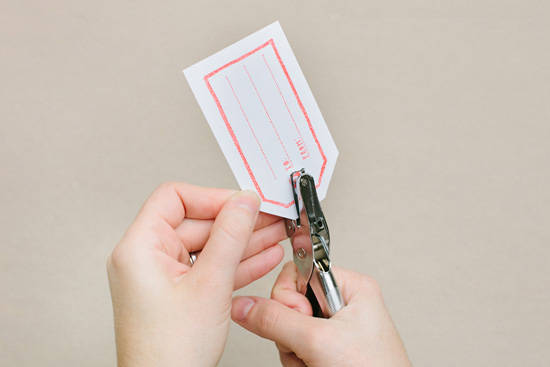
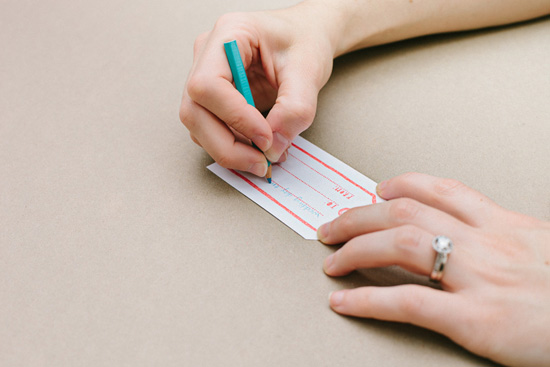
STEP 4: Using the pencil from the Gift Tag Stamp Set, fill out the tag.
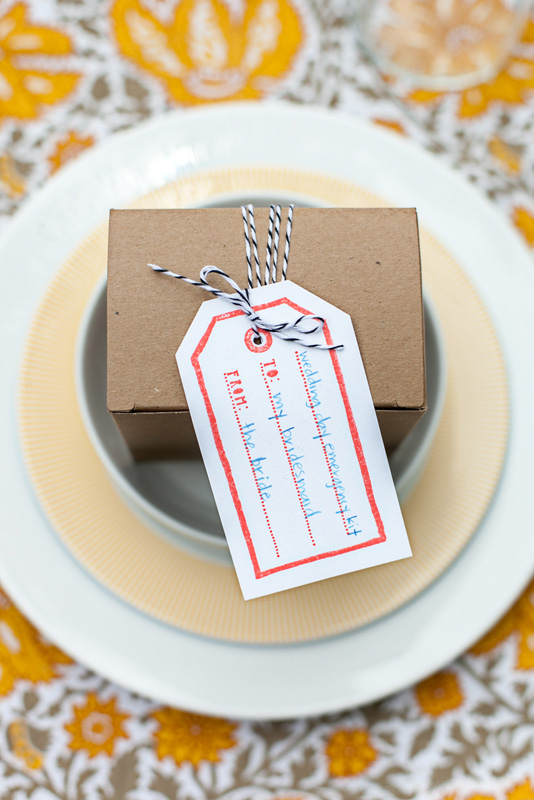
STEP 5: Take a piece of twine or string that measures about 1 yard and wrap it around the box several times. String the tag onto the twine and tie in a bow to complete the box.

Gift Guides

Gift Lab: Father’s Day Puzzle Project

June 8, 2012

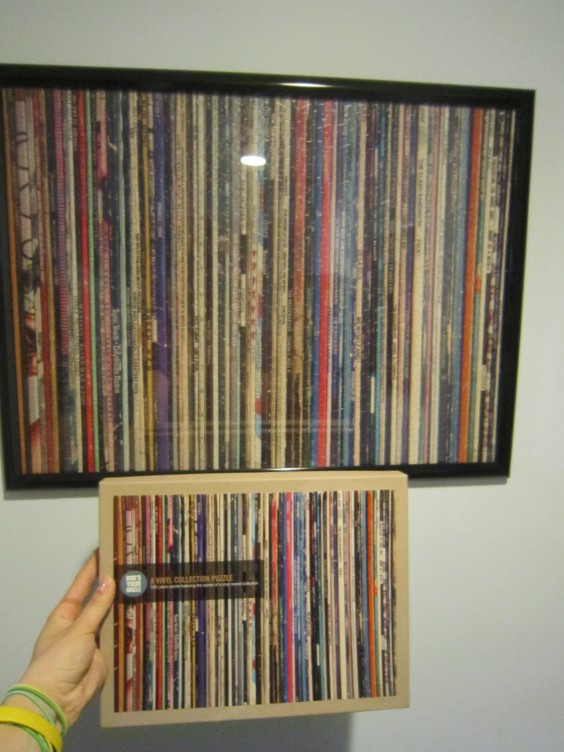
Every year for Father’s Day I get my dad the same thing – a store bought tie. This year I decided not to add to the mountain of ties in his closet, but instead give him a unique gift we could create together. The vinyl collection puzzle was that perfect unique gift – what’s better than some quality father-daughter time, while creating DIY wall art!?

Background Research:
Many a family game night during my childhood was spent working on puzzles. You would think that putting together puzzles would be a calm activity; however, in my family it is practically a competitive sport. Each piece was quickly put in place as we raced to see who could put in the most pieces in our 250, 500, even 1000 piece puzzles. It was a fun challenge that we could compete in together!

Hypothesis:
The Vinyl Collection Puzzle will be not only a great father-daughter activity, but also a great DIY Father’s Day gift.

The Experiment:
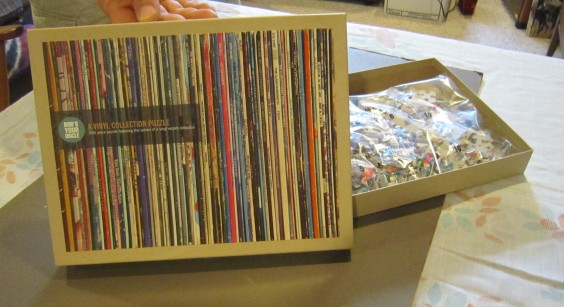
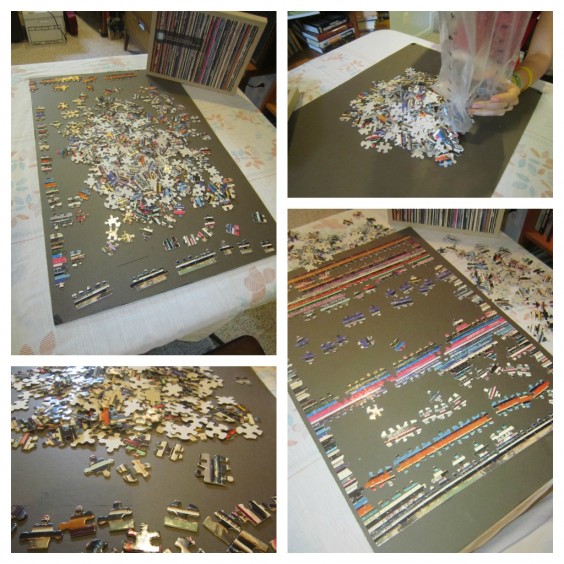
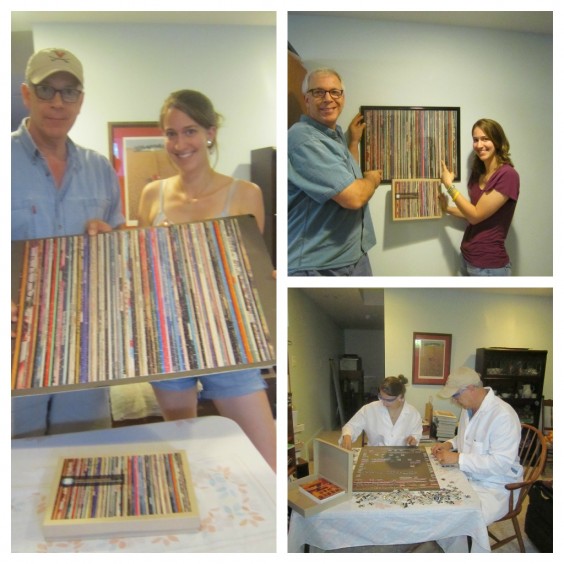
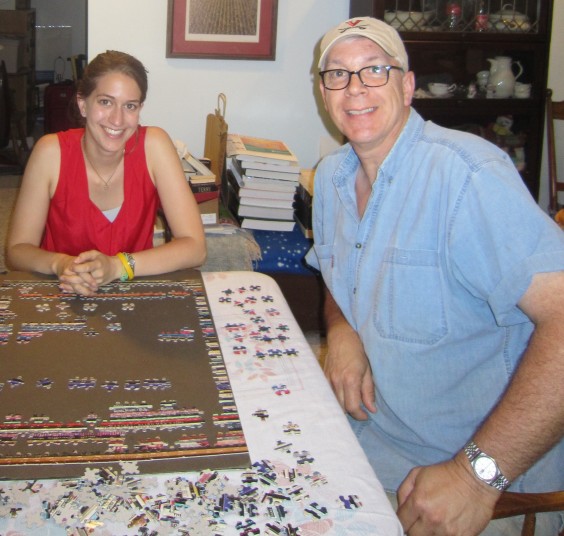
On a slightly overcast Saturday – perfect for a family afternoon indoors – my Dad and I set up an old folding table in the basement, opened the box, and got down to work*. Now, I am sure everyone has his or her own unique “puzzle-ing” style. My Dad insisted (like he always does) that we start with the edges, and then work our way in.

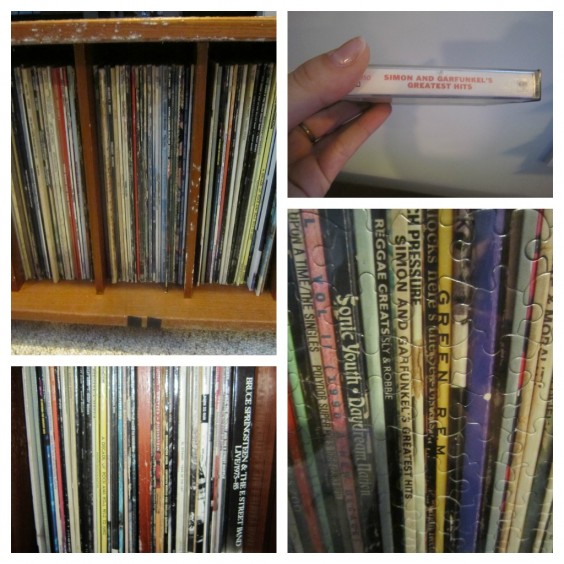
While working on the puzzle, I got to spend some quality time with my Dad! I heard about some of his records and we even took a break to look at some of them. (Disclaimer: The Bruce Springsteen Collection is actually my Mom’s…she had a New Jersey roommate in college.) The vinyl collection of the puzzle is quite unique and diverse, but my Dad found a tape version of one of the records in the puzzle (Simon and Garfunkel’s Greatest Hits)!

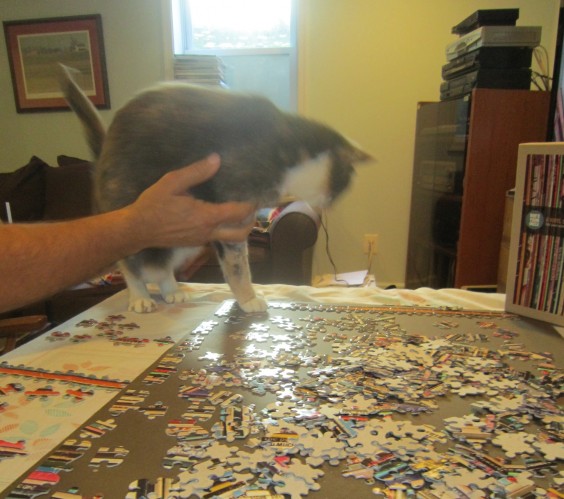
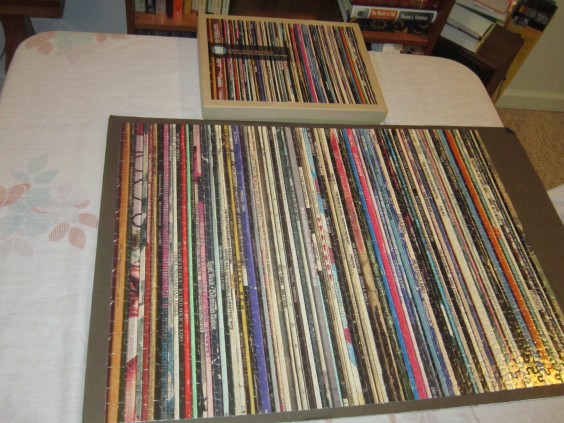
My Dad and I were not the only ones working on the puzzle – we had a little “helper.” She decided to walk through the center of the puzzle taking some of the pieces with her. Beware of these four-legged “helpers!” Despite this adorable distraction, after a few hours, my Dad and I finished the puzzle. (Disclaimer: My Dad is incredibly good at puzzles!)

The next step was to create the wall art that would become my Dad’s present. I set out to my local arts and crafts store to buy a picture frame. I chose to get a nice black frame that was 18” by 24” – the dimensions of the puzzle. The tight fit holds the puzzle between the glass and the backing, which means the puzzle can be mounted without being glued together. (You never know when you might want to take down the puzzle and put it back together again!)

When putting the puzzle into the frame, make sure to take extreme care. (You don’t want the puzzle to fall completely apart and you’d have to redo it, unless you are a master puzzler who enjoys the challenge.)

*Helpful Hint: When beginning the puzzle find a large poster board to do the puzzle on, the sturdier the better. When you frame the puzzle, the poster board makes it easier to slide the puzzle to the backing of the frame.

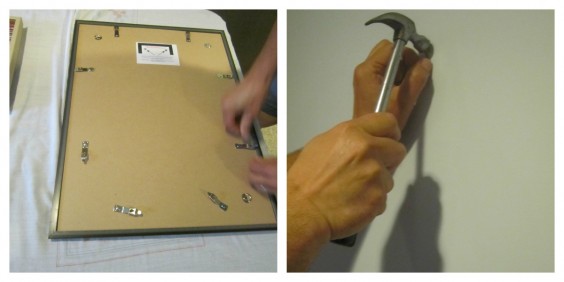
Finally, we attached the framed puzzle to the wall with standard picture frame hooks. Then stood back and admired our work!

Results:
The finished product is not only a beautifully completed puzzle, but also a piece of wall art. It now hangs in my family’s basement so that my Dad will see it every time he (and anyone else) hangs out down there, which is pretty often!

Conclusion:
The vinyl collection puzzle is a great family activity for anytime, but especially this Father’s Day. Even if you aren’t able to make it home to spend time with your Dad, a DIY activity like this puzzle is a great Father’s Day gift. To all the fathers in your life, I wish them and you all a Happy Father’s Day! I hope your day is full of memories and perhaps a few DIY craft presents!

Happy Father’s Day, Dad!

The Uncommon Life

How To Repot Succulents

June 8, 2012

In the world of trends, Succulent plants seem to be taking home the crown in the fauna and flora category. And why shouldn’t they? Succulents are hardy, unique, and perfect for the dry summer heat. They don’t ask for much, but a good environment No green thumb needed — follow this quick DIY tutorial to repot your succulents and ready for your front porch or city window.

As Charlotte (you know, the one with the web) would say, Salutations! I’m Blair – the bloggin’ gal from the lifestyle and fashion blog, Wild and Precious and now that I’ve introduced myself lets chat about a way to spruce up that patio of yours!

Mix Your Potting Soil

Potting soil recipe:

  • Potting Soil
  • Coffee Grinds
  • Sand

Did you make mudpies growing up? If so, this might be your favorite part — make your own dirt mixture! When picking out potting soil just get the very most basic stuff. You don’t want anything too rich in additives — Succulents just don’t like that stuff. The goal of your dirt mixture is to get water/food/light/nutrients to and away from the roots in a time appropriate fashion. Mix coffee grinds and a little sand into your dirt before filling your pots. The sand will keep your soil from getting too over saturated with moisture (remember, these type of plants are desert dwellers – they aren’t use to a whole lot of the wet stuff) and the coffee grinds will help fertilize as well as keep away slugs and bugs that would otherwise love to nibble your Succulents down to nothingness.


Prepare Your Pot

As far as picking out pots the world is your oyster. You don’t need anything too big and can even choose to put more than one succulent together in a pot. With your pot(s) picked out fill 1/3 of each pot with sand. Do not try to cut costs (sand is cheap anyway) by bringing home sand from your beach vacation — that stuff is full of salt and your succulents will no longer be… well, succulent. Sand is important in helping move around and drain water. Once you’ve got the sand in, fill with your dirt mixture leaving a small lip of space up top.

Prepare Your Succulent

Before introducing your plants to their new home give the bottom of the existing dirts/roots a bit of a scrunch. Flare the root structure out a bit. This will help it transition better into its new/bigger/better environment. This is something good to remember when planting anything anywhere. If you don’t break up the bundle they are used to having in their temporary store shells, they might be a little too shy to branch out (pun intended) into their new world.

Pot Your Succulent

Now — where to put them? These guys are not fans of the midday sun. They prefer indirect/filtered sunlight and enjoy a nice airflow (I chose to put mine on my front porch which is roofed). As for watering — unlike planting in your garden, you do not want to water these right away after repotting. Give them some time to adjust and then give a good watering about once a week during the warmer months. Don’t ever leave standing water in your pots — it makes them angry.

Wham bam thank you ma’am we have ourselves some repotted Succulents! Call your self hip cause you’ve got the trendiest little plants on the block. Mischief managed!

Thanks for hanging out with me — pop over any time to say hi Wild & Precious. ta ta friends.

Ready to get started? Shop planters at UncommonGoods >>

The 10 Best Indoor Succulents | Indoor Plant Tips | UncommonGoods

Check out this INFOGRAPHIC to discover the perfect succulent for you. (No green thumb needed.)

The Uncommon Life

Urban Gardening & Fire Escape Flora

January 11, 2012

I don’t believe in New Year’s resolutions. Especially not self-improving ones. What I believe in is hobbies. Hobbies take you out of yourself. That’s an improvement right there.

One of my hobbies is gardening. Helping seeds burst into life and transform into flowers or food gives me thrills. I live in a 4th floor tenement building in Brooklyn, NY. But the lack of an actual garden has never gotten in my way.

I started out knowing, truly, nothing. In fact, I’d always had a black thumb. The few plants I’d ever owned had died from neglect. Yet I developed a yen for pretty, blossom-filled window boxes.

The CSA (Community Supported Agriculture) farmer I bought vegetables from one summer said, “Seeds want to grow, you know.” I couldn’t believe mine would. But they did! The very first year I tried, I had adorable flowers in every window, all summer long.

This created happiness. Which made me want to continue. That’s what hobbies are all about. You want to do them. They’re not “shoulds.” Unlike New Year’s resolutions.

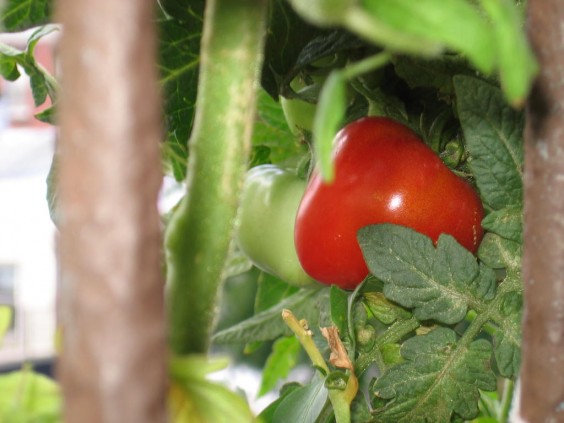
I had an actual garden plot, in the ground, at a local community garden for a year. There, I took my first shot at tomato-growing. Holy mother, were those things delicious. And gorgeous. And basically, free. A packet of seeds costs about the same as a couple of New York City farmer’s market tomatoes.

But the community garden wasn’t quite local enough for me. My fire escape – that was local.

I’d heard about the Topsy Turvy Upside Down Tomato Planter (“As Seen on TV! World’s easiest way to grow tomatoes!”).

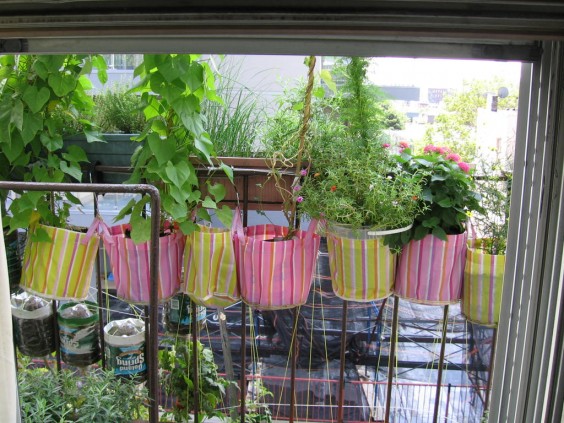
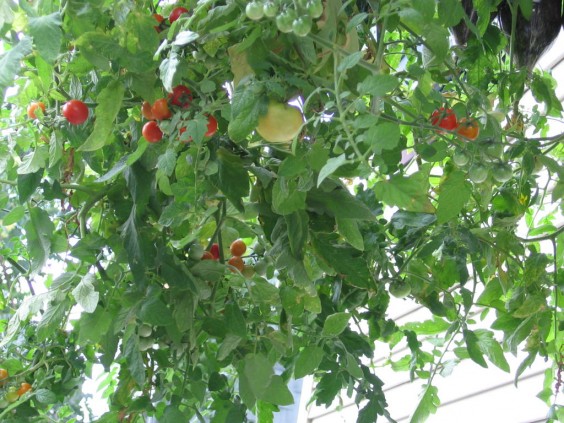
Reading the paper one day, I came across the idea of making my own version with empty soda bottles, a resource NYC has in abundance. I made a bunch of them, stuffed them with my old potting soil after enriching it with finished compost, and planted each one with a tomato seedling.

This was the result.

(Note: Although I had a decent tomato crop with these, I decided that even the largest bottles I used were too small. My tomato plants’ roots were way too crowded. So if you want to try this, use bigger containers, like I’m going to this year.)

Now, in early January, all that glorious green growth seems like a mirage. It takes a leap of faith to believe that if I buy a few handfuls of tiny, dull-looking seeds and put them in dirt indoors (or outdoors, which I haven’t tried yet) in February or March, then re-plant them in their permanent summer homes after the last frost… six or seven months from today, they’ll look like that.

It is literally a miracle. But – as opposed to the notion that I could resolve on January 1st to quit even one of my lifelong bad habits and actually succeed, it’s an entirely plausible one.

Gift Guides

How To Tie a Gift Bow

December 14, 2011

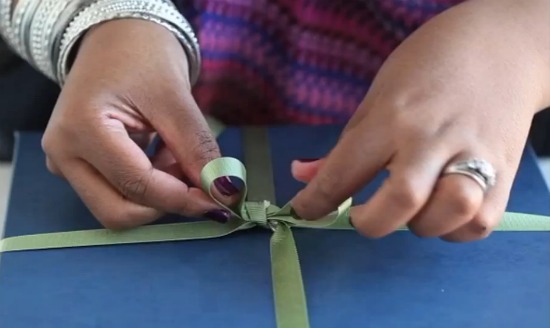
You’ve finished your holiday shopping; now it’s time to wrap up all the gifts. But don’t worry! Here are a few tips to turn a basic gift box and ribbon into a present fit to be placed under any tree:

Think you’ve mastered the bow tie? Here are a few more tips to refine your technique:

1. Pick The Right Ribbon

The width of the ribbon will depend on the size of the box. On smaller boxes I would use widths ranging from .25”-.5”. For medium boxes .5”-1”, and for larger boxes 1”-1.5”.
2. Vary The Texture

Textures range from satin, grosgrain, organdy, and some even have flowers on them. It depends on the look that you are going for.

3. Don’t Be Afraid to Mess Up

There’s so much you can do with ribbon. Don’t be afraid to experiment.

If you aren’t satisfied with your bow, you can start over using the same ribbon. Just make sure to line up the ribbon but the placement when doing the ribbon over must be precise. Meaning, you have to make sure you’re tying the ribbon in the same exact spots or you will see creases in the ribbon. If you think you cut the wrong length, start with a fresh piece of ribbon. It’s not like you’ll have to throw out a crumpled sheet of wrapping paper!

Got a gift wrapping question? Just ask in the comments below.

Gift Guides

Gift Lab: Jingle All the Way

December 8, 2011

Background Research:
Kim: When I first saw this item, I immediately remembered the recorder that I had when I was six. The only songs that I knew were ‘Hot Cross Buns’ and ‘There’s a Hole in the Bucket’, but I felt nostalgic nonetheless.

Kayla: I was so excited when Kim told me that we would playing the recorder for gift lab because in the fourth grade I had a recorder and even though I have no recent practice at all, I thought it would be a fun experience to live out childhood memories from a long time ago.

Hypothesis:

Kim: This could potentially be an epic failure, because I have no recollection of how to do this. I do, however, think it will be hilarious.

Kayla: The recorder appears to be a really simple instrument but I have no musical talent in my blood whatsoever and getting involved in this could mean huge embarrassment for me.

The Experiment:

Kim: Upon opening the item, I saw that there were no instructions on how to play the item. The one that I had as a child came with a book of songs and how to play them. I was starting to think that this might not be as easy as I had hoped. Thank goodness for Google.

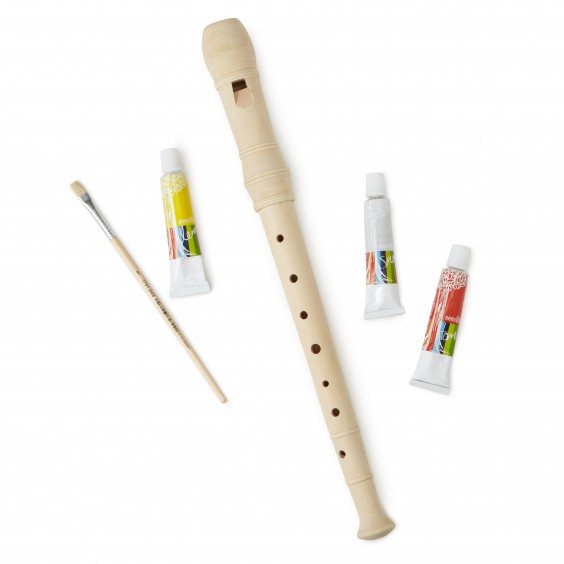
Kayla: When we first opened the box together, I got even more nervous than I already was. I assumed that the item would come with a list of notes and how to achieve said notes, but the main idea of the project was actually centered on painting it. I was excited to find this out, but was still unsure of how I would ever learn the song ‘Jingle Bells’. At least Kim knew was she was doing.

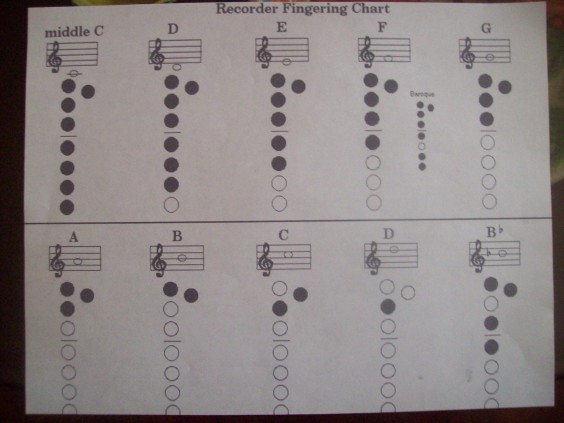
Kim: Not entirely! The pictures of where to put your fingers for the notes are just different colored circles. Logically, the black circles are where your fingers go, but I wanted to be sure, so I consulted YouTube.

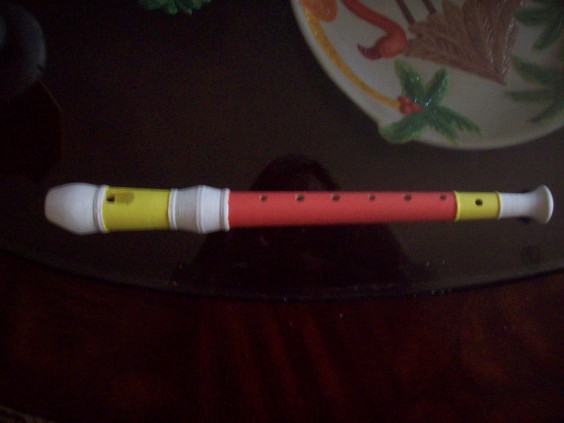
Kayla: But before we got to playing, we had to paint the recorder. We both enjoy pink, so we cheated and mixed the red and white… as it comes with white, red, and yellow. Our “pink” was more of a coral since we also needed white to pale our yellow – you know how picky girls are.

Kim: I was a little sad at first that the pink wasn’t the shade we were aiming for—a nice pastel—but the coral grew on me after a minute or so.

Kayla: We got done figuring out which paint colors would go where and went at it, too excited to sneak in a photo before we painted it. We were so focused on our video that we missed a lot of visuals. The recorder turned out to be very beautiful however, so we were doing okay in that department. Now the difficult part of the adventure…

Kim: The video was definitely the most difficult, but the most fun, as you can tell from our laughter. We weren’t entirely sure how we were going to make this a two-man job, so I grabbed a bell and my dog, Bebe, while Kayla practiced the song. We were hoping that the bell and the dog would deter people from our horrible playing.

Kayla: Thankfully, I picked up the song pretty quickly. It was a lot easier than I thought and I was really happy with the turnout. Yet, I was still embarrassed to play on film, as I am very self-conscious.

Kim: Personally, I think she was awesome. It was definitely better than my attempts. I’ll stick with my bell.

Conclusion

Kim: This was a really fun project. I had a great time doing it. I was also really inspired by some of videos on YouTube to learn newer, more modern songs. My only advice is to keep in mind that this is designed to be a one-person project, so it only comes with one paint brush.

Kayla: I had a blast with this as I love to paint and decorate things. Even learning to play one simple song was entertaining because it reminded me so much of being a kid again. This is a fun project for children or adults who want to act like children/remember childhood.

Gift Guides

How to Make a Gift Bag

December 2, 2011

I tend to procrastinate when it comes to gift wrapping. I purchase the gifts I want to give and stuff them under the bed or on a shelf in the closet until right before Christmas. Then, while I’m fantasizing about radiantly glazed holiday hams and sweetly spiced rivers of eggnog, I’m also faced with making a pile of presents bright and giftable.

Those odd shaped, extra-uncommon gifts pose a particular challenge. I suppose I could skip the fancy wrap and just stick bows on things that don’t pack up pretty. Or, I could put any asymmetrical or otherwise un-rectangular products in big boxes stuffed with lots of tissue paper, then wrap them. I go with option three–a fancy gift bag.

While the bow trick works in a pinch, it’s not nearly as fun to take off a bow as it is to find a surprise inside of pretty wrapping. I know this, because my husband is a huge supporter of “just stick a bow on it.” I do have to admit, it’s a step up from his other, “just hand her the thing in a crumpled-up shopping bag” approach.

The second tactic–put that hard to wrap gift in another box–seems like a viable option, but wrapping a box just right takes time and creates a lot of waste; you spend 20 minutes getting each crease perfect, only to see your lovely artwork ripped to shreds and tossed in the trash. It’s heartbreaking, really.

So, you can see why, for me, option three takes the customary yuletide fruitcake.

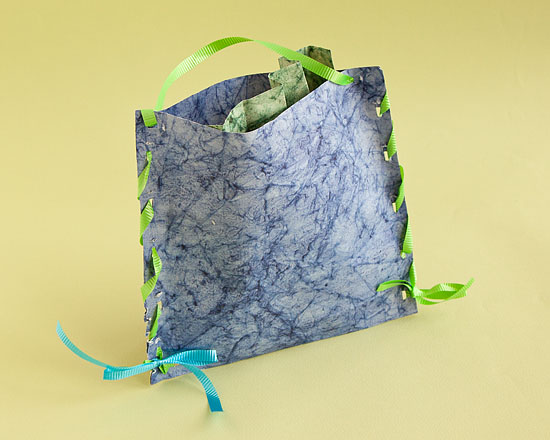
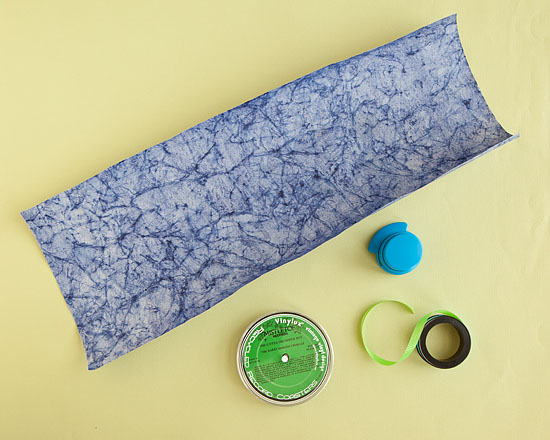
Not only are gift bags simple to use and reusable, they’re also easy to make. All you need is some heavy wrapping, construction, or scrapbooking paper and ribbon to create a sturdy, eco-friendly alternative to traditional wrapping. I picked pretty blue craft paper from the paper mezzanine at Pearl Paint here in New York. (Yes, that’s really what their paper department is called; it’s an entire sublevel–mezzanine, if you will– full of gorgeous papers for wrapping, crafting, and scrapbooking.) I wanted my bag to be festive, but not too Christmasy, so it could still be reused after the holidays. To fasten the paper, I used a Staple-less Stapler, but you could easily use a hole punch and stapler to create a similar effect.

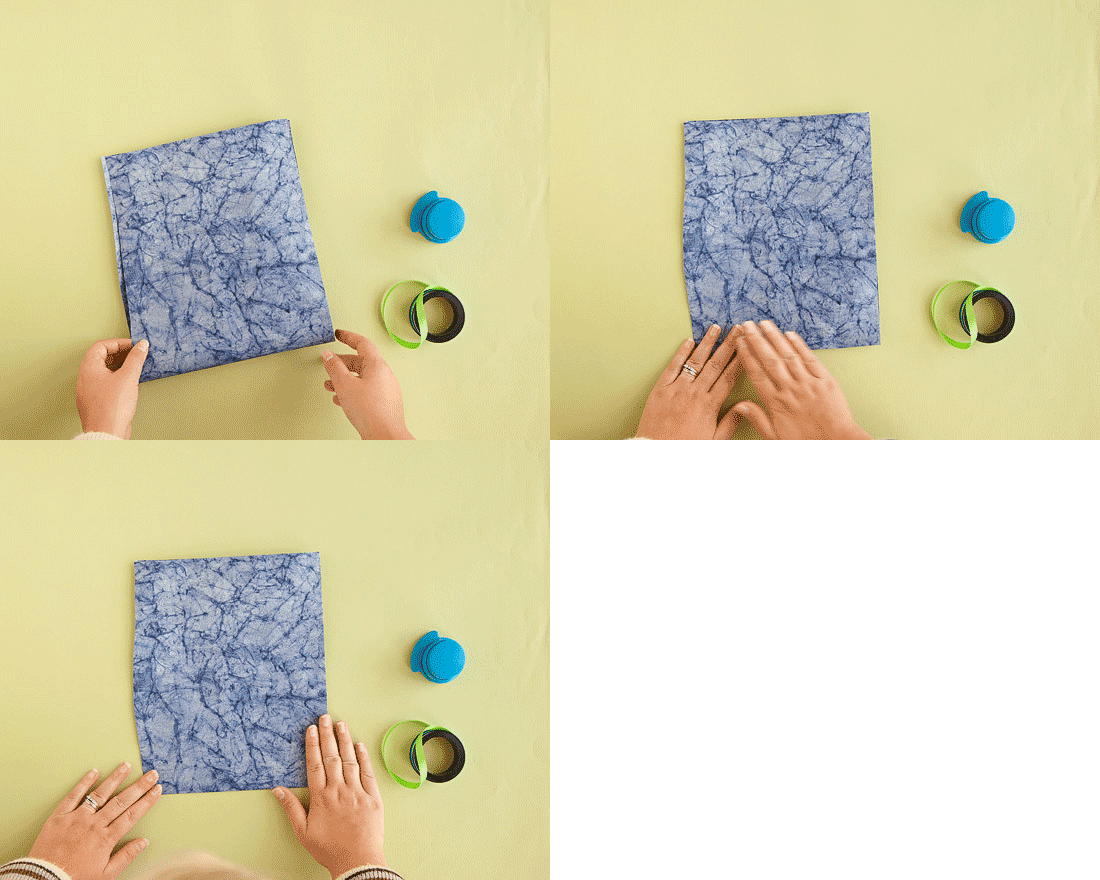
First, make sure you have enough paper to cover the item you’d like to wrap. To wrap the Holiday Record Coasters, I placed the product in the middle of the top half of the paper, then folded the bottom up to completely cover the gift. It’s okay to make the bag a little bit bigger than you need it, just make sure the gift doesn’t stick out of the top.

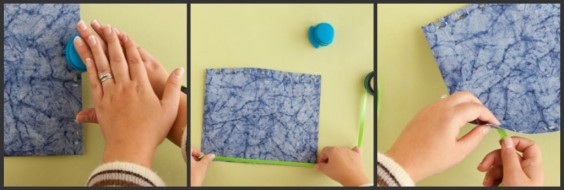
Next, “staple” along the edges on both sides. The staple-less stapler will create interlocking flaps for a secure hold, but it also leaves a small hole where you punch. You’ll also want to punch once in the bottom left-hand and once on the bottom right-hand, just above the seam.

Threading the ribbon through the holes not only adds decoration, it also increase the bag’s sturdiness and create a handle. However, before threading the ribbon, make sure you have enough by measuring it against the length of the bag four times (once for each side, once for the handle, and once for extra ribbon to work with).

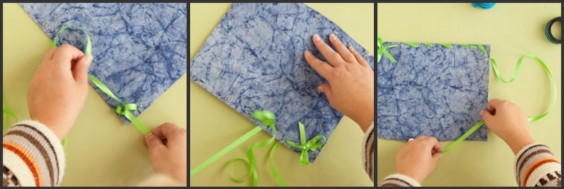
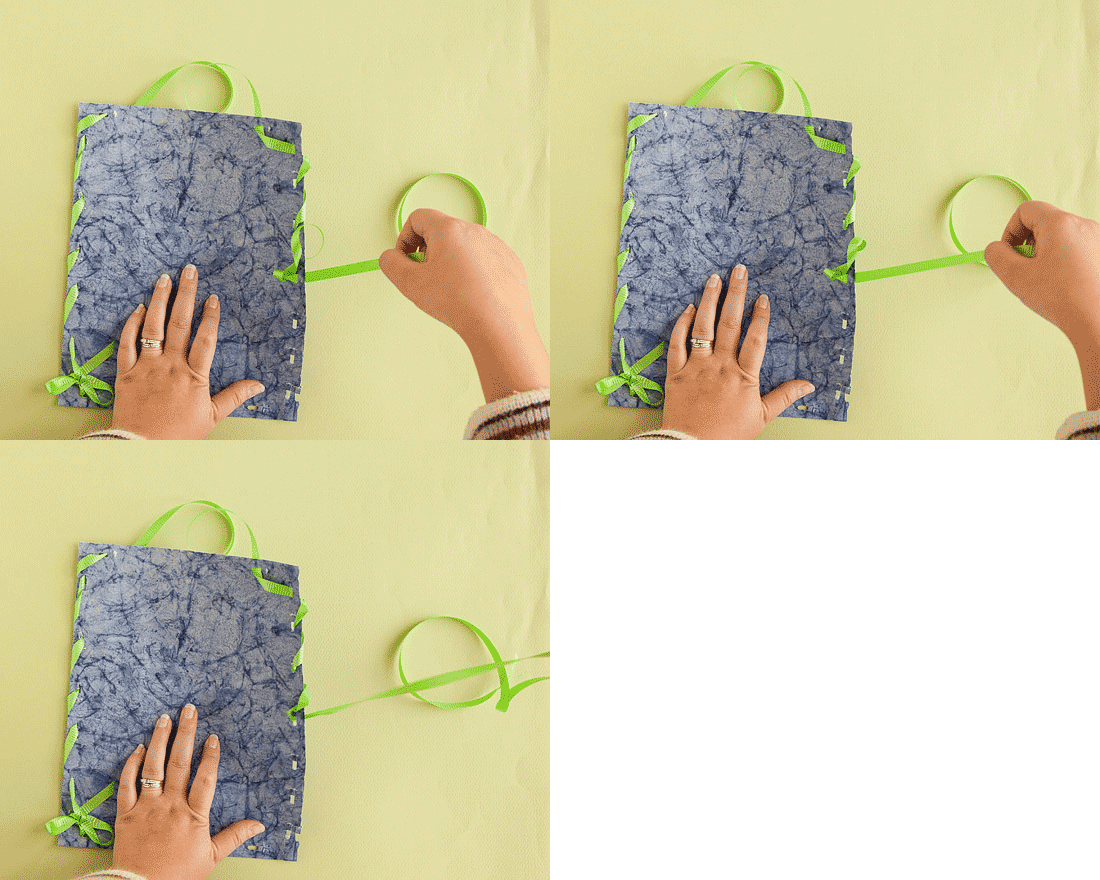
Start threading by inserting the ribbon in one of the bottom corners, just above the seam. Leave a few inches of ribbon, then pull the remaining ribbon up through the next hole in the side of the bag. Tie the two ends into a knot, and create a bow with the remaining ribbon from the short end. Using the long end, continue to thread up the side of the bag, looping around the outside edge of the paper.

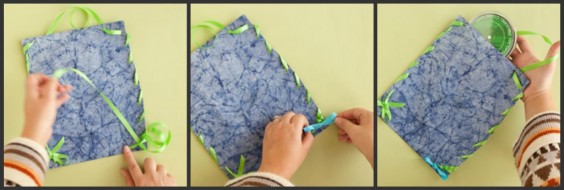
When you come to the end of one side, leave enough ribbon to create a handle before continuing to thread down the opposite side.

Once you reach the end of the second side, pull the remaining ribbon up through the hole on the corner above the seam. Pull the leftover ribbon back though the final loop on that side, and tie it into a secure knot. This side won’t be as pretty as the bow on the opposite side, but the problem can be easily remedied by cutting off any excess ribbon and tying a new bow to cover up the knot.

The finished product uses no tape, glue, or staples (if you go the staple-less stapler route), can be used over and over again, and costs less than buying a pre-made gift bag. For an added touch, stuff the bag with leftover wrapping paper, folded into fans (or other origami shapes, if you’re feeling extra crafty), instead of using a new sheet of tissue paper.

Gift Guides

How To Wrap A Gift Box

November 18, 2011

With the holidays coming up, I wanted to show you a few ways to make your holiday gifts stand out in the crowd. Here are two easy tricks to wrap your presents so that anyone would think they’d been wrapped by professionals!

These gift wrapping techniques can be used for any occasion. I usually try to pick wrapping paper that goes with the theme of the gift, or something that suits my recipient’s personality.

I learned my gift wrapping techniques while working at Kate’s Paperie located in Soho in 2003. This is where I actually learned that I was good at arts and crafts. Along with gift wrapping, I would perform demonstrations on scrap booking, different ways to tie a ribbon around your gift, how to create your own greeting cards & envelopes, and much more.

If you have any questions, just leave me a comment!

Put your new wrapping skills to use. Find gifts for everyone on your list.