Browsing Tag

Gift Lab

The Uncommon Life

Gift Lab: Flip & Tumble + Wine Tote + Bentgo: A-leftovering we will go

November 22, 2013

Research

I hate waste. I’m really OCD about it. Disposable shopping bags, takeout containers, and water bottles really bug me. And yet, I do shop, eat on the go, and need H2O. Thus was born my quest for the perfect personal food transport equipment.

3-ItemCollageHypothesis

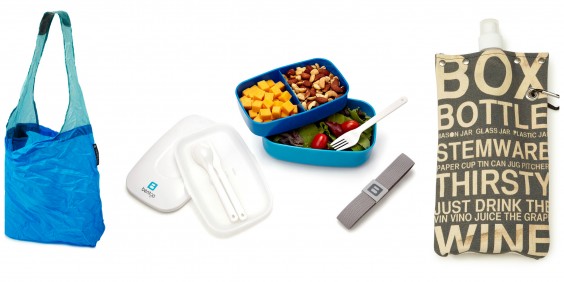
Our Flip & Tumble Reusable Shopping Bags are light and small and hold a lot. Sounds promising. Our BentGO Lunch Box is good looking. Most of its lunch-toting brethren are decidedly not. It’s also a good size, and except for the lids, microwaveable (for warming up, not cooking), and dishwasher safe. Also promising. Our Wine and Beverage Tote, with its tough canvas outer skin, seems a lot sturdier than fold-up plastic bottles I’ve used before.

Experiment

Step 1: Shopping.

This was mostly accomplished at the Park Slope Food Coop, of which I am an enthused member. A sustainability-minded organization since forever, the coop doesn’t give out shopping bags. Flip & Tumbles are perfect for shopping there. They weigh virtually nothing, open up in a jiffy (faster and easier than any shopping bag I’ve ever used), hold a lot, and are strong and sturdy. The even have a non-slip patch on the inside top of the shoulder strap.

Giftlab food-bags 016-CROPPED

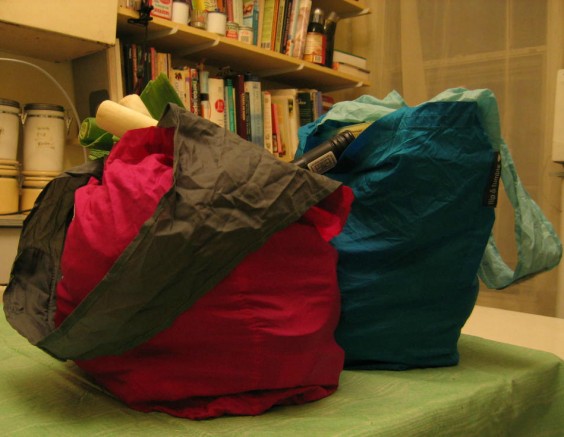
Here’s how they look full of groceries.

Giftlab food-bags 019-CROPPED

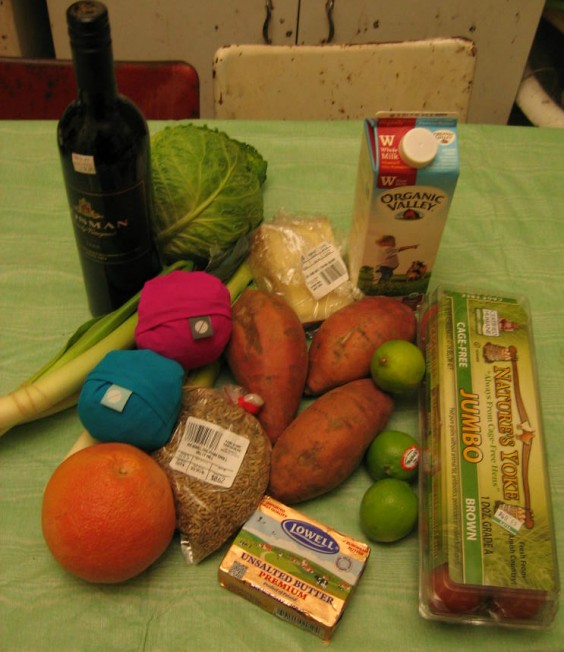
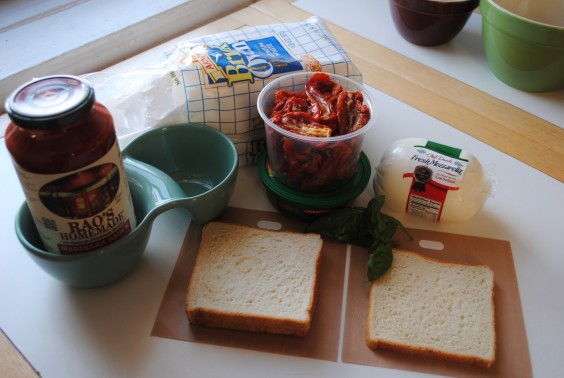
Here are most of the ingredients, spread out. (The bags actually held a lot more than this.)

Step 2: Cooking.

I bought a spaetzle maker no less than 6 years ago, and until now, had never used it. Sound familiar, gadget lovers? I saw this recipe in the New York Times, and knew this was what would make spaetzle happen in my kitchen.

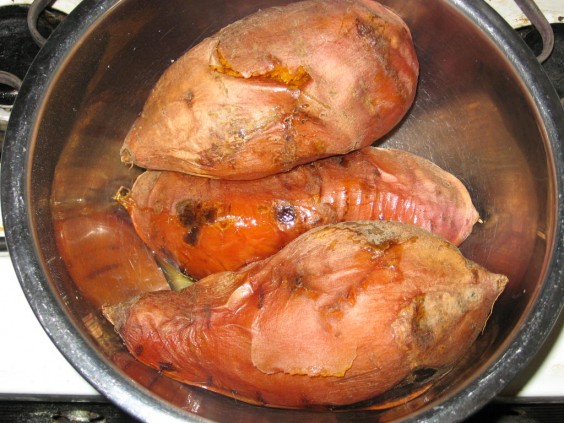
To round out the meal, I decided to make mashed sweet potatoes with lime and honey (the recipe calls them yams, but they are NOT; shame on you, Saveur!) with broiled grapefruit for dessert.

11-18-13UG-giftlab-cooking 004-CROPPED

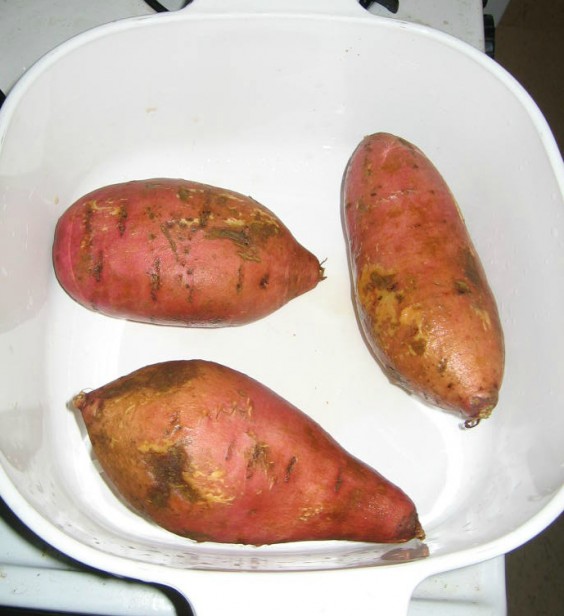
I put the sweet potatoes in a casserole dish and stuck them in the preheated 350 degree oven.

I then sliced the leeks and cabbage (separately) very thinly in the food processor. I melted a bunch of butter in a big frying pan and sauteed the leeks. But I forgot to take photos of all that, so you’ll have to use your imagination.

CabbageCookingCollage

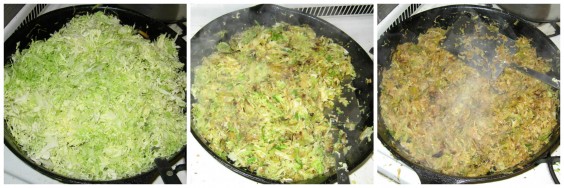
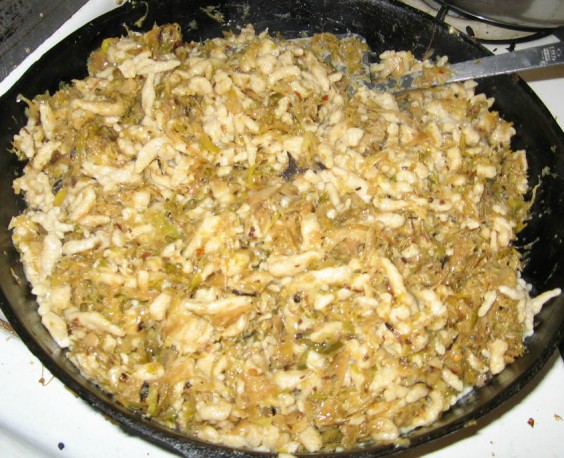
The savoy cabbage, sauteeing on top of the already-sauteed leeks.

11-18-13UG-giftlab-cooking 021

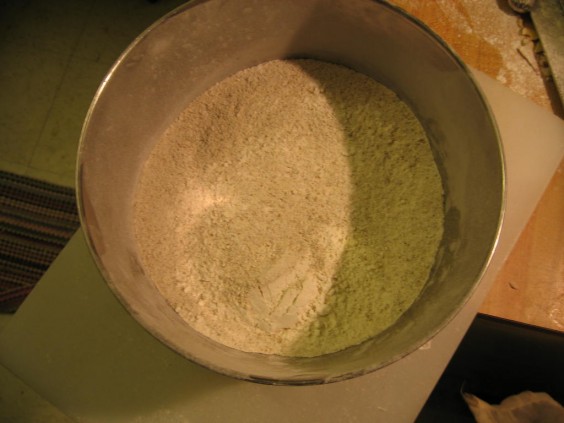
Above is the mixed white all-purpose, whole wheat, and whole rye flour (yes, I ground it from the berries, here’s why), to which I added an egg and whole milk. It’s supposed to end up like cake batter, not bread dough, so you keep adding milk until it feels right. Because I used whole wheat flour, which the recipe doesn’t call for, I used more milk than recommended, because whole wheat flour absorbs more liquid.

11-18-13UG-giftlab-cooking 001

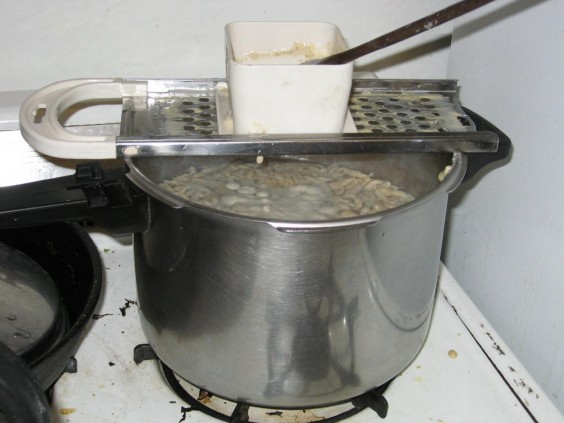
My spaetzle maker in action, at long last. You pour the batter gradually into the white hopper which you then slide along the holey stainless steel part that’s straddling the pot of boiling, salted water. The dough slips through randomly, drops into the pot, and cooks very quickly, rising to the top.

11-18-13UG-giftlab-cooking 022

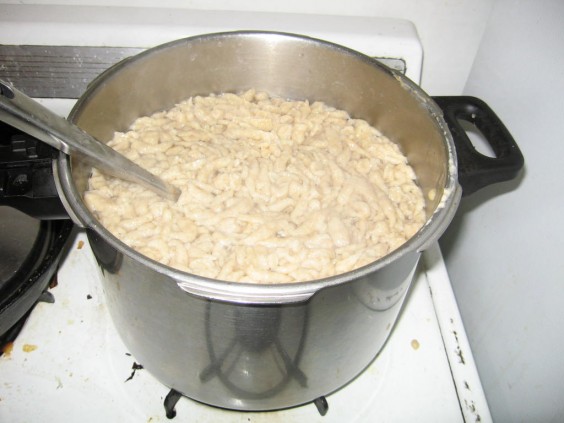
It’s pasta…it’s dumplings….it’s spaetzle!

11-18-13UG-giftlab-cooking 027-CROPPED

11-18-13UG-giftlab-cooking 017

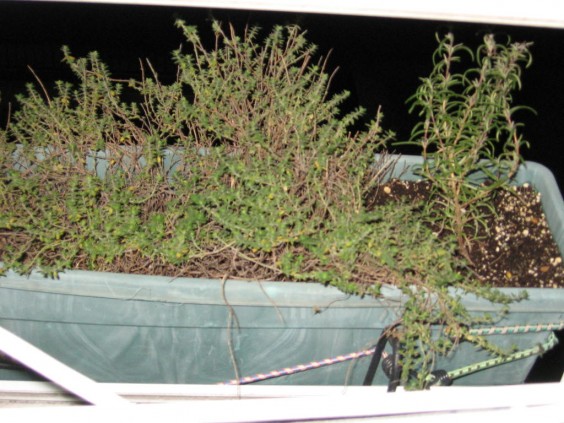
The recipe calls for thyme, which I conveniently have growing in one of my kitchen windowboxes.

Now it’s time for it to be topped with grated Gruyere cheese, put in a casserole dish, and baked. But wait–where’s that dish?!

11-18-13UG-giftlab-cooking 044

Oh yeah, it was baking these. When I took them out, I didn’t bother cleaning it, because sugary, gooey sweet potato ooze can only improve a dish. I did mix it in, though, so it wouldn’t just burn on the bottom.

11-18-13UG-giftlab-cooking 032-CROPPED

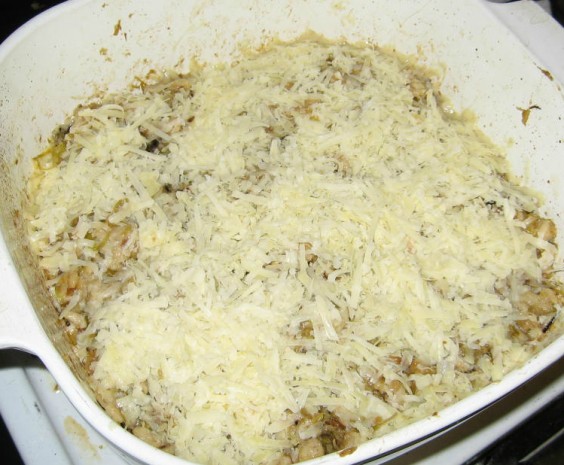
The casserole in a state of baking readiness.

11-18-13UG-giftlab-cooking 045-CROPPED

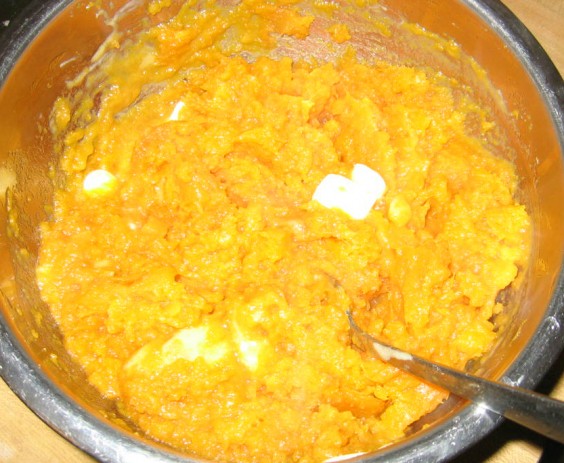
The sweet potatoes, mashed with a fork and mingling with their new BFFs: butter, fresh lime juice, and honey.

11-18-13UG-giftlab-cooking 051-CROPPED

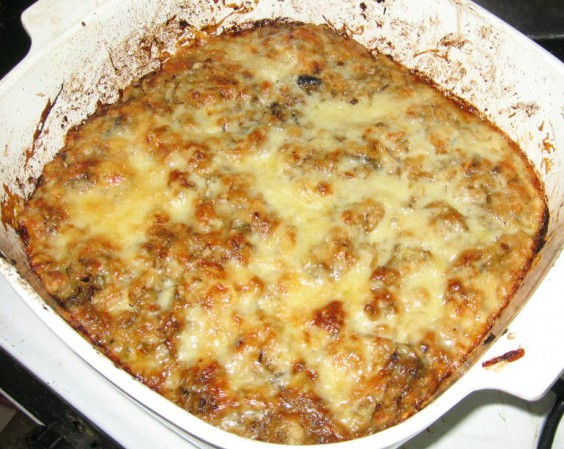
20 minutes after being put into the 425 degree oven: Done.

11-19-13UG-giftlab-cooking 018-CROPPED

Now for the broiled grapefruit. Easiest thing ever: cut in half, top with brown sugar (or not), turn broiler on, pop in citrus.

~An interlude, during which I eat this delicious dinner, and sleep. A new day dawns.~

11-19-13UG-giftlab-cooking 025-CROPPED

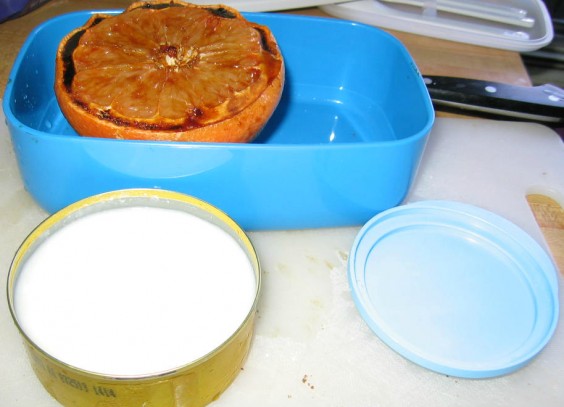
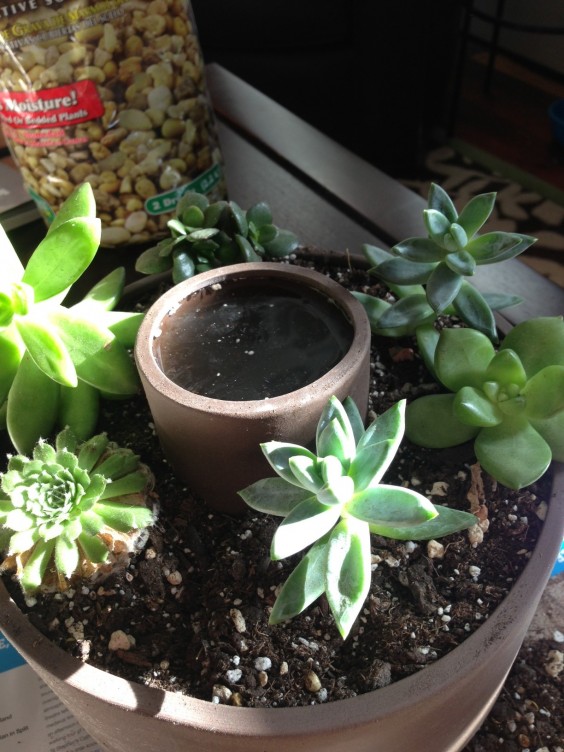
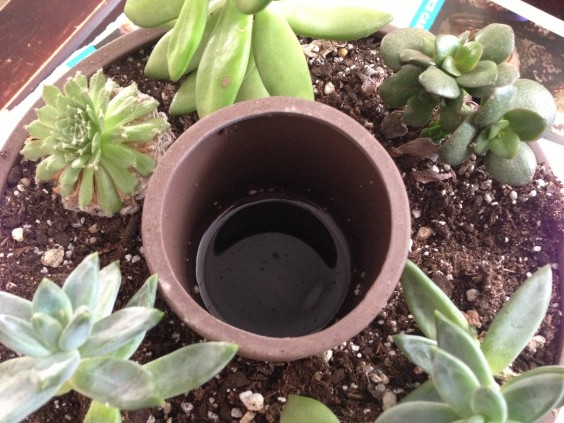
The true and ultimate destiny of this food, of course, was being consumed as leftovers. I added some homemade kefir I put into a can that I’d fished out from the recycling and washed (see above re: “OCD about waste;” also, it was the perfect size), because I thought it would go well with both the casserole and the grapefruit.

11-19-13UG-giftlab-cooking 038

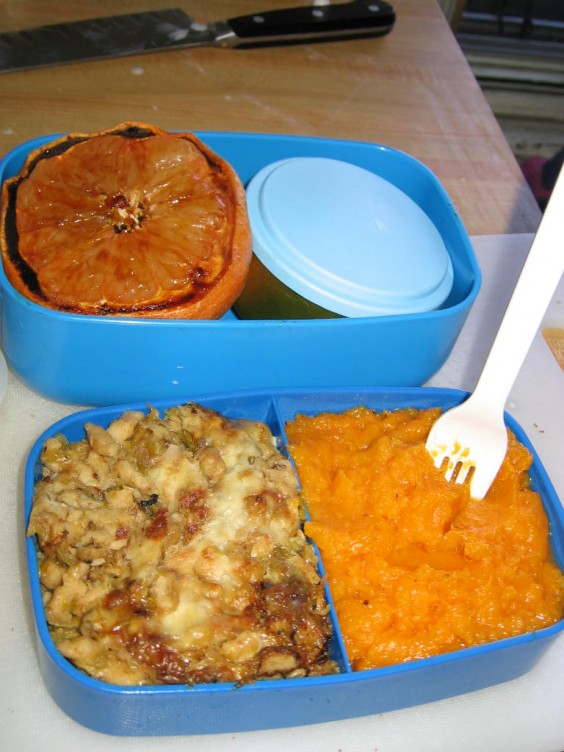
Stick a fork in it–it’s done.

Step 3: A) Eating and B) Drinking

A) The spaetzle dish, like most casseroles, was even better the next day. It nuked up beautifully in its spiffy BentGO container. I ate it in about two minutes flat. No, I will not show you what that looked like. My mother might be reading this, and it would make her cry to see that all those years of table manners lessons were wasted on me.

UG giftlab-wine tote 004-CROPPED

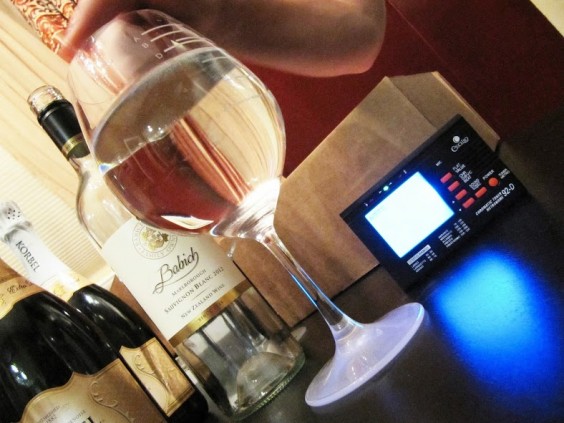
B) The Wine and Beverage Tote, alas, was filled only with water, because I was at work. (You think I can write all juiced up? No. I leave that to pros.) For purely scientific purposes, I did fill it with wine the night before. Miraculously, it holds an entire, normal-sized bottle, though you have to make sure the bag is poufed out all the way while (carefully) pouring. I recommend red wine, because the Tote isn’t insulated, so the wine will be at room temperature before long.

I really appreciated its sturdy canvas exterior, because it freed me from the nagging worry that something sharp in my bag might gouge it. If there’d been red wine inside, I would have appreciated it even more–no, not because of the alcohol; because of the potential for mess. (OK, the alcohol, too.) Note that I swapped out the original petite black carabiner with a larger one of my own, partly–but ONLY partly, I swear–because mine is pink.

Recipe links:
New York Times: Rye spaetzle gratin with savoy cabbage, leeks and caraway
Saveur: Mashed sweet potatoes with lime and honey
TheKitchn: Sweet and smoky broiled grapefruit

Gift Guides

Gift Lab: How to Make Grilled Cheese (in the Toaster!)

November 15, 2013

Anna Moreno | UncommonGoods

Research
I love a good grilled cheese. The gooey goodness inside reminds me of childhood meals, always paired with a tomato soup, of course. I first saw the Toaster Grilled Cheese Bags and thought it would be a fun, and super easy, way to make that delicious, buttery comfort food. I’d never heard of such a product before. How simple – just put it in a toaster! I’m, however, familiar with the iron-grilled cheese approach…enough said. In comparison, that ironing approach is quite barbaric.

Hypothesis
Given my experience with toast and grilled cheese, I suspect that the sandwiches will be nice and melt-y. However, the warm buttery flavor (that is signature to anything cooked with butter on a frying pan) will be missing.

Experiment
Step 1: Checking out the goods
The Toaster Grilled Cheese Bags are very different than I expected. They’re a silky-papery material. Very tough and pliable. So far, I’m impressed. Three bags are included in the package (wish it was four for those 4 slotted toasters). The grilled cheese in the picture looks really delicious – nice and golden.

Make grilled cheese in your toaster!
Toaster Grilled Cheese Bags | UncommonGoods

The Ooma Bowl
I love the clean and colorful look. It’s meant to easily fit into the hand for holding. Overall, the style gets two thumbs up from me. The bowl may also serve as a nice pet food dish? Food on the left, water on the right.

Ooma Bowl | UncommonGoods

Step 2: Assemble the ingredients
For my experiment I’m making 2 recipes.

First: The Classic. Simple and to the point; white bread, sharp cheddar.

Making Grilled Cheese

Second: Italian Craving–Featuring the Ooma Bowl. Yummy take on the classic done Italian style. My plan is to cut the finished sandwiches into sticks and use to use the Ooma Bowl for easy dipping. Using mozzarella, pesto spread, fresh basil, and sundried tomatoes. For the dipping sauce I’m using my favorite marinara Rao’s Homemade (it’s the best; I highly recommend trying it).

Italian Grilled Cheese

Step 3: Get’m grilled
Attempt Number One:
The Classic. It was pretty simple to get them into the bags. It needed a little maneuvering, but nothing difficult. I have a nice toaster that accommodates bagels. After getting them bagged I put them in, I set the toaster to level 4 and set it into motion.

Easy Toaster Grilled Cheese | UncommonGoods

The end result was not what I was hoping for. Setting 4 didn’t cut it. The cheese didn’t melt, and the bread was not toasted enough. Compared to the picture on the packaging, my sandwich was a total fail. Try again…

Sandwich

Attempt Number Two:
OK, the setting was too low; I overcompensated by upping the game to a level six setting. Also, I was thinking I would try to add some butter to the bread in hopes of obtaining that nice golden buttery glow. I melted 2 tablespoons and brushed the outsides of the bread with a pastry brush. Drum roll please…

I got the taste spot on and beautiful melted cheese. However, I ended up with burnt bread. It didn’t taste bad, but charred is no good either. Also, the butter made the bags all greasy.

grilled cheese

Toaster Grilled Cheese | UncommonGoods

Attempt Number Three:
I completed my attempts with the Classic recipe and moved onto the Italian Craving. First things first, I washed the bags. They got greasy from the butter and the melted cheese. Washing was incredibly easy. I used a simple sponge with handle and hot water. I hand dried, but noticed that the bags held moisture. I didn’t have time to let them air dry, so I continued on with the sandwich making.

I made a total of 4 sandwiches; all of which came out a little darker than I expected. I’m not sure what’s to blame. My toaster setting, the moist bags, the butter; I really am not sure. What I do know is that the sandwiches were tasty. (The chef has to taste their food before it leaves the kitchen).

Italian Grilled Cheese | UncommonGoods

Step 4: Plate and Taste
Time to eat, drink, and be merry. As planned, I cut the grilled cheese into long strips and placed them into the Ooma Bowl. I heated the sauce and added that to the smaller section. Et voila! A culinary masterpiece. (At least for moi, a simple cook.)

Grilled Cheese Fingers with Tomato Sauce

The bowl was easy to hold. Modeled by my fiancé (thank you for your help). Recommended for couch activities such as Sunday sports and Netflix. A delicious end to a full day of ingredient shopping and toaster cooking.

Grilled Cheese Dunk
Noah

Conclusion
Did these match up to the classic grilled cheese? Not completely; however, they were 1. Easy to make and 2. Melt-y and tasty.

Lessons Learned:
1. Don’t apply butter before toasting! It may be good to apply after? Question for thought.
2. The bags need to thoroughly dry before the next use. I later washed, hand dried, and placed on the handle of a frying pan to dry.
3. Toaster settings are key; you need to find the right one. (I have yet to find the right one for my toaster.)

Photo Credit: Moi! Anna Moreno
Model: My fiancé Noah Perkins

Gift Guides

Gift Lab: How to Keep Plants Healthy While You’re Away with the Self Watering Planter

October 23, 2013

Jen | UncommonGoods

Research
I travel a lot and my plants tend to suffer because of it. Turns out it’s easier to find someone to take care of cats than plants – probably because the plants don’t complain as loudly as the cats do. Over the years I’ve tried a bunch of gizmos to get the right amount of water to the plants, but they were all either ineffective, the wrong size for my plant, or just plain old ugly.

Hypothesis
Let me be the first to say that I was skeptical about this planter. It was a good size and attractive, but it seemed too good to be true. The last of my non-succulent plants just died (thanks, cat-sitter), which meant that this was going to be a long experiment. Armed only with slow-drinking succulents, I took a chance on this planter.

Experiment
May 2013: I got my materials together: some succulent planting mix, some decorative rocks, and some new succulents from my favorite store. I took the lid off of the water compartment to check it out, but neglected to put it back on when I started filling the planter with planting mix. Lesson learned: put the lid on because that planting mix goes everywhere and it’s really hard to remove from the water reservoir.

Self Watering Planter With Succulents | UncommonGoods

June 2013: I hadn’t checked the water in a month but the plants looked happy and healthy. The water level had definitely decreased, though it was hard to tell whether this was from the planter soaking up the water and it evaporating, or if the planter was delivering water to the succulents. I filled the reservoir and went on vacation for 3 weeks without leaving watering instructions for the cat-sitter.

Succulents | UncommonGoods

July 2013: I came home to find that (a) the cats were fine and (b) so were the succulents. They were larger than they were when I left and the water was about half gone. I was starting to become a believer.

Growing Succulents | UncommonGoods

August 2013: Baby succulents began popping up – this was the clearest sign that the planter was delivering water as promised. Another sign that the planter was working: the succulents that I hand-watered were all near-dead from over-watering.

Beautiful Baby Succulents | UncommonGoods

Conclusion
1. This planter actually works.
2. The planter has got to be much more impressive with something that needs more water. I’m going to get another one and try to grow some herbs.
3. Put some little plastic feet at the bottom of the planter to raise the planter a bit above the windowsill or table it’s sitting on. I found that the water in the reservoir affected the paint on my windowsill.

Gift Guides

Gift Lab: How to Make Music by Playing Wine Glasses

September 27, 2013

Major Scale Musical Wine Glasses | UncommonGoods

Research
As a developer of the Major Scale Musical Wine Glasses®, my knowledge of the product is quite comprehensive, but this was my first chance to test a random unit straight off the production floor. In developing these musical glasses, we looked for a glass that would allow for a full A major scale, allowing for more versatile music-making. We used a high-quality lead-free crystal glass here to ensure the best resonance we could achieve.

I’m not a big wine drinker, but you’ll find me sneaking a swig of water every now and again – so I’m conducting this experiment with water as an alternative. I try to keep practice on my violin, but I’m much more likely to produce something resembling music with my finger on these glasses than with my bow on strings – so I’m looking forward to the chance to actually hit the right notes for a change.

Musical Wine Glass Packaging | Uncommon Goods

Hypothesis
Due to variations in glass we knew absolute, orchestral perfection was a bit too aspirational, but we have been pleased to find that the fill lines correspond quite nicely to the note indicated. My hypothesis is that I’ll have a pretty happy match today.

Experiment
Fill ‘er up! I poured to the first note – an ‘A,’ moistened my finger in another glass to allow for smooth movement around the rim, and round my finger went firmly in a circular motion. As I draw my finger around the rim, the alternating slipping and sticking creates a vibration pattern in the glass. The speed of vibration, meanwhile, is affected by the volume of liquid in the glass, and different vibrations will produce different notes. The results of my first attempt?

Playing Music on Wine Glasses

A lovely ‘A’ note resonates through the dining room, accompanied by a hypnotic ripple along the surface of the wine. As you can see…a successful ‘A’!

'A' Note

I toast to a successful first pour and continue on my journey through the A Major scale.

I poured a taller glass and around I went again.

Major Scale Musical Wine Glass | UncommonGoods

Crosschecking with another tuner – a direct hit! SuccEss with a capital ‘E’.

'E' NoteConclusion

Though slight variations in glass will yield somewhat different performance, a random test proved more than satisfactory to my unprofessional, yet music-appreciating ears. Very content and ready to wet my whistle, I toast to beautiful music with my fiancée and Franklin Broccoli, our almost-real pet bulldog.

Musical Wine Glass Toast

To see and hear these uncommon instruments make music with your own eyes and ears, check out this video of me playing Vivaldi’s Four Seasons.

Gift Guides

Gift Lab: How to Get the Perfect Shave

August 27, 2013

Jeff | UncommonGoods Customer Service

Research
I shave every other day, occasionally back to back days, and end up spending $40.00 to $50.00 using disposable blades such as Mach3 and Proglide. Usually after two shaves the blade does not give a close shave at all. I heard the Razor Pit Sharpener will solve this problem and save me lots of $$$$.
Razor Pit Razor Sharpener

Hypothesis
I am curious to see if there truly is some way to extend the life of my disposables; everything I have heard and read about the Razor Pit Sharpener makes me hopeful this is the tool to use.
Sharpen your Razor

usingpit1

Experiment
Pretty simple stuff here, you can use a squirt of shaving cream or soap to lather up the surface of the Pit. You then push your razor FORWARD–five or six times will do. I found that pushing it once, then rubbing the shaving cream around so it covers the entire surface again, then doing my second push and so on to the fifth or sixth push. Then I ran the blade under COLD water for a few seconds (cold contracts the metal, which is good. My own tip). Then you shave!!!
Jeff Shaving | UncommonGoods

shaving1

Conclusion
No kidding, this is incredible! The four (very old, perhaps a few months) blades I tested on each gave me a shave that is just about the same as a brand new blade. I used it for two weeks, then shaved once more with a brand new blade. I found no difference between the Razor-Pitted blades and the brand new one. While I suppose that I will eventually have to buy new blades, I can certainly see my costs being at least half, so I will have paid for my pit within two months.
sharprazors

Gift Guides

Gift Lab: How to Stay Chill & Kick Back Cold Ones

June 11, 2013

Research
I was already familiar with the Corkcicle, but was excited to hear of the introduction of the Chillsner— a stainless steel tool you freeze and then put in your beer, juice, or soda.

Hypothesis
My hope is that my beverage remains cold, even if I get distracted playing video games.

Experiment
I have to admit I was a little skeptical about using the Chillsner. Also I was a little nervous my lips would get stuck to it, due to the Chillsner’s time in the freezer. So on the first night, I put the product in the freezer for an hour. (The instructions call for 45 minutes.) I took it out and stuck it in the bottle, but not following the instructions, I spilled some of my beer because I didn’t take a sip first. Stupid physics.

The first attempt worked pretty well, even though I purposely put the Chillsner in a warm beer, and it cooled it pretty quickly. Yum.

The next night, the Chillsner had been in the freezer for 24 hours. My lips still didn’t get stuck. Also I made sure not to spill my beer. It kept my chilled beer chilled as I nursed it for an hour and a half. Normally I don’t take this long to drink a beer, but sacrifices must be made in the name of science.

Conclusion
Overall, I was pleased. My beer stayed cold for much longer than I was used to. I look forward to using the Chillsner this summer.

Gift Guides

Gift Lab: From Wine Bottle to Watering Globe

May 28, 2013

RESEARCH
Ok, so I don’t have the greenest green thumb, but I love having fresh herbs and veggies on hand. When I’ve planted in the past my poor plants’ main downfall has been lack of water. If my sprouts are not directly in sight every day I tend to forget them. The backyard for my apartment building is accessible, but it isn’t exactly easy to get to each day, so I need a watering system that will babysit my sprouts a few days a week. I’m hoping the Plant Nanny is up for the job!

HYPOTHESIS
The Plant Nanny will keep my herbs and tomato plants well-hydrated without daily watering sessions on my part.

EXPERIMENT
I got my seedlings home and potted in a sunny spot. I also brought home the Plant Nanny wine bottle set. Because my herbs went into pots on the small side I decided to try empty beer bottles for their Nannies. The tomato plants went into a larger pot, so they got a wine bottle. The necks of the beer bottles fit just about perfectly into the wine bottle Plant Nannies. But I wasn’t certain that the water would hold out in them over the next few days.

The directions recommended that the end of the Plant Nanny should be pushed down by the roots. This was easily accomplished without over-packing the soil too tight or crowding out my seedlings.

It was also really simple to get the full bottle into the Plant Nanny. The directions noted to put a finger or two over the top of the bottle before tipping it into the Plant Nanny. The water filled the base of the nanny and balanced out without losing hardly a drop.

Ok, so I have to admit I thought the upside-down bottles might not be that great looking. (Course, neither do the re-used pots I got from a neighbor that was going to chuck them.) It turns out that they look pretty cool, and I can already tell that they’ll blend in a bit better once my plants start to fill out.

CONCLUSION
So, I did my planting on a Sunday afternoon. By Wednesday morning there was only a bit of water left in the both the beer bottles and the wine bottle Nannies. The small-bottle-to-small-pot and large-bottle-to-large-pot idea worked out well with the wine bottle Plant Nannies! The soil in all three pots was moist without being overly flooded.

Looks like I’ll be able to let the Plant Nannies “babysit” for about 2-3 days at a time. If we hit a dry spell I plan on checking my plants every 1-2 days to be on the safe side.

Gift Guides

Gift Lab: How To Be a Real Smooth Guy

April 29, 2013

Research
Hard work comes at a price; rough hands! I chose the 7 Day Hand Repair Kit for Men for my experiment because it seemed like the perfect product to give my hands an overhaul. The designer of this kit was a mechanic for 20 years, and his damaged hands pushed him to make this product. Coupled with the fact that I have never tried anything like a hand repair kit before (although my neighbor wore gloves everywhere because she was a hand model), I figured that this might have interesting results.

Hypothesis
I was very active as a teenager, and I work in a warehouse now, so this seemed ideal given that my hands have lost many battles in the hand-aesthetics department. I predict that I will have softer, more moisturized hands by the end of the seventh day of me using this repair kit.

Experiment
I figured that Monday morning would be a good day to start this experiment. I opened the kit, which includes soap, hand repair lotion, knuckle wax, night salve, cotton gloves and butter nub along with instructions.

The instructions on the kit state that there is a morning and evening routine. The first step in the morning routine was to thoroughly wash your hands with the hand scrub soap. The soap actually made my hands feel smooth and soft after using it.

Next, the instructions state that after the soap, I should use the hand repair lotion followed by the knuckle wax. After the first couple of days I did not really notice much of a difference. However, at around the fourth day, my hands did in fact feel somewhat softer.

The evening routine varied slightly. After using the soap and hand repair lotion, the instructions stated that I must coat my hands with the night intense salve instead of knuckle wax and then cover them with the cotton gloves. The main ingredients in the salve were cocoa butter and shea butter, which left my hands shiny and slippery (even after rubbing the moisturizer in for a couple minutes). I left the gloves on overnight and took them off when I woke up the next morning.

The butter nub, which has skin healing oils and is meant for on-the-go moisturizer, took a bit of extra effort to get out of the container as it was of a more solid consistency. My wife described the smell of it as similar to shea butter, although it definitely seemed harder than the night salve. Throughout the seven days of hand repair, I used the butter nub in an attempt to moisturize my hands while at work and home.

Conclusion
My hypothesis was correct. My hands actually felt softer after using the 7 Day Hand Repair Kit for Men. This was a cool experiment that allowed me to improve my hand texture and keep them moisturized. If I did this again, I would probably use less of the butter nub as that seemed to have the least effect on my hands. Overall, though, the morning and night time routine seemed to work after a few days, and now I have great hands! Well, maybe not great, but definitely smoother than before I started using this kit.