Browsing Tag

Gift Lab

Gift Guides

Gift Lab: How to Make Fruit-flavored H2O

April 18, 2013

Research
A glass water bottle with a built in fruit infuser. What a brilliant idea! is the first thought that came across my mind. I’ve never heard about this product and finding out about it would make a change in my lifestyle. All of my life I’ve grown accustomed to drinking soda and juice, neglecting water which is necessary to keep our bodies properly hydrated. Breaking this bad habit by using the Flavor Infuser Water Bottle would help me transition from my lack of water intake.

Hypothesis
Infusing fruits into water on a daily basis will lead to a healthier lifestyle and water being an essential part of my life.
Experiment
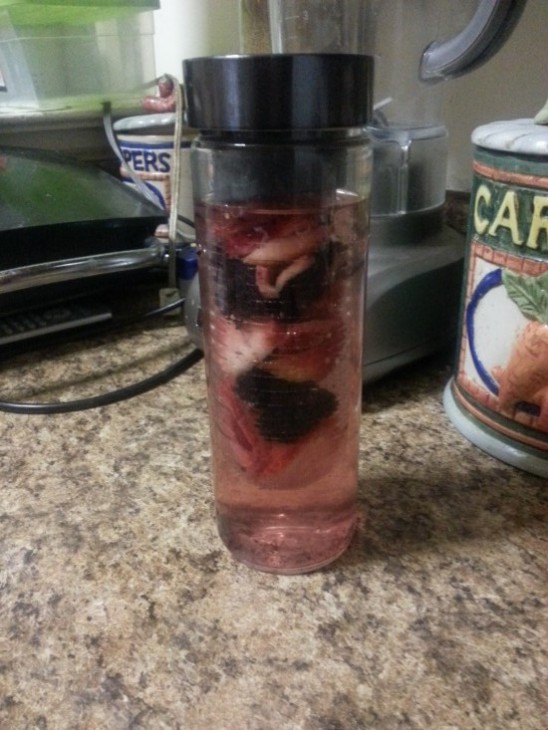
With a variety of fruits I will mix and match them and properly infuse them into water creating a couple of different types of fruitful H2O. Below was my favorite concoction.
Watermelon Lemon Basil Water
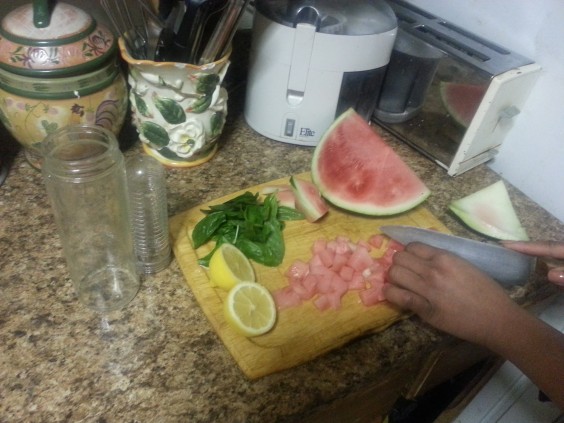
Step 1: Finely slice lemons into 6-8 pieces
Step 2: Cut watermelons into small cubes (10-12 cubes)
Step 3: Chop 8 basil leaves in half
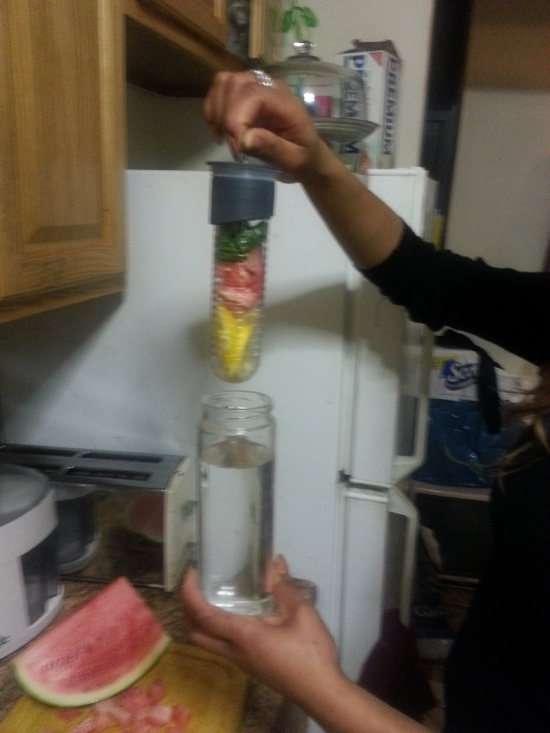
Step 4: Take the center piece of the infuser and add lemons, watermelons, and basil leaves together.
Step 5: Place the top onto the center piece.
Step 6: Fill the glass water bottle with water.
Step 7: Place the center piece inside of the glass bottle and place the main top on to seal the bottle.
Step 8: Let the infusion begin! Wait 30 minutes until you drink the water. Enjoy!
Conclusion
This infuser is definitely a hit. After experimenting with different fruits my outlook on drinking water has changed. Using this product created a fun experience. Researching the different fundamentals of fruits and water helped me in having a want to drink water. It’s simple, it’s easy and I am becoming a water-loving person.


Gift Guides

Gift Lab: The Levitron Lamp’s Floating Fluorescence

March 20, 2013

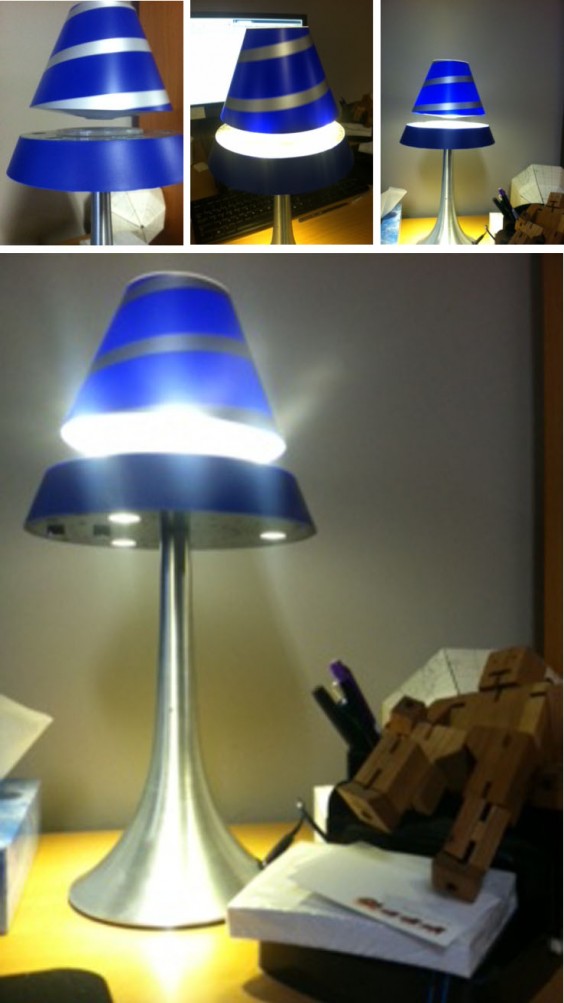
Rocky tests the Levitron Lamp | Uncommongoods

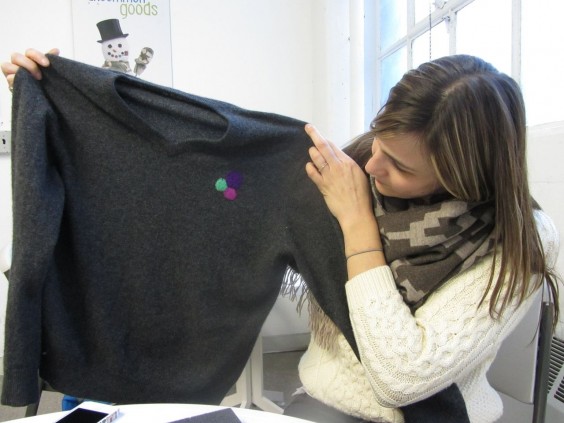
The Levitron Lamp in action. Read on for Rocky’s Step-By-Step floating lamp tutorial.
Research
I remember it like yesterday..

About 6-7 weeks ago I’m sitting at my desk, headphones on, Spotify playlist blasting, putting in work on the current task at hand. I get to a point where I feel like a mini break is warranted and decide to relax a bit, sinking into my chair and mentally preparing myself to go full on into daydream mode. However, right before I get the chance to picture myself on a foreign beach, drinking margaritas out of umbrella decorated coconuts, something catches my eye…

Sitting on a shelf behind the neighboring desk to mine, there is a fairly large box with “Levitron Lamp” in bold print, accompanied by a photograph of a lamp underneath … I think. Why the uncertainty? Because according to the picture I’m now staring at, the lamp’s shade that sits on top, actually doesn’t “sit” at all, but FLOATS. Yes.. I’m sure now. There is definitely a minimum of 1-1.5 inch of space between the lamp’s shade and its base, with nothing connecting the two..

W. T. F. ?

See, working at UG for about a year and a half now, I’ve grown accustomed to expecting the unexpected when it comes to the products we carry. Time and time again, I find myself floored by the level of creativity and innovation applied. So much so, that I’ve made myself a permanent resident in the Merchants’ area of our office so I can scope out the samples of potential new products as they come in. (Marketing team, I promise I love you guys.. but yes, I have something on the side with the merchants.) Needless to say, this just became another time to add to that list of ‘time and time again’ I mentioned earlier.

*Pauses music. Snatches off headphones. “KATIE.. What.. is… that?!”. *

Katie (UncommonGoods Associate Buyer and my desk neighbor) informs me more about the newly received lamp and confirms that it purportedly does have floating pieces incorporated, although no one has yet to see it with their own eyes. Then after a brief pause, she adds…

Hypothesis
I have to assume that because someone out there took the time to mass manufacture, officially name, professionally package, and ship this product to our office, there is some truth about what it claims to do. However, I’m suspicious about how well it will work and for how long. My past experiences from life teach that often, things like these don’t stick around for very long, once out of the box and put to continuous use (and of course, that doesn’t fly at UG). That said, I’m predicting ‘oohs’ and ‘ahhs’ for a short-lived amount of time before it becomes a has been.

Experiment
Setting up the lamp is fairly simple, just pay close attention to the directions, because between the different parts to the lamp and the various laws of science at play, there’s a chance of some confusion if you do not. Take it from me–I admit, at first I quickly threw the directions right to the side and had at it.

It took 1 minute and 20 seconds for me to pick them right back up again… which brings me to

STEP ONE Use the directions to identify all the pieces.

You see that first picture on the left up there? Take a real good look at it. It identifies all the pieces you will need to put the floating lamp into play and gives you the ABCs of what goes where, when, and why. You will see later that this is very key to this whole operation.

STEP TWO Read the directions thoroughly.

By now you get the point. Directions = good.

STEP THREE Find desired location for lamp and plug it in.
You will want to do this. Trust me. You will see why.. eh, I’ll just tell you now. Once setup is complete, you will not want to A. Unplug it (unless you want to practice setting it up all over again), because the way it floats is due to electromagnetism. That’s short for ‘no electricity, no magnetism.’ B. Even if you do not need to unplug your lamp, sliding or carrying it will require very slow movement. The lamp’s magnetic field is easily thrown off balance (causing the shade to fall off) when knocked too hard.

STEP FOUR This is where you get your David Blaine on and make some magic happen.

Grab the clear plastic disc and find the side that has a tiny peg poking out from the center of it. Then look at the top of the lamp’s base and find the little hole at the center of that. Once found, place the clear plastic disc, peg side facing down, on top of base’s center and slide it around until the peg falls into the little hole, securing the disc in place.

Now grab your black cylinder/tube/thingamajig. Notice one end will have a thick border and the other end will not. Place the end that doesn’t have the thick border into your clear plastic disc. (You will know you’ve done it correctly because it also will slide securely into place.) At this point, find your little hockey-puck-looking magnet, hold it over the top of the cylinder as if you’re going to drop it in and take a trip down memory lane to junior high science class. If you feel that the magnet is trying to run away from the cylinder’s opening, that means it is repelling and you need to flip the magnet over for the side we need to work with. If there is no repelling, then we’re good to continue.

Next, drop the magnet into the center of the cylinder. The directions say to start much higher for this to work, but I found that starting right over the cylinder is fine. When dropped into the cylinder correctly, it will float on its own directly in the center. If done incorrectly, it will still float, but also rest on the walls of the cylinder. That’s a no-no. You will have to redo it.

Once you have the magnet floating in the center, you can now take the cylinder off by pulling it straight up. After that, push the plastic disc off the side. Neither of these are needed anymore.

STEP FIVE Place your lamp shade on the magnet.

So after spending some time looking at how cool the magnet looks floating there (because you’re definitely going to), you’re now ready to place your lamp shade. There is a groove in the bottom of the shade that allows it to sit perfectly on top of the magnet. Using some finesse (so to not knock the magnet out of ‘orbit’), place the shade on top.

WALLAH! Floating Lamp Goodness complete.

Conclusion
I also want to highlight that besides the floating feature, the lamp itself is pretty nice. As you can see from the pictures, it has a modern, sleek/Jetsons futuristic hybrid look to it. The light comes from the top of the base and the bottom of the base, with two separate touchpad light switches controlling the different sides.

Wherever you find yourself setting up this lamp, it will be a conversation starter for sure. My desk has easily become the coolest desk at UG (I’m accepting any challengers, what up?!) and anyone who notices it while walking by stops to take a closer look.

WARNING: With great power comes great responsibility. Like I said, this lamp will draw people in to take a closer look. They also WILL play with it, and they will knock the shade off over.. and over.. and over again. So get use to setting it up. But after the first couple of times, it’s easy as pie–Scratch that. I don’t know how to make pie, bad example. It’s easy as buying pie–and you’ll come to enjoy watching people’s expressions when they do knock it off. (Everybody’s face always look like they just broke an irreplaceable ancient artifact and are about to get hauled off to serve hard time for it.. or at least have to buy me a new one.)

At the end of the day, simply said, this is one cool lamp. And today it’s still on my desk, working as great as the day it came out of the box.

Also, that ‘lil guy basking in the lamp’s light in the picture? That’s Blocky. He makes sure my pens don’t go missing while I’m away from my desk.

Design

Slate Cheese Board Styled 3 Ways

March 19, 2013

Any apartment dweller knows the plight of a lack of storage. I cringe at the though of single-use items that will take up space on a shelf or counter (oh, how I’m dying for a waffle iron!). Since moving to New York City a couple moons ago, I have started to give a lot more thought to my purchases and make sure everything that enters my tiny apartment will be used. Simply, I don’t buy things that won’t get used frequently!

I spied the Slate Cheese Board with Soapstone Chalk since it was launched on our site months ago but wasn’t sure how often it would get used. Yes, I love cheese – many, many kinds of cheese – but it’s rare that any lasts long enough in my posession to leave out for guests. But the board was too gorgeous in all it’s rustic glory to pass up. So I took it home and gave myself a weekend to see how many times it could get used, finding that there were more uses for this board than meets the eye.

Build your own omelet party After work on Friday I met some friends at the gym to get the weekend started. Afterwards we all came to my place for dinner and I had two main objectives: a) eat some protein to rebuild muscle tissue and b) clean out my fridge. So I threw a “build your own omelet” party and set out the ingredients. It was a self-serve experience so everyone could make their omelet to their liking. I’m glad I got to label their choices so no one picked up an ingredient they didn’t want. The idea was a success and I can’t wait to throw another “build your own” party (sundaes, cocktails, pizza, grilled cheese…).

Movies in Bed Nothing is more fun that lounging in bed on a cold Saturday with your laptop and Netflix, but I always struggle with keeping crumbs from falling out of a lopsided bowl of popcorn. Wondering how the cheese board would fare as a bed-tray, I stocked it with gummy candies, a Mexican Coke and a heaping bowl of lime coconut popcorn while getting under the covers to tackle my growing queue. It did the trick and kept my soda and popcorn level when I readjusted in bed. That night’s sleep was not a story of the Princess and the Popcorn Kernel, thankfully.

Sunday Brunch One of my favorite New York past times is hunkering down after a morning of yoga with the NY Times and a cup of tea. Just sitting all day, leafing through the massive pages that cover my dining table. Since my Sunday brunch is never quite a complete meal – some fruit, nuts, a bagel, maybe a pastry – it was nice to spread out an afternoon’s worth of things to munch on as I caught up on current affairs. I was so comfortable, I didn’t get up until the sun went down and it was time to make supper.

Gift Guides

Gift Lab: Thumb Piano “Ka Limba Limba”

March 11, 2013

Research
The Kalimba is older than Jesus. Also referred to as a thumb piano, it has changed form and tuning numerous times over the last 3,000 years. It was initially made of bamboo and then independently created in metal form 1,300 years ago. Small and light, it was the perfect instrument for travelling griot storytellers in West Africa. They believed that the angelic notes could float up to heaven and bring spirits down to earth.

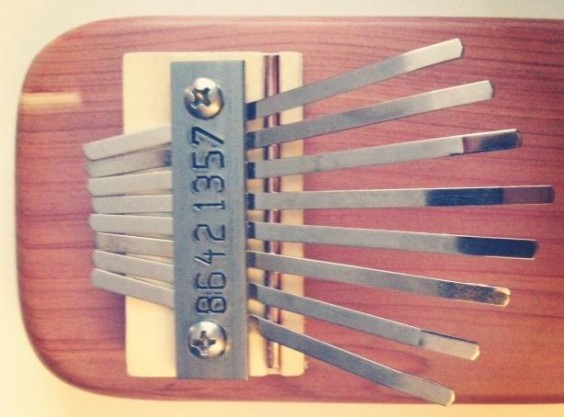
Upon plucking one of the metal tines for the first time, I immediately realized that there is indeed a mystical element to the tone it emits. It is also quite easy to play, especially the version I had, since it consists of only 8 notes. Has someone ever asked you to name one object you would take with you to a deserted island? This has to be it. It makes for great company. I immediately had an innate desire to contribute to the history of the Kalimba by writing a short song for it.

Hypothesis

I figured that the best way to learn this instrument was to make like a griot and play it while I walked. Living in NYC, I walk a lot. I figured I would bring it everywhere I went and play it everywhere I walked. I could probably come up with something decent in a week.

Experiment

I started with my walk home to the subway station. I developed a pleasing four note repetition. Still playing, I made my way down the stairs of the station, caught a train and sat down. On the subway, I memorized a few variations on the loop. It’s a fairly quiet instrument. When the train was moving, only I could hear it. When the train stopped, a man next to me glanced up, curious. I smiled. He smiled back, looked down and continued to read. Nothing is out of the ordinary on the NYC subway. I continue playing on my walk home. Head down, deeply focused on memorizing the verse. The next day I created a complementary verse and walked into a stop sign. No biggie. Griots used to do it all the time, I’m sure.

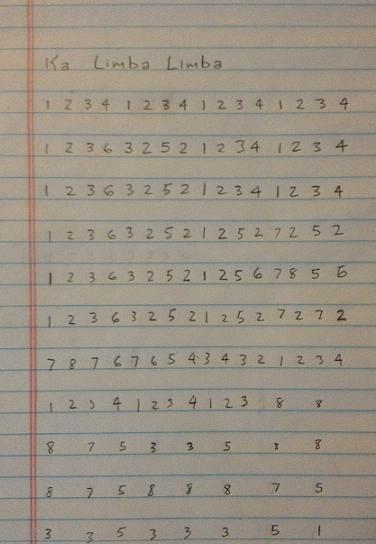
By day 3 I had a 40 second song that I could repeat. Guessing I would soon forget it, I wrote down the notes. For proper documentation, I named it Ka Limba Limba. It’s 11 lines long.

I recorded it here for your listening pleasure. It’s quiet, so headphones are suggested:

Conclusion
I thoroughly enjoyed playing this little instrument. My thumbs are a bit raw from playing for a week. I’ll likely wait a few days before working on my next song.

Gift Guides

Gift Lab: It’s Written in the Tea

February 27, 2013

Research
I was always attracted to the world of mysticism and fortune-telling. I’ve had my Turkish Coffee Cup read and it was the most accurate “psychic reading” I’ve ever had— and I’ve had quite a few. The second I saw the Tea Leaf Reading Kit, I had to have it… immediately.

Hypothesis
With the help of the instructions, I will be able to read the futures of my friends and co-workers.

Experiment
The first step is finding a few victims test subjects. I found myself eyeing up friends and co-workers and wondering if they would think I was crazy or play along. Luckily for me, I found some who would!

Meet Lauren and Seneca, my two favorite Uncommon sisters.

Okay, so maybe they thought I was crazy, but they were willing to play along, which is really all that matters.

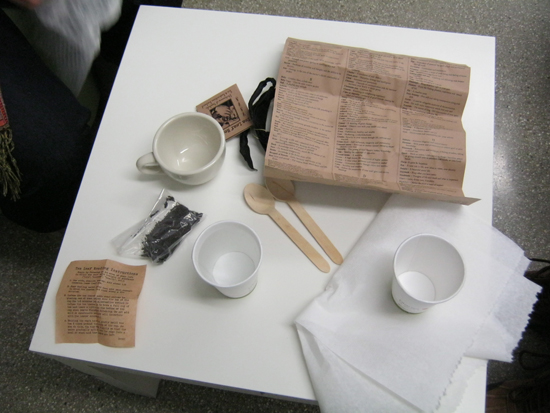
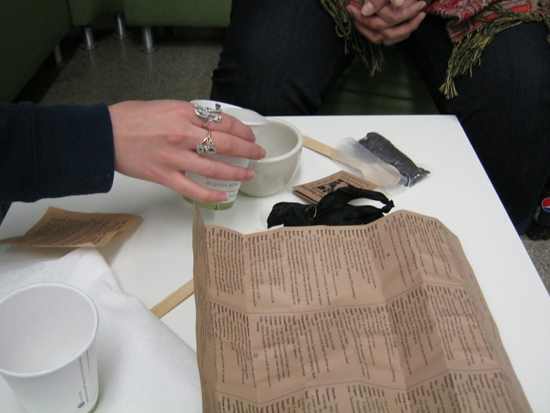
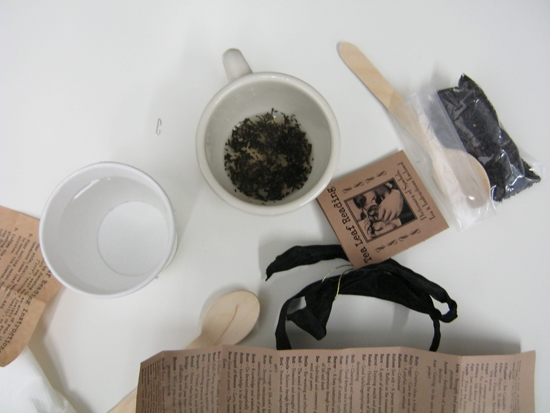
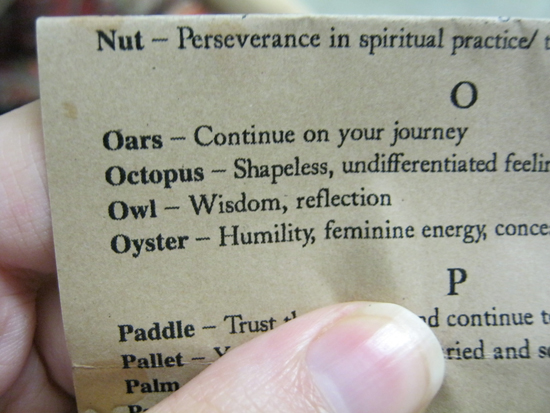
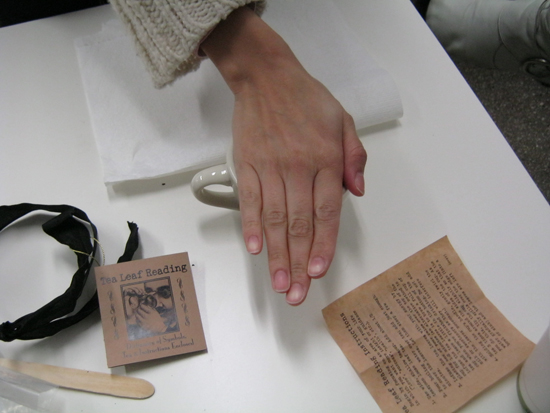
The kit comes with a mug, tea leaves, instructions and a symbol dictionary. All we needed to add was a spoon, some napkins, boiling water and somewhere to pour the excess liquid. It’s safer to use a bowl or a sink, as the instructions recommend. We used a cup. Don’t do this! We might have made a bit of a mess…

First up was Lauren.

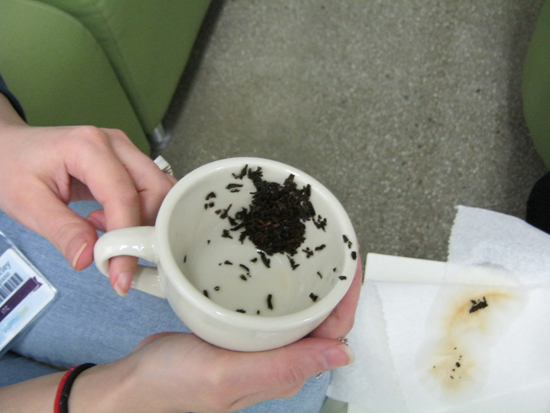
We put in a half teaspoon of the tea leaves and just enough water to cover them.

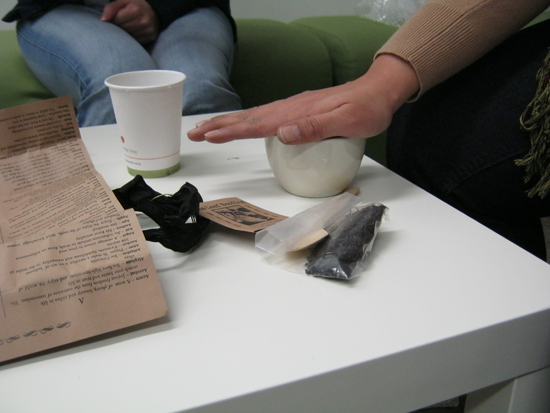
The person who is getting their tea leaves read must then put their hand on top of the cup to infuse the leaves with their energy, making sure to focus on what they would like to know. Lauren did this while focusing on her future.

After a minute or two, that person then holds the handle of the mug, swirling it three times to pour out the excess water and line the sides of the cup with the tea leaves. This was the messy part! A piece of advice: have a nice amount of napkins readily available to you. You will need them.

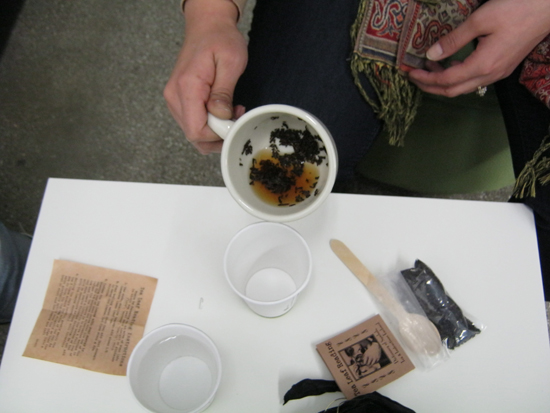
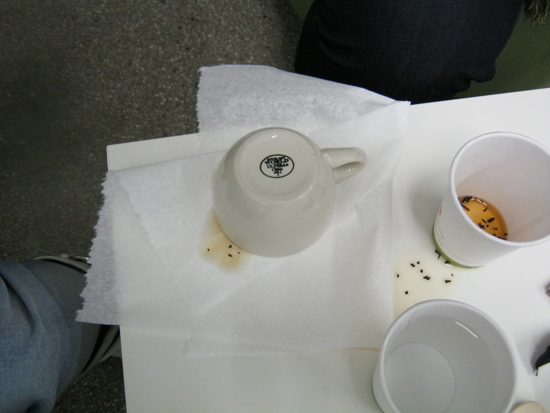
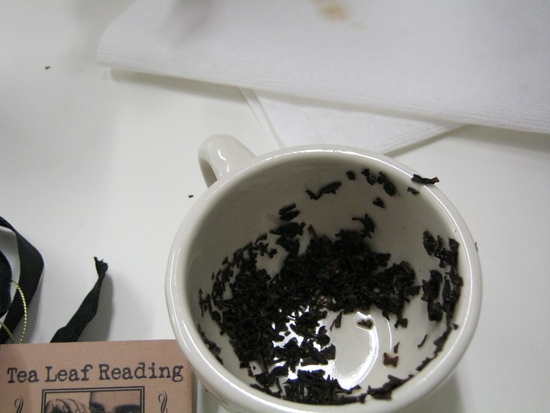
Once the water is almost all poured out, flip the cup upside down on a napkin or paper towel for a few seconds. Then, spin the cup three times to seal the leaves into place, turn over, and start reading!

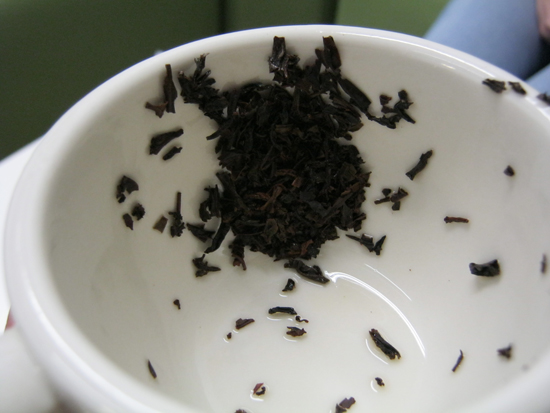
As you can see, all of Lauren’s leaves decided to band together to form one big animal. In person, this looked more like an owl. Here, however, it seems to be a cat.

Since at that point we saw an owl, we went with that description.

It looks like Lauren’s future is full of wisdom and reflection. I wasn’t entirely sure how to turn those two words into a cheesy reading speech, so I went with one sentence: “You will soon gain insight and wisdom from reflecting on your life and choices so far.”

Seems legit.

Seneca’s turn!

Seneca had quite a few shapes going on in there. It was pretty difficult to decipher them, but I found some winners. I didn’t take pictures because you would all think I was crazy and imagining them.

Don’t judge me.

After deciphering four different shapes, Seneca’s fortune turned out to be pretty promising: “You will receive some new, positive information that will result in a journey with a faithful companion.”

We took that as “Some really great news is coming that will send you and your guy on an adventure down a new path in life.”

Conclusion

This item is just as awesome as I expected it to be. Cheesy mysticism aside, the two “readings” seemed to coincide with their current life-events. Okay, so it could just be the Forer Effect. Please don’t ruin my moment.

Yay for the Tea Leaf Reading Kit and its fortune-telling abilities!

Gift Guides

How to Repair a Wool Sweater

February 22, 2013

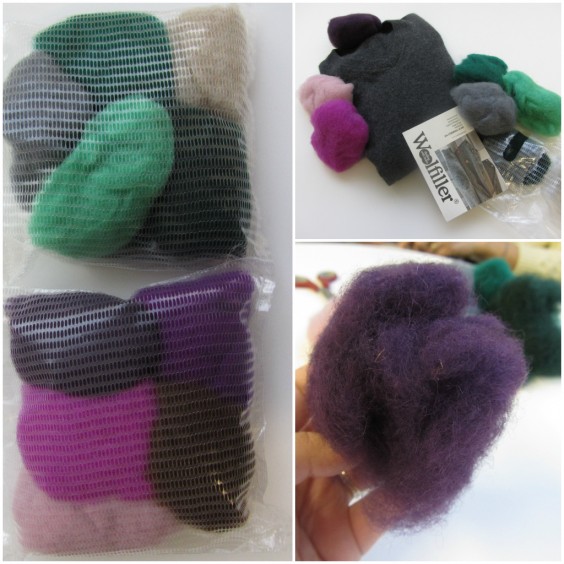
Getting the opportunity to try uncommon products is one of the great things about working at UncommonGoods. While many of these product-testing experiments become gift labs, every now and then we find a new good with so many uses we can’t fit them all in one “report.” The Woolfiller Sweater Mending Kit is an example of just such a product, AND, since associate buyer Katie and community moderator Cassie both had their eyes on this winter must-have, we decided to diverge from the traditional gift lab format and see just how many uses we could come up with for this clever kit. Four are outlined below, but Cassie and Katie agree that the fun doesn’t have to stop there!

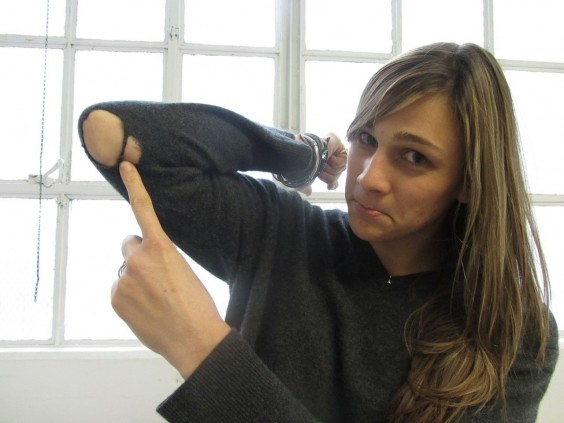
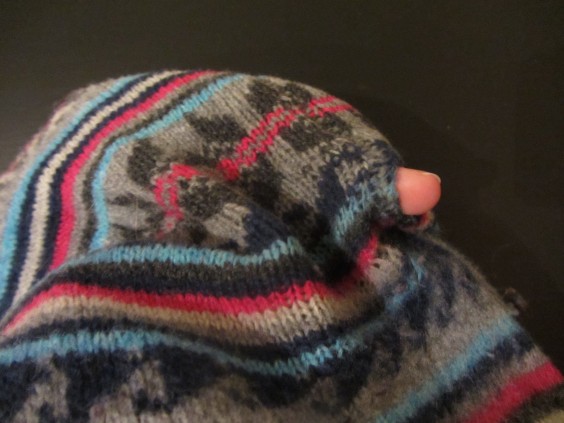
Katie: Having spotted the Woolfiller at a major New York trade show last year, I was anxious to get such a solution-oriented product into our assortment. A fun, hands-on kit to patch up an old favorite or add some flair to a basic sweater seemed like the perfect DIY project nearly anyone could adopt.To put this product to the test, I decided to tackle two specific projects, the first was to patch the embarrassingly large (and winter chill-inviting) elbow holes on one of my favorite sweaters. After completing the elbow hole patches, I wanted more – I had seen some fun images the company provided where people used the bright colored wool to add some creative patches as flair and I wanted to try this out, which lead to Project two: adding flair.

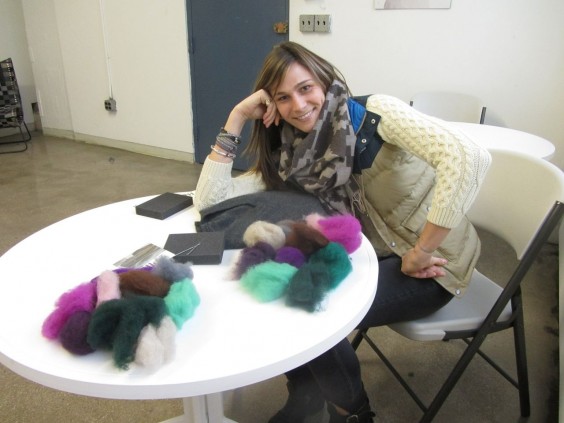
Cassie and I decided to each purchase one kit – a match made in heaven as this green-adoring girl, could partner with Cassie’s purple-loving self and combine to make a cornucopia of rich, jewel-tone wools mixed with solid staple colors (greys, blacks, beiges) which came in extra handy for my second project. But I would also say that one kit is entirely sufficient – each comes with bright color options as well as neutral, basic colors which should cover a range of sweater needs. And to that point, upon unloading our kits onto a communal table, we were both surprised by how much wool comes in each kit – we went about tearing each ball into half and divvying up our goods.

Project 1: Bold Elbow Patches

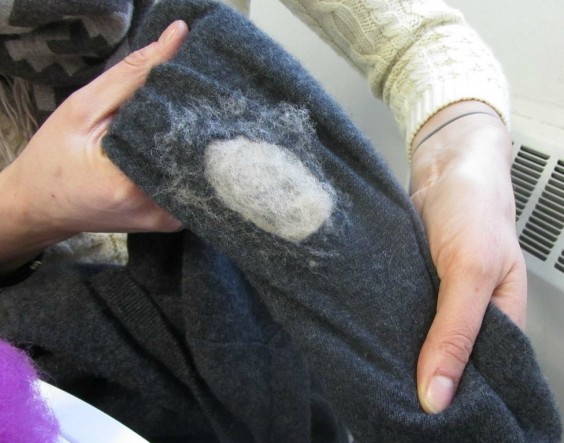
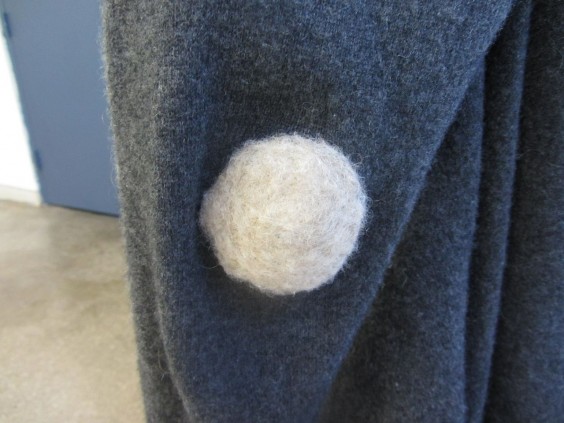
Katie: After some deliberation, I chose to patch the elbows of my dark, gray sweater with the natural beige wool – aiming for a contrast patch look – like your grandfather’s sweater.

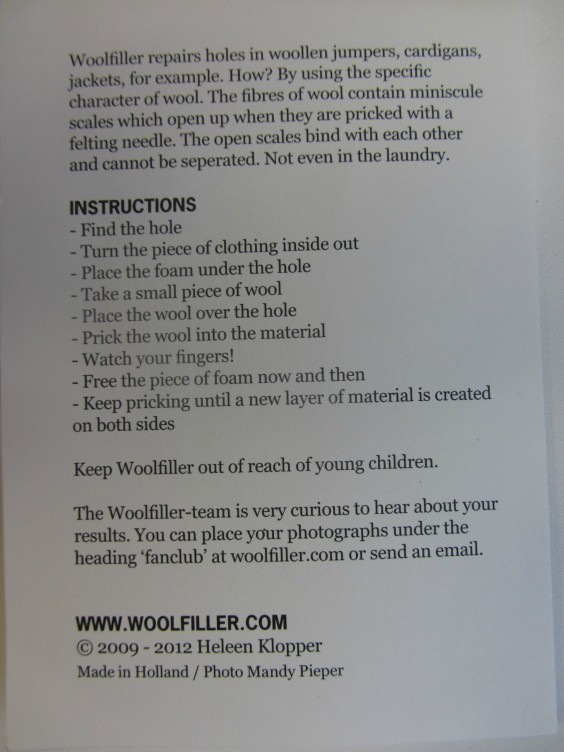
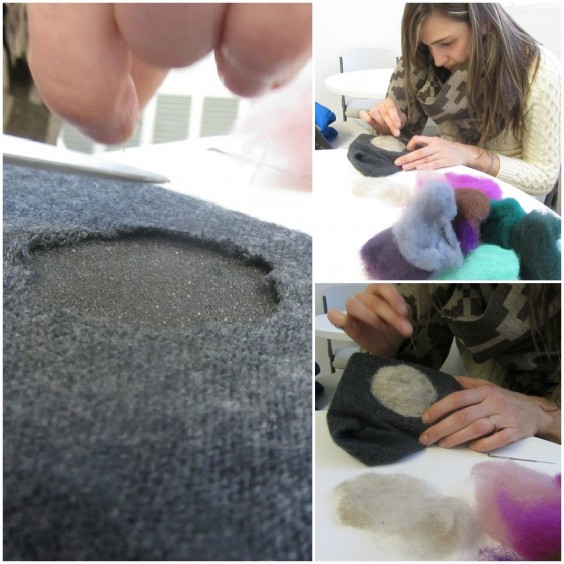
After choosing the color of wool, I reviewed the simple instructions and went to work. I used a pair of scissors to make the first of my ragged elbow holes into a smooth, even oval to ensure my patches would be as clean-looking as possible. Next, I ripped a decent amount (maybe the width of a lime) of wool off the main piece, turned my sweater inside out, put the provided foam piece in the sleeve, laid the wool over the hole, and began poking!

After completing the first of two patches, I turned my sleeve right-side out to inspect my work. Herein I learned one of the bigger lessons of the project – while the instructions suggest turning your piece inside-out to use the product, I found that by doing that I was less aware of the exact line of the hole (because the piece of wool covered it) and as a result I ended up with what can only be described as a “halo” effect around the patch – one sold patch, with a light ring of excess wool surrounding it.

On elbow #2 I decided to try another approach – again I cut away the ragged edge to make a smooth hole, but this time I left the sweater sleeve right-side out, I inserted the felt piece, and lined the wool up perfectly with the hole and started poking away. I found when I did it this way, I was able to guide the wool into a perfect oval while poking and overall felt much more in control of the overall work. When complete, the patch appeared much more perfect and solid.

After completing the elbow patches, I moved onto my next experiment…

Project 2: Adding a Little Flair

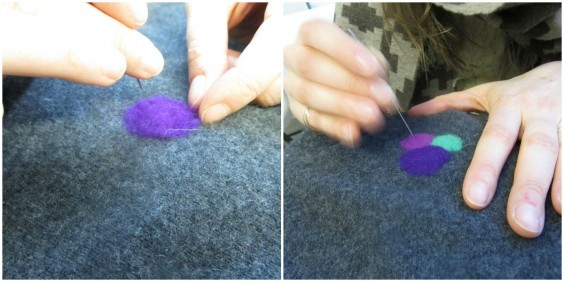
Katie: I decided to do a simple trio of mini circles with bright colors. Having learned from my elbow patches, I left my sweater right-side out, tore of tiny circles of wool (about the size of a quarter), and started poking away! I found my technique was much-improved, I used my fingers to expertly guide the wool and before I knew it I had my little flair added in.

In the interest of science, here are my key Findings:

Finding #1:
This kit comes with a lot of wool. I was surprised by how little wool it took to patch up my rather large elbow holes. I have a lot of wool leftover and am just waiting for a quiet Sunday to get to patchin’ my slew of other well-worn sweaters.

Finding #2:
The more you poke – the more “felted” the wool becomes. Good thing poking is super fun.

Finding #3:
As mentioned above, the kit recommends turning the piece inside-out and then using the wool filler, however, I found this created a slight ‘halo effect’ around the actual patch, and when I tested using the kit the opposite way – with the sweater turned right-side out, I was very pleased with the results – I could control the pokes more and create a clean oval with no halo.

Finding #4:
The Woolfiller is a really easy, creative way to patch.

Having now completed two projects on one beloved, well-worn sweater, I can vouch for the usability and honestly–the fun– this product provided.I passed the DIY-sweater-patch torch along to Cassie.

Project 3: The No-Show Repair

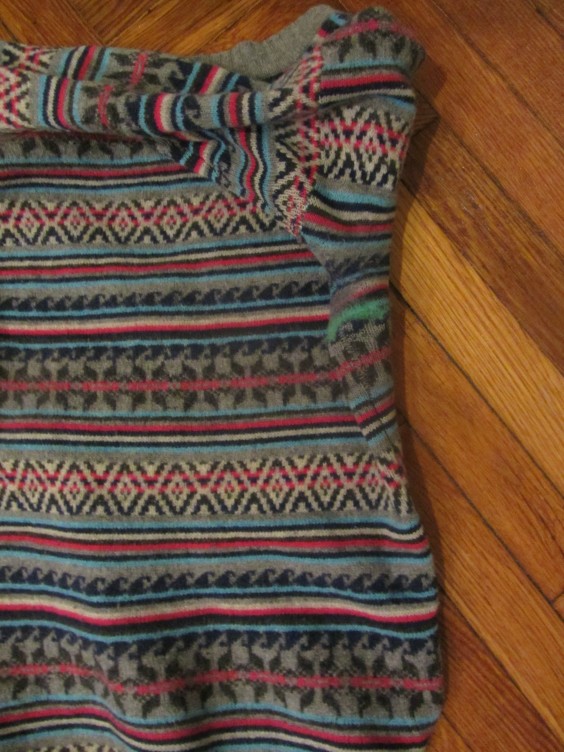
Cassie: I also had a beloved sweater with a hole in it. Unlike Katie, I didn’t want my repair job to be super noticeable. My hole was just under the arm of a multi-colored sweater, so I hoped I could blend the new wool in and make the sweater look like new. Taking her findings into consideration, I began my exercise in craftology.

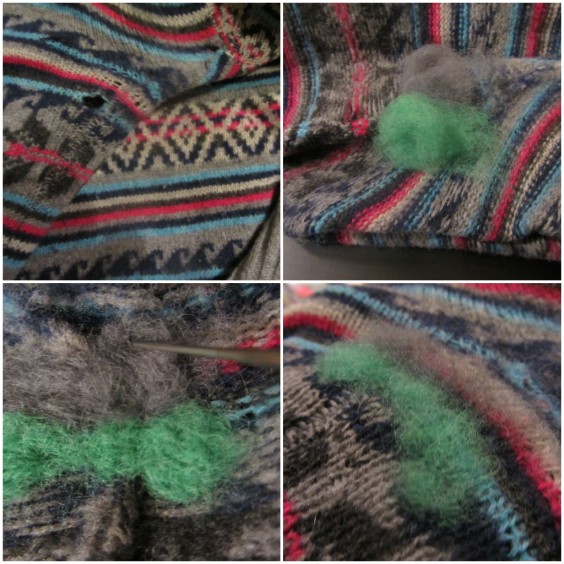
I started out the same way, by finding the hole, turning the sweater inside out, and inserting the foam block. Then I picked out a couple of colors that I thought would mix nicely with my sweater’s pattern.

I placed the wool over the holes and started poking. It was really fun, and, because the sweater is 100% wool the new wool took almost instantly. I pricked at the wool with the felting needle for less than a minute before the patch was completely attached, but I kept at it for a little longer, just to make sure it was blended well.

I turned the sweater back inside in and gave it a few more pokes, just to give the wool a smoother look. The finished product looked good, and the patch feels just like the rest of the sweater.

While I agree with most of Katie’s key findings, I found that starting with the sweater inside out worked great for a small, blended patch. She preferred the look of the patch when she placed the wool directly over the hole without turning her garment inside out first. I’d recommend doing a test on your own piece, by woolfilling just a small section of the patch, before completing your own project.

Project 4: Super Star Style

Cassie: Giving my sweater a quick fix was fun and easy, but after seeing Katie’s bold patches and the little bundle of flair she added to her project, I was a little jealous. I wanted to give my own colorful creation a try, so I decided to add a little shape to an old cardigan.

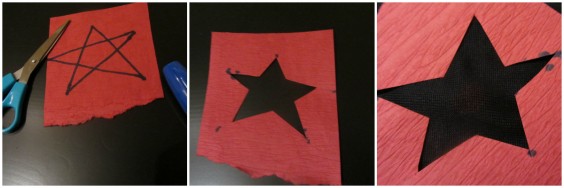
First I drew a star shape on a small piece of scratch paper. Then, I cut out the star, leaving an outline. Next, I placed the outline over the elbow of my sweater. (Remember to insert the foam block first.)

I didn’t turn the sweater inside out this time, since I wasn’t actually making a real “patch,” I was just covering up the existing material with new wool.

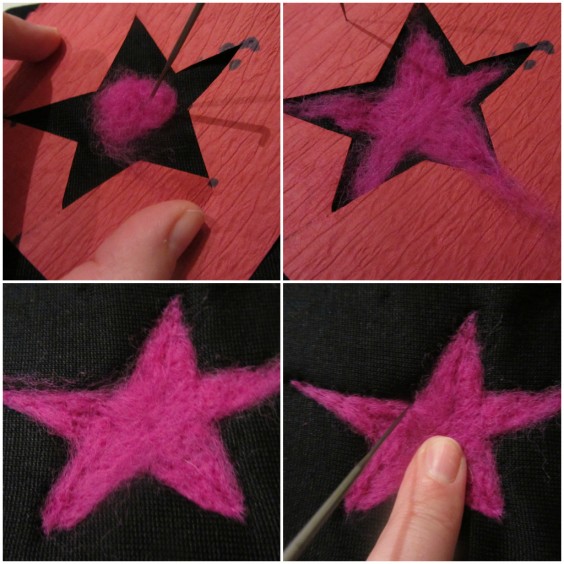
I put a little ball of bright pink wool in the center of the star shape, then started stretching it out to fill the cutout as I poked it with the felting needle. I didn’t secure the star before starting this process, which made it a little trickier than it had to be. Next time I’ll hold it in place with some fabric tape or a safety pin.

I gradually added more wool and pulled it into the shape of the star as I worked at it with the felting needle. Once I had the outline filled in I removed the paper and then poked carefully around the outside edges of the star to give it a sharper shape.

Since the cardigan isn’t entirely wool (it’s a blend also containing nylon and cotton), it took a lot longer for the woolfiller to adhere this time than it did with the 100% wool sweater I’d used it on before.

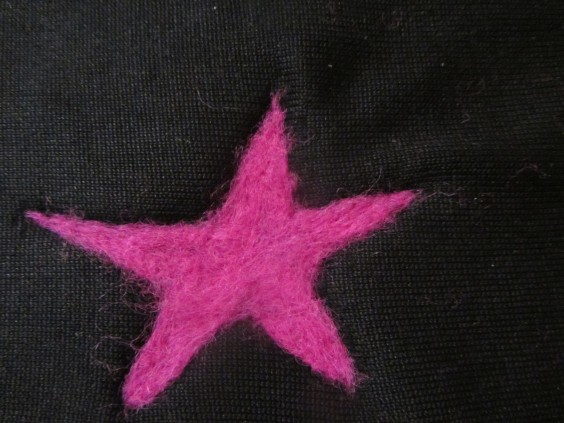
The star turned out well, but there was one problem. I was so focused on creating my shape that I forgot to move my foam block the whole time I was poking. The wool (and the sweater) got stuck to the block, so It was somewhat difficult to remove when I was done. Make sure to readjust the block several times during your project to make sure this doesn’t happen!

I’ll definitely try this again next time I want to give an old sweater a new look. Next time, I might try a heart, a triangle or square, or maybe even a letter.


Through our multiple sweater patching projects, we learned that the Woolfiller Sweater Mending Kit is a great way to repair a damaged sweater, give old wool a new look, or add a personal touch to your favorite pieces.

And, bonus, it’s not just for sweaters. It works on any pretty much anything made of wool!

Gift Guides

Gift Lab: A Pocketful of Convenience

January 30, 2013

Background Research
The Pocket Utensil Set is an exciting new addition to UncommonGoods’ collection. In the world of utensils, I had only experienced traditional silverware, plasticware, and chopsticks until now. This new option could open up an entirely new realm of utensils for me.

Hypothesis
Since I dislike the feel and overall experience of plasticware, and I often find myself in situations where plastic is the only option, I predict that always having stainless steel flatware on hand will improve the way I enjoy meals every single day. I predict that I will be much happier always having this option available to me.

Experiment
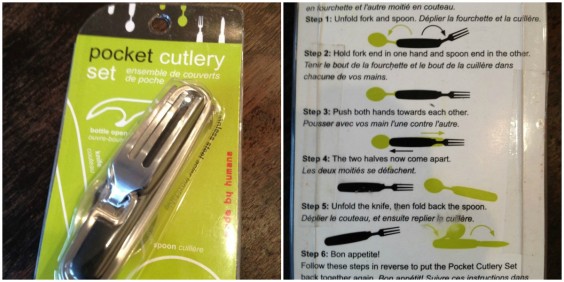
I began by examining the packaging. It’s quite simple, and leaves minimal waste. (Good for the environment, which is always a plus for me.) The back of the packaging has simple directions for separating the device in two.

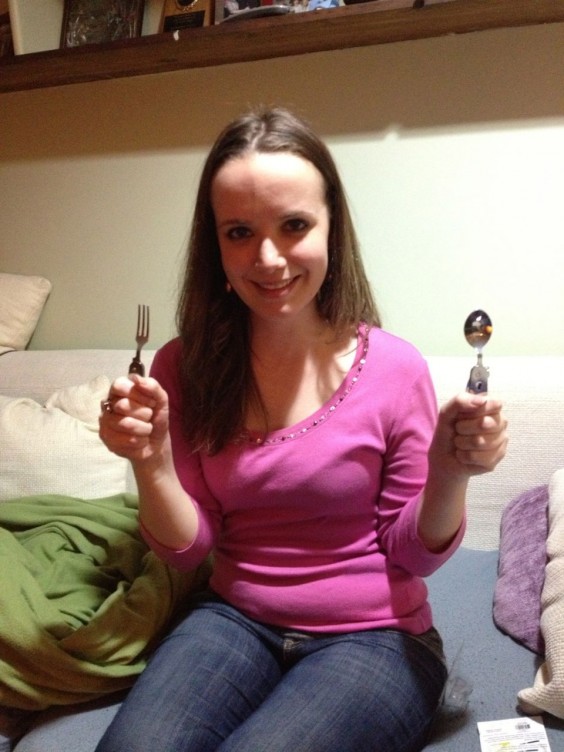
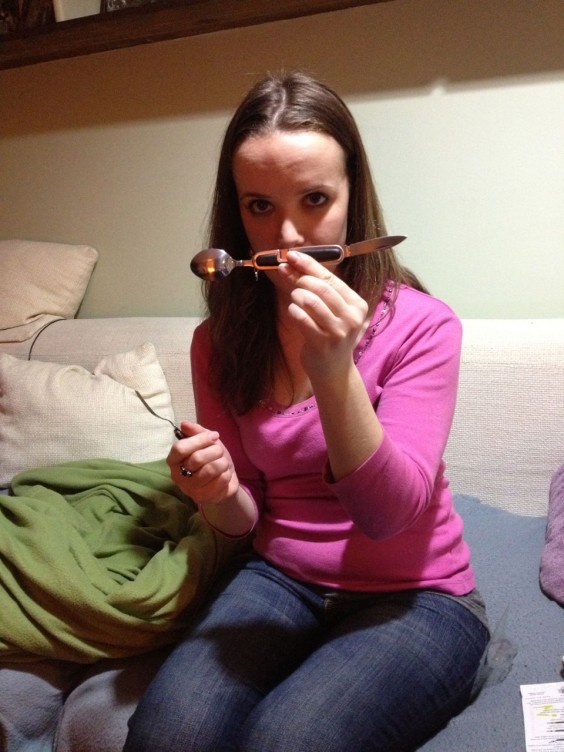
My friend’s dog Max watched as I learned how to split it in half. This was really easy to do. (It’s also very easy to re-assemble).

When I first set out, I wanted to use the pocket utensil is every possible scenario until my experiment was done. I took it everywhere I went. In some situations, such as when having dinner at a friend’s home, where a table is set and so forth, it really made no sense to pull out my own silverware, so I figured I would refrain. However, I found it most useful when my roommates have left all the silverware dirty in the sink, and I didn’t want to dig for a dirty fork to wash, and then subsequently, use. I now ALWAYS have a clean fork, knife, and spoon available to me!

The feeling of using the pocket utensil is much nicer than the plastic variety; however, there are a few things I’d like to point out. The fork, spoon, and knife are scaled down a bit. Which makes them still useful, and, of course, portable–but it is harder to grab a bunch of spaghetti on this smaller fork than with a larger, traditional one.

The spoon is most certainly not for soup, but it is fine for cereal or any food where it makes sense to have a smaller amount in each spoonful. It’s great how easily you can separate the fork/bottle opener end from the spoon/knife side. If you had a meal that requires a spoon, fork, and knife all at the same time, you may find yourself rushing to the kitchen to wash off the knife and spoon alternately, as needed. This could be a bit annoying, but luckily most meals do not require that many utensils.

The Pocket Utensil is cool-looking, portable, and useful. It definitely improved those meals where I would have had to wash my silverware right before eating, or where I would have had to use wasteful, flimsy plasticware.

Conclusion
My hypothesis was proven to be true. I enjoyed meals with the Pocket Utensil far more than without. The only real ideal situation is to always have traditional silverware ready, clean, and available to you, no matter what. When you can’t have that, the Pocket Utensil is a brilliant alternative.

Gift Guides

Melissa’s Game Night: Kwizniac Trivia Countdown Game

January 15, 2013

Welcome to the second installment of “Melissa’s Game Night,” the blog post series where I fill you in on the behind-the-scenes product testing I conduct on new uncommon games. Basically, I force all of my friends to play games with me, then I write about it.

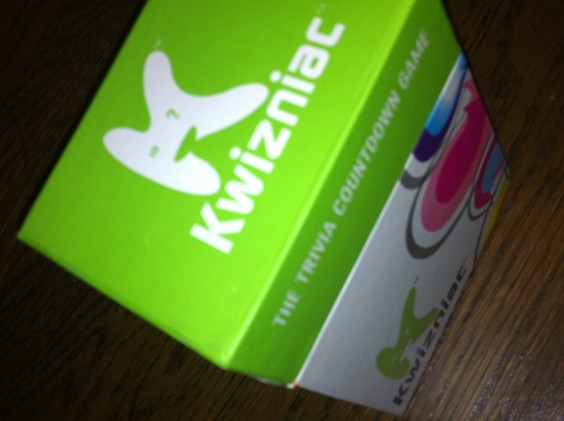
This time around, we played Kwizniac, “The Trivia Countdown Game.”

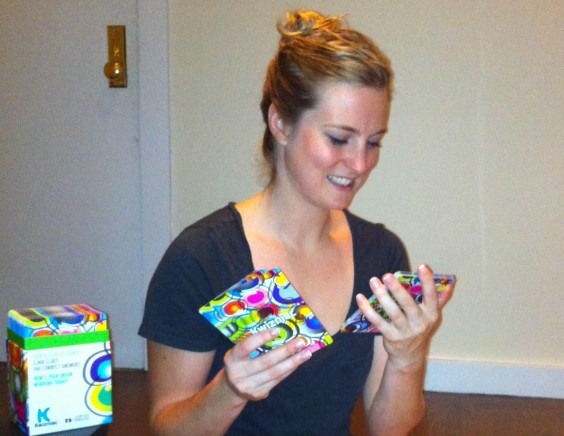
Kwizniac is the kind of game that is the perfect time-filler. As people trickled in for the game get-together (I have some punctual friends, and some not-so-punctual friends) I had the box sitting on top of my counter. I was whipping up some dinner for everyone–boiling pasta, and heating up canned pasta sauce. I know, I’m a culinary genius–and people kept grabbing cards out of the deck, reading through them, chuckling, and then reading out the clues to me and the others while I “cooked.” This informal play was just as much fun as when I got the whole group to sit down with their dinners and we actually played the game for real.

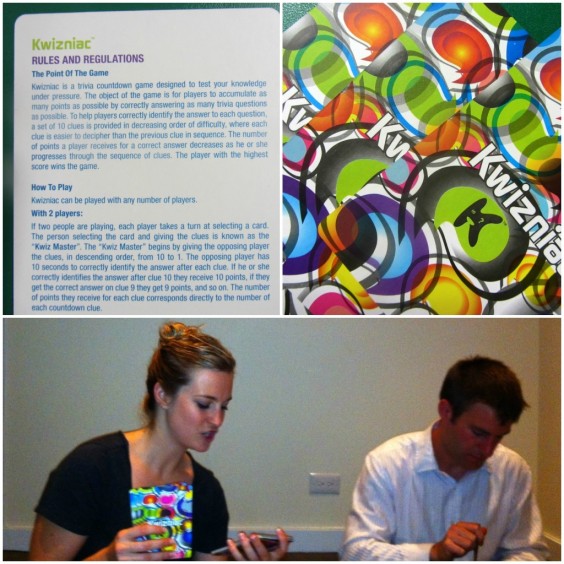
The way the game works is simple. There’s “a set of 10 clues provided in decreasing order of difficulty, where each clue is easier to decipher than the previous clue in the sequence.”

The scoring system is also easy to follow. If you guess the answer on the first clue that is read you get 10 points, and “the number of points a player receives for a correct answer decreases as he or she progresses through the sequence of clues. The player with the highest score wins the game.” To be honest, though, I have never even paid attention to the score while playing the game – what’s great about Kwizniac is that the score isn’t really necessary or isn’t even the most fun part of the game. It’s highly interactive, and seems to spiral off into fun conversational tangents every time I play. It’s the kind of thing that you can pick up and read through only one card and it still has that moment of competitive trivia fun, or play for an entire span of time. You can use it for a true game night with a bunch of friends, as a conversation starter among two friends or on a date, or as a fun moment of learning alone. (Yes I have done all 3, don’t judge.)

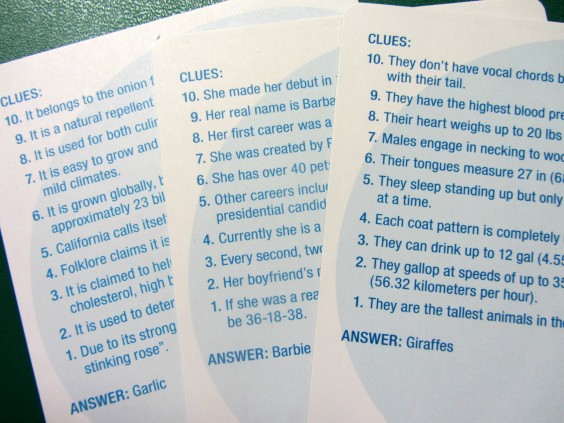
The variety of clues is also great. There were a bunch of clues about everyday objects and creatures that were great in the “wow, I had no idea!” kind of way (i.e. Did you know that giraffes have the highest blood pressure of any animal? Or that garlic belongs to the onion family?), and then clues that are a little harder to capture at first but become obvious as you go through. For example, for Barbie, the first clue is “She made her debut in 1959” (no idea), the 5th clue is “She has over 40 pets, including a horse named Dancer” (still fairly open), the 3rd is “Every second, two of her are sold somewhere in the world” (getting warmer), the 2nd is “Her boyfriend’s name is Ken” (got it!), and the last is “If she was a real person her measurements would be 36-18-38” (yikes).

I love this deck. We had a ball at game night, and my copy of Kwizniac now lives next to my couch, where houseguests pick it up all the time and flip through it. It’s a fun, easy piece to keep around – perfect for kids and adults alike. Kwizniac is destined to teach you something new!

Thanks for joining me for Game Night. See you next time!
Melissa

P.s. Our community moderator just told me that she should have read through and memorized all of these before she tried out for Jeopardy! recently. I agree.

*Editor’s Note: The quiz game fun doesn’t have to come to an end after the first deck. Kwizniac 2nd Edition is also available, so your friends can guess the answers to those countdown clues for many game nights to come! And, there’s a version for younger trivia fans, too: Kwizniac Kidz!