Browsing Tag

Gift Lab

Gift Guides

Gift Lab: Pizza Cones Kit

October 23, 2012

Research
I have lived in Brooklyn my whole life, so I know myself a good slice of pizza when I see one. With what seems like another pizzeria on every other corner, I have also tried many types and styles of the delicious and cheesy treat. Slices, squares, thin crust, deep dish, on a bagel, on an english muffin, with toppings or plain. I thought I had seen and eaten it all.

I was wrong. I must eat what few pizza-lovers have ever eaten before – the pizza cone.

Hypothesis
Pizza is already awesome. I predict that mixing things up with a new shape will only make pizza more awesome.

The Experiment
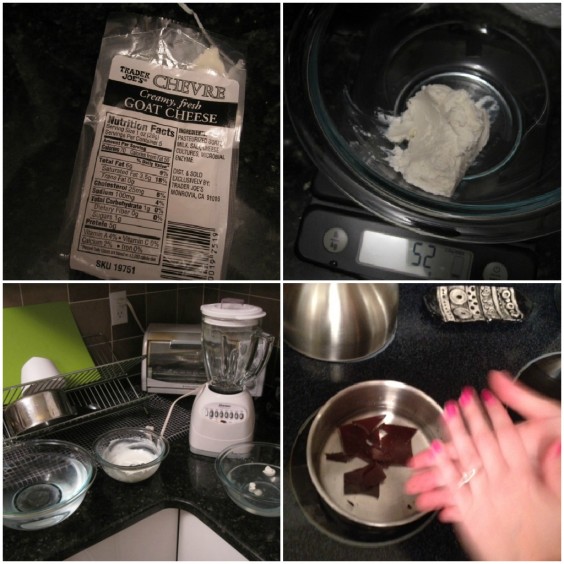
I started by assembling everything necessary to make my pizza cone:

  • the Pizza Cone Kit
  • Dough – The set comes with instructions to make you’re own. I bought mine from a local pizzeria for $4.
  • Cheese
  • Sauce
  • Optional toppings
  • Flour for working with the dough
  • A rolling pin

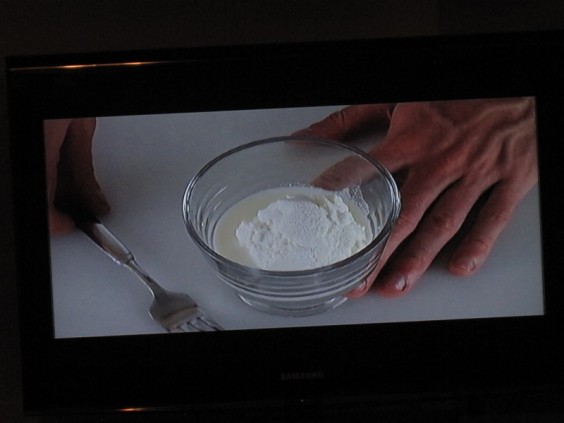
The pizza cone set comes with the tools necessary to cut and shape the dough so that you can roll it into a cone. This is my first time working with fresh dough and it feels so right. I think I was born to play a part in this evolution of the pizza. Just look at my hands go:

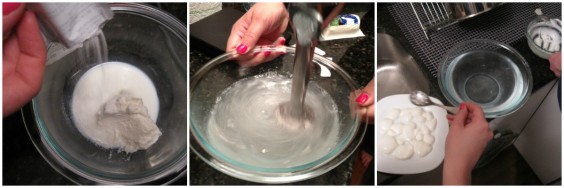
Next, I had the need to knead. As per the included instructions, I wanted a flat piece of dough measuring about an 1/8 of an inch all around. The dough should be wide enough to cut out two bell-shaped molds that would form two pizza cones.

Once you have the initial pieces cut, you fold them over in half and crimp the edges sealed. You leave the bottoms unsealed so that you can later place them over the pizza cone form. I used the included crimper tool to finish the job.


My expectations were rising as I prepared the dough to go into the oven for the first time. I carefully placed my creation onto the pizza cone form (which is made of no-stick materials).

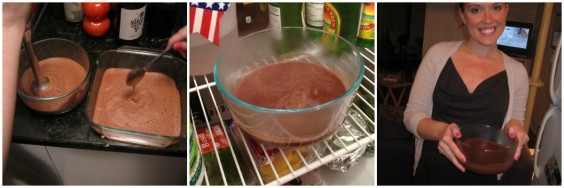
After 6-7 minutes of baking, the dough was starting to brown. I removed them from the oven and let them cool before removing them from the pizza cone forms and placing them upright in the pizza cone stands. I brought over the rest of the ingredients and got to work filling the cones with sauce, cheese, and other toppings (sliced pepperoni in the pictures). Like an artist finishing his masterpiece, I used my spoon to splash sauce along the inner walls of the cone. I sprinkled cheese throughout until it filled up completely. I cleverly hid pepperonis in any unused pockets of air.

After a few more minutes in the oven, right up until the insides start bubbling, I was able to meet my creation.

Conclusion
I was wary at first. However, I have confirmed that the deliciousness of pizza has no bounds. Pizza cones are a fun new way to eat pizza, especially during the upcoming winter, when ice cream cones are just not as practical. I approve.

Dexter has volunteered as the next test subject when I run this experiment again.
Gift Guides

Gift Lab: DIY Lip Balm Kit

October 15, 2012


Research:
I am a total lip balm addict, as is our entire family. I have two on my desk at work, a few stashed in my bag, and always one in the car. The thing about my lip balm is, frankly, I do not like to share, and therefore I can never have enough of fresh sticks or tins of fresh balm on hand!

Hypothesis:
I am thinking that since I am a creature of habit and typically buy the same flavors, making my own lip balm with the DIY Lip Balm Kit will give me an opportunity to experiment with a different range of scents; and since everything is provided for us it should be fool proof!

Experiment:
I knew my 12-year-old daughter Tea was super excited to experiment with me and could not wait to open the box and check out the contents. We decided to make a variety of flavors instead of 6 tins of the same flavor, so we raided our cabinets for essential oils and found a few interesting base scents. The kit comes with peppermint, so we opted for the peppermint, our tangerine oil, and added a chocolate oil to the peppermint (for the “never yet seen on any store shelf”) chocolate-peppermint lip balm.

Everything is well labeled in the kit and very organized and the instructions were very easy to follow. Basically all that was needed was a scale, a few mixing cups, a spoon, and a double boiler. It was very nice to see the cards had details on all the ingredients – informative and educational.

We wanted a “plain” balm first, so we threw all the ingredients to melt together–basically beeswax, cocoa butter, and sunflower oil–let that melt and filled the first tin with the unscented mix. There are really clear instructions on how to get the balm to be smooth on the top, and what to do if it coagulates.

Since we were doing a variety of flavors, we had to plan out the best way to achieve our assortment, and it seemed like the best way was to just mix the plain base with the oil right in the little tins.

We discovered that if you add too much essential oil, it becomes too strong and can burn your lips, so in this case less is more, as the natural oils are very concentrated.

Next came the peppermint, and since this was our last base flavor, we added peppermint right to the boiler, and mixed it well. After we filled the tins with peppermint, we added some chocolate to the nearly empty boiler, making our last mixture of chocolate peppermint.

The instructions recommended a curing/hardening period of a few hours. In the meantime Tea labeled the tins so we could be ready for action when the balms were set.


Conclusion:
This was a super fun, easy activity that was basically fool proof. We over-scented one tin but found you could dilute the mix by added more wax/base… so all in all it was very fun, we achieved great results and had a lot of fun doing this together! I was very happy to have all the instructions ingredients provided for us, and know that if we want to continue another time, we just need to seek the ingredients. We still have the tins and the recipe, and the know-how; I am sure we’ll give it another try and even experiment with some more flavors next time!

The Uncommon Life

A Rockin’ Sinangag (Filipino Garlic Rice) Recipe

August 31, 2012

I had a bunch of leftover cooked jasmine rice in the fridge and a new UncommonGoods gadget I wanted to try, the Garlic Rocker. So I did the math and came up with Garlic + Rice = Garlic Rice. Clever, eh?
Googling “garlic rice” in search of a recipe led me to the discovery that in the Phillippines, it’s a breakfast staple called “sinangag” in Tagalog. Garlic for breakfast?! I was on it like white on rice.
Because fried rice doesn’t require exact measurements–you can judge just by looking how much of each ingredient you want to add to it–I looked at several recipes and more or less winged it from there. (The recipe links are at the bottom of this page.) I also consulted UncommonGoods’ two Filipino software developers, Albert Tingson and Orlando Geronimo.
Orlando (right, in photo) said, “How about if you bring the sinangag to work and we’ll have a good breakfast with some tapa and fried egg. We call it ‘Tapsilog.'” All three of us were enthused about this idea until we remembered that we have no way to cook fried eggs at work.
With any kind of fried rice, you want to get all the elements (except herbs, if you’re using them) cooked and chopped before the “frying” begins (actually, sautéeing in my case, as I used a flat pan instead of a wok).
I put some “fancy” generic store brand frozen peas in a bowl and defrosted/cooked them in the microwave. When they were done, I set them aside.I started scrambling a couple of eggs. The secret to good scrambled eggs is low heat, minimal scrambling, and removing the eggs when they’re still slightly underdone, because they’ll cook a little more from their internal heat. That way, the eggs turn out soft and delicious rather than rubbery and tasteless.
When the eggs were done, I sort of stab/chopped them into irregular, bite-size chunks with the plastic spatula I was using in the non-stick pan. Then I set them aside.I took my leftover rice out of the fridge and broke up the stuck-together hunks so that it’d be ready to be scattered into the pan when the time came. I set that aside, too.Then I cut each garlic clove in half lengthwise so that it would lay flat and stable.Now I was ready to ROCK. I pressed the rocker down onto a nice, fat garlic clove and rocked it back and forth to cut through the whole clove.Oh, how beautiful the results were. Perfect little bullets of garlic that resembled part of a honeycomb. Without bothering to scrape off the “bullets,” I put another couple of cloves underneath the tool and pressed/rocked them, too.Because I’m a garlic glutton, I rocked a few more cloves. Then it was time to sauté the garlic bullets.
I used peanut oil. Chinese cooks normally use it because it has a high “smoke point” – meaning it can get a lot hotter than, say, canola oil, corn oil, or butter, before it starts smoking and burning. Also, its flavor goes better with Asian food than olive oil’s does. (If you live near an Asian grocery, buy it there. It’s a lot more expensive at typical American groceries.)I put maybe three tablespoons more into the pan than I needed for sautéeing the garlic, so that there’d be plenty of gloriously garlicky oil left over to fry the rice with.
I’m an impatient cook and I hate to watch over things, which is why I very often overcook my hamburgers and burn my garlic. Burning garlic ruins it. It tastes really acrid and bad. So I made myself pay attention and kept the heat low-ish. I didn’t ruin it! OK, actually a few pieces were overcooked, but I deleted them.One of the recipes I’d found said to add the rice to the garlic in the pan, but I didn’t want to risk cooking the garlic any longer. Instead, I set it aside with the other prepped ingredients, leaving as much as possible of the now-flavored oil in the pan.
It was time to put together the sinangag. I raised the heat to high and added the rice, stirring it in order to make sure it all got some oil on it. I cooked it for maybe three minutes, not enough to brown it, but sufficient to get it hot and give it some of the character of the hot oil. You can smell when it’s right — it’ll remind you a little bit of popcorn cooking in oil.
I added the peas and eggs and stirred to more or less evenly distribute them in the rice and to get all three elements to flavor-kiss a bit. Then I turned off the heat, added the garlic, and stirred some more. A wave of garlic bliss came over me while putting so much into what was only a couple of servings of rice.And there you have it. In imitation of the photo accompanying one of the recipes I’d found, I pressed it into a little bowl-type thingy (I don’t know what to call it because it isn’t round like a bowl — mini-crock?) and made it look all nice and photogenic.
I served some of it into a bowl that I know is an actual bowl because it’s rounded, added a couple of dashes of soy sauce, and dug in. It was a beautiful, heavenly, garlic symphony, much more than the sum of its humble parts.

Recipe: Sinangag (Filipino Garlic Rice)

Ingredients
(I’m not giving amounts because it’s up to you and how much leftover rice you have.)

Leftover cooked rice (it should be at least one day old)
Frozen green peas
Eggs
Garlic cloves (lots)
Peanut oil
Salt or soy sauce

Preparation steps
1. Break up the rice if it’s sticking together; set aside.
2. Defrost and cook the peas. Set them aside.
3. Gently scramble the eggs; then break them up into small pieces. Set them aside.
4. Peel and cube (or “rock” – but do not use garlic press) the garlic into quarter-inch-size chunks and saute until golden–not dark–brown.
5. Set frying pan or wok on a burner and set heat to high.
6. As soon as oil has a subtle, shimmery sheen (but before it smokes), add rice and cook for about 3 minutes, until the rice is hot and perhaps very slightly browned in a few places, but no more. Turn heat down to medium.
7. Add the peas and eggs and stir to mix; cook for about a minute.
8. Turn off heat; add garlic and stir.
9. Add salt or soy sauce to taste.

Recipe links
Sinangag – Filipino Garlic Fried Rice
Garlic Fried Rice
Sinangag – Eggs and Peas Fried Rice
How to cook fried rice (Sinangag na Kanin)

The Uncommon Life

Gift Lab: Fresh Air Compost Collector

July 5, 2012

Background Research

The Fresh Air Compost Collector, designed by Heather Tomasetti and Tal Chitayat, is a smart-looking, new-fangled container for storing your compostable food scraps.

Image: Royal Caledonian Horticultural Society

First, for those of you who don’t already participate in the wonderful world of composting: what is it, and why should you do it? In a nutshell (ha-ha, see what I did there?), composting is piling up a lot of waste plant matter–fruit and vegetable peelings, moldy bread, browned avocadoes, raked leaves–in a specific way that makes them decompose in the same manner, but at a faster rate, than they naturally would on their own.

Compost Heap, a 39 Day Time-lapse

Not only does this divert them from the general waste stream and thus the landfill, but “finished” (thoroughly broken-down) compost works magic on plants, not only in an eco-positive way, but also in terms of complex plant science. I tried it, and my plants shot up like they were on steroids.

You’ve probably heard of people keeping worms in bins in their homes in order to compost. But you don’t have to do that. You can just save your scraps and bring them to a compost site run by your community, or a neighbor. However, there’s no getting around the fact that saving compost scraps means keeping them at room temperature for at least a few days if not longer, which can have its unpleasant aspects. The purpose of the Fresh Air Compost Collector is to make them less so.

Time-lapse Fruit and Vegetable Decomposition

See? It’s not necessarily gross. It’s natural, and fascinating to your inner biology nerd.

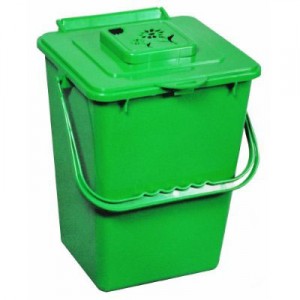
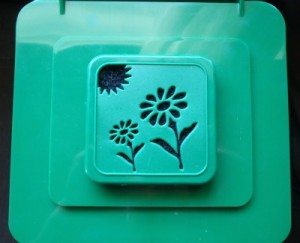
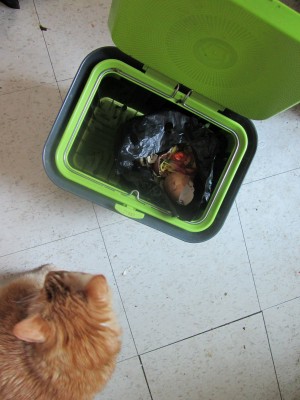
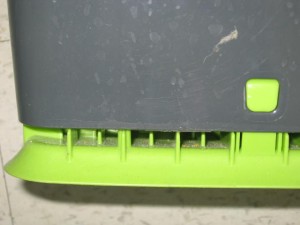
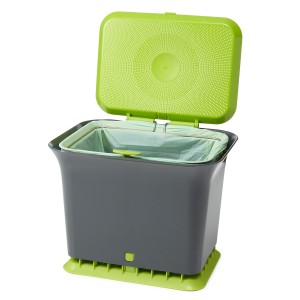
Most indoor compost collectors either have a lid to prevent odors from escaping, or, like the one I used to have, above, use charcoal filters or other devices to absorb them. (Admittedly, the ventilation-promoting, filter-holding, cut-out flowers on the lid are nicely done.)

The Fresh Air Compost Collector, on the other hand, is designed to allow air to circulate around the scraps in order to slow down the rot rate. (The inventors refer to “air flumes,” and there are no such things, but calling them that is kind of adorable on their part.) Oxygen can get in and heat and moisture can get out, so your moist, vegetably, fruity leftovers evaporate a bit, preventing “anaerobic” (oxygen-free) breakdown. That’s what causes quick bacteria and mold growth, evil-smelling slime, and the fruit flies it attracts.

Hypothesis

The Fresh Air Compost Collector will allow me to enjoy composting, relatively undefiled by disgusting smells and unwelcome fruit flies.

Experiment

I got my Fresh Air Compost Collector in January and have been using it ever since. To be honest, I didn’t expect it to work all that well, because I usually believe in the tried, true, and un-chic, and this is pretty stylin’ for a waste receptacle.

I was game to try, though, because it was a pain to deal with my old compost pail. With that one, I was never sure if I was supposed to put a bag inside it to collect the scraps, or drop them directly into the naked pail.

If I just put them in the pail, it would soon absorb their collective noxious stink. But plastic bags would never stay upright enough to catch the scraps when I dumped them in (which almost invariably happened when I was cooking and unwilling to stop, open the pail, and hold up the stinky, slimy bag to get the scraps in while somehow keeping it upright so as to not spill its contents). Paper bags disintegrated when wet. And when I pulled the bags out to bring it to the compost pile, they always dripped putrid, decomposing produce juice on me, either then, or on the way there, or when I dumped their contents into the community container.

So, on to the new one: First of all, the design of this container is deceptively simple. You can’t really perceive this until you use it, but it’s very well thought-out in every detail.

The sides and bottom of the container have ribs that stick out and keep the bag from lying flat against them. Any liquid that might drip evaporates instead of pooling and festering.


Image: Picker's Treasures

The spring-loaded lid, which is full of tiny holes that allow air to circulate but keep out the flies (just like the tin panels of an old-fashioned pie safe), pops open when you press the button, and stays open without having to be held.

A detachable metal frame keeps the bag upright, so you can toss your scraps into it without getting glop all over yourself. The frame is strong, but light and very easy to lift off and click back into place when you put in a new bag.

One ergonomically crucial factor for me is that, because of where it needs to be stowed in my kitchen, it has to fit under my all-the-way-open dishwasher door, and at 9” tall (and 11.4″ long by 8.5″ wide), it does.

Whether its 1.3-gallon capacity is a good size for you or not depends on how often you eat fresh fruit and vegetables, and how often you’re able to drop off your saved scraps at a compost pile. The one I go to, the North Brooklyn Compost Project, is only open Saturday mornings, so I have to keep my scraps for up to a week (or longer, if I miss the day–see below).

There have been weeks when it was too small for me (I joined a food coop, got overly ambitious, bought too many vegetables, then got busy with other things and most of them went bad in my fridge).

There have been other times when it was too big (my cat died suddenly, I wasn’t up to cooking for a long time, didn’t bother to grocery shop, and put only coffee grounds and the occasional squozed-out lemon in there).

Aaaaand there have been weeks when I missed the compost drop-off day. By “weeks,” I mean “three weeks in a row.” (In my defense, this happened in the middle of winter.) Then it started to smell, though it never got as bad as my old one did.

But those aren’t fair testing conditions; no composter could deliver fume-free service under such circumstances. In general, the Fresh Air Compost Collector performed as promised: it emitted way fewer smells than my old composting pail, and the only time fruit flies were appeared were that one time when I pushed the limits of biology way too far. Even then, I saw only the beginnings of mold.


You’re meant to use compostable liner bags with the Fresh Air Compost Collector, because unlike plastic ones, they “breathe.” Since the bags start biodegrading as soon as you put moist food in them, I was sure they’d break in the container, or on the way to the compost pile. As a precaution–because I don’t like coffee grounds mixed with fermented mango skin and slimy rotten cucumber bits dripping down my legs–I put the bag into a plastic shopping bag for the walk to the compost pile. But it was never actually necessary, even after three weeks. None of the bags has broken yet. Still, I recommend holding the bottom of the bag in such a way that it won’t tear when you pick it up. The speed with which they (and everything in them) break down increases as the temperature gets warmer.

The container can easily be taken apart and put in the dishwasher, though the one time I needed to wash mine (following the three-week-no-compost-pile era), I did it by hand.

Tip: Don’t buy the wrong type/size of bags like I did once, duh. Doggie bags! Rusty Marmalade (RIP) was so disappointed in me.

Conclusion

I’m impressed with this doohickey. The Compost-Scrap-Saving Experience no longer means mess, stink and flies. As all three of those are greatly disliked by humans, no wonder the Fresh Air Compost Collector won a 2012 Green House Design Award. Six months in, I’m still happy with it, and am looking forward to filling it with the remains of this summer’s delicious fruits and vegetables.

Gift Guides

Gift Lab: Molecular Gastronomy Dinner Party

June 21, 2012

Background Research
Wikipedia says that “Molecular gastronomy is a subdiscipline of food science that seeks to investigate, explain and make practical use of the physical and chemical transformations of ingredients that occur while cooking, as well as the social, artistic and technical components of culinary and gastronomic phenomena in general.”

Huh?

I have heard of this food science. I have heard of different restaurants in metropolitan areas around the world, maybe even in not-so-metropolitan areas. I have seen it done on one of those cooking shows. Many friends have gone to wd-50 in NYC and said it was interesting. My friend Stephanie had a 12 course meal of different foods reconstructed at a resort in Mexico. The pictures were awesome. I mean a lemon meringue pie that looks like a SOS Sponge awesome!

Walking at the NY Trade Show I see some fun pictures of crazy foods and then a kit. I can do this at home? Yes please! I couldn’t wait to try out this new product.

Hypothesis
I will be the new Wylie Dufresne, with the help of some friends, and make a meal that will impress the masses. This will all be accomplished in 1 night without a culinary class and with little cooking skills. My most impressive meal is chicken and rice.

Experiment
Materials Needed:
1 Molecular Gastronomy Kit with all its contents
Blender
Roomy Fridge and Freezer
Hand Blender
Lots of Bowls
Stove
Lots of Pots
Friends
Wine (just in case it all goes wrong)
Ingredients for all recipes (frozen chocolate wind, arugula spaghetti, balsamic vinegar pearls, goat cheese raviolis, raspberry raviolis).
Extra ingredients to pair with the yummy food
TV
DVD player
Timer
Scale if you want to be exact

Step 1: I watched the DVD to pick the recipes I wanted to cook and get all the instructions.

Step 2: I Gathered friends and all materials.

Step 3: Watch DVD of all recipes with friends and decide what recipe has the longest cooling time and do that one first. (FYI: Chocolate wind had to cool down in the fridge and then sit in the freezer for about an hour.)

Step 4: Start cooking/ being a scientist.

Goat Cheese Raviolis

Chocolate Frozen Wind

Arugula Spaghetti

Balsamic Vinegar Pearls

Step 5: Make everything look pretty for the cameras.

Goat Cheese Raviolis with tomatoes and basil / Arugula Spaghetti and Balsamic Vinegar Pearls with Tomato / Frozen Chocolate Wind with Raspberry Raviolis

Step 6: Enjoy!

Thanks for your help Nate and Stefanie and Morgan and Sorayah!

Conclusion
The kit has very thorough instructions that walk you through each step by showing you and some great music to keep cooks dancing. It makes the process easy and super fun! And the balsamic pearls and arugula spaghetti looked the best! But maybe I need some more snacks when things are cooling in case guests have not had a snack before the party. I think I just need one more party and a little less wine, and I can open my own restaurant! So fun!

Gift Guides

Gift Lab: Beer Tasting Tool Kit

June 14, 2012

When most of us are confronted with the prospect of working over the weekend it often involves shuffling plans and muffling expletives. Luckily, at UncommonGoods we treat it like any other weekend and turn the mundane into a festival of flavor and fermentation. What follows is our rigorous “testing” of the Beer Tasting Tool Kit.

Hypothesis:
With this Beer Tasting Tool Kit my friends, colleagues, and I will be able to distinguish the difference between dunkels and doppelbocks, lagers and lambics. If not, we will have a good time trying!

Experiment:
We assembled a team of 8 imbibers to evaluate a cornucopia of beers springing from Brooklyn to Bavaria and beyond. The kit includes numbered paper bags for each bottle to encourage blind taste tests. Maybe it was this brown-bagging or the lack of a spit bucket, but this was surely no wine tasting garden party. With a pitcher of water and plenty of snacks on hand, we were ready to get started.

Adhering to the kit’s main tenets of “See, Smell, Sip, Swallow,” we began with the bag labeled #1. After each sampling we filled out tasting cards, measuring the levels to which we detected specific flavors (Creamy, Bitter, Hoppy) as well as notes related to the 4 S’s (Stephanie noted one beer’s smell was akin to “shoes” whereas I found chocolatey hues!). Comparing our notes after each round was as much fun as tasting the beers (some of which were downright painful…I’m talking about you Mr. Double IPA).

Conclusion(s):
We were learning a lot and every new pour made us thirsty for more, but unfortunately, the game came to its inevitable end when we ran out of beer. Perhaps most telling was the fact that our palates need some refining—we were all over the map in describing the taste impressions of each beer. But with further studying of the kit’s super informative fact book and a few more sessions of Saisons and Scotch Ales we will all be beer-tasting connoisseurs!

Gift Guides

Gift Lab: Father’s Day Puzzle Project

June 8, 2012

Every year for Father’s Day I get my dad the same thing – a store bought tie. This year I decided not to add to the mountain of ties in his closet, but instead give him a unique gift we could create together. The vinyl collection puzzle was that perfect unique gift – what’s better than some quality father-daughter time, while creating DIY wall art!?

Background Research:
Many a family game night during my childhood was spent working on puzzles. You would think that putting together puzzles would be a calm activity; however, in my family it is practically a competitive sport. Each piece was quickly put in place as we raced to see who could put in the most pieces in our 250, 500, even 1000 piece puzzles. It was a fun challenge that we could compete in together!

Hypothesis:
The Vinyl Collection Puzzle will be not only a great father-daughter activity, but also a great DIY Father’s Day gift.

The Experiment:
On a slightly overcast Saturday – perfect for a family afternoon indoors – my Dad and I set up an old folding table in the basement, opened the box, and got down to work*. Now, I am sure everyone has his or her own unique “puzzle-ing” style. My Dad insisted (like he always does) that we start with the edges, and then work our way in.

While working on the puzzle, I got to spend some quality time with my Dad! I heard about some of his records and we even took a break to look at some of them. (Disclaimer: The Bruce Springsteen Collection is actually my Mom’s…she had a New Jersey roommate in college.) The vinyl collection of the puzzle is quite unique and diverse, but my Dad found a tape version of one of the records in the puzzle (Simon and Garfunkel’s Greatest Hits)!

My Dad and I were not the only ones working on the puzzle – we had a little “helper.” She decided to walk through the center of the puzzle taking some of the pieces with her. Beware of these four-legged “helpers!” Despite this adorable distraction, after a few hours, my Dad and I finished the puzzle. (Disclaimer: My Dad is incredibly good at puzzles!)

The next step was to create the wall art that would become my Dad’s present. I set out to my local arts and crafts store to buy a picture frame. I chose to get a nice black frame that was 18” by 24” – the dimensions of the puzzle. The tight fit holds the puzzle between the glass and the backing, which means the puzzle can be mounted without being glued together. (You never know when you might want to take down the puzzle and put it back together again!)

When putting the puzzle into the frame, make sure to take extreme care. (You don’t want the puzzle to fall completely apart and you’d have to redo it, unless you are a master puzzler who enjoys the challenge.)

*Helpful Hint: When beginning the puzzle find a large poster board to do the puzzle on, the sturdier the better. When you frame the puzzle, the poster board makes it easier to slide the puzzle to the backing of the frame.

Finally, we attached the framed puzzle to the wall with standard picture frame hooks. Then stood back and admired our work!

Results:
The finished product is not only a beautifully completed puzzle, but also a piece of wall art. It now hangs in my family’s basement so that my Dad will see it every time he (and anyone else) hangs out down there, which is pretty often!

Conclusion:
The vinyl collection puzzle is a great family activity for anytime, but especially this Father’s Day. Even if you aren’t able to make it home to spend time with your Dad, a DIY activity like this puzzle is a great Father’s Day gift. To all the fathers in your life, I wish them and you all a Happy Father’s Day! I hope your day is full of memories and perhaps a few DIY craft presents!

Happy Father’s Day, Dad!

Gift Guides

Gift Lab: Summer Picnic

June 1, 2012

Background

The Picnic Backpack ($40) is a two person picnic backpack. The core of the backpack is fully insulated thermal lined pocket, while the smaller front pocket comes with storage for [also included] two: plates, cups, napkins, forks, spoons, knives. There is also one waiter’s tool bottle opener. It also has a cell phone pocket on the strap and side and front pockets for a bottle and accessories.

It comes just as expected!

Hypothesis

I love to go out to eat or entertain at home. I also like to combine the two by getting a couple friends together for a nice outing in the park (food included, of course!), but there’s always the hassle of lugging my picnic basket which gets way too heavy. The weight of the basket plus its components doesn’t even include my beverages. I usually have to carry an extra backpack with the beverage and utensils. By the time I get to the park–I’m exhausted.

I think having the weight on my back alone would be easier, and this backpack seems to have the right storage for my drink, food, and utensils. I think I’ll be more excited and willing to bring lunch from home to the park, or anywhere for that matter, with this backpack.

Experiment

Instead of picnicking with friends as planned, I opted to take my younger brother Naquan (14 years old) and cousin Mya (2 years old). Taking these two would be perfect in figuring if this product will turn my picnic horrors upside down. My brother willingly (shocker) carried the FULLY packed bag, while skateboarding!

Dealing with a teenager and toddler is not the easiest thing, so I aimed to keep them happy with plenty of snacks and games.

Conclusion

The picnic was a success! With this one backpack, I was able to fit 1 qt. of water, 2 bowls of salad, 2 yogurts, 2 pints of fruit, 2 canned beverages, an abundance of snacks, a full-sized sheet, beach mat, card games, hand sanitizer, a trash bag, iPod, and there’s probably other things I’m forgetting. This backpack kept all of my cold items chilled, and everything I wanted to keep dry dry. According to Naquan, it was easy to carry–even on wheels. It was easy to setup, cleanup, and everyone enjoyed the day out in the sun (well, mostly shade).

In conclusion, picnicking was made fun again and we can’t wait for our next outing!