Browsing Tag

Gift Lab

Gift Guides

Gift Lab: Celebration!

May 4, 2012

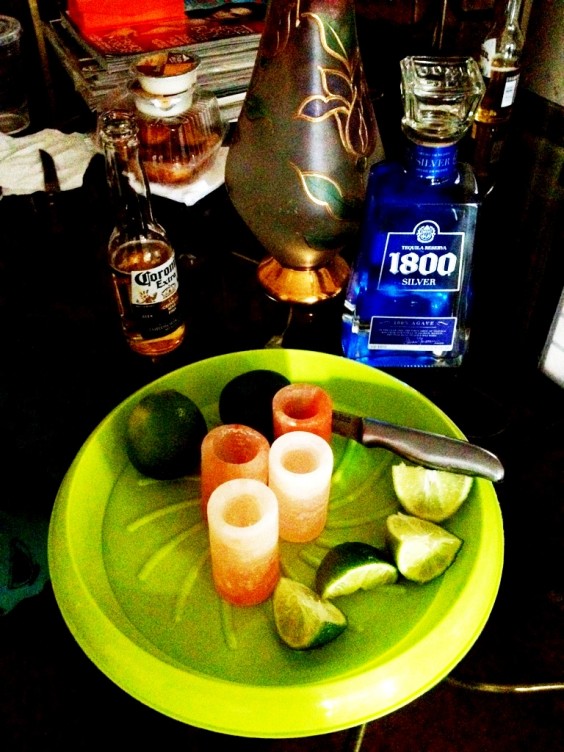
Background: The Himalayan Salt Tequila glasses, $30, are a finely veined, translucent appearance of rose quartz, but they are actually carved from the highest quality, food grade, Himalayan pink salt. They are long lasting and won’t be easily dissolved. They are also 100% antibacterial!

Hypothesis: I have a hard time replicating that perfectly salted glass look that all of my favorite restaurants and bars have effortlessly achieved each time I stop in.

Every time I have tried to do it at home when hosting a girls night in or on my way out with some of me fave gal pals I find myself either:

1-mistakenly forgetting I handled salt and rubbing my eye (ouch)
2-making a mess of my counter/floors
3-having some of the salt crystals make a run for it before I even hand it off to my friend/guest

I predict this will no longer be a problem for me now with these beautifully hued Himalayan Salt Tequila glasses

Experiment:

To ensure that this truly works I will need the following ingredients

-A bottle of yummy tequila
-Lime
-Four Himalayan Salt Tequila glasses
-A few friends 21 and over


Next step is the use of the shot glasses followed by fun times!


Conclusion:

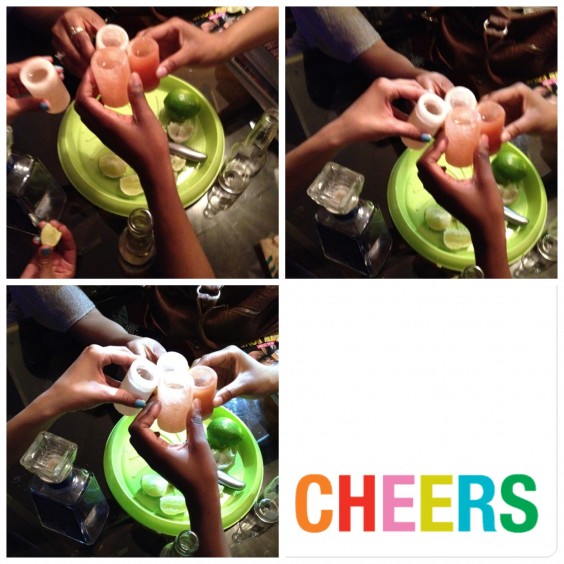
Everyone really loved the Himalayan Salt Tequila glasses, so much so we had quite a number of rounds of shots. (I mean we wanted to make sure they really worked well). What I loved about them was how much of a conversation starter they were. I also liked the fact that I didn’t have to try so hard to perfect the salted rim effect, it was just pour and go.

As weird as this may sound the only thing I didn’t like was how salty they were. After a few rounds if you let the tequila sit for like a minute or so in the shot glass the salt dissolves a little more causing the shot to be all types of salty. This was not the case for all of the shot glasses strangely enough, just one of them did this. This one glass was sort of reshaping before our eyes.

Side note: Be sure that you let them drain out so that the bottom doesn’t dissolve sooner. The liquid pooled just a little on the bottom. Rest assured though these glasses aren’t dissolving anytime soon but when it does start to you get a shot glass that holds more tequila along the way!

My friends and I can’t wait to use these again.

Gift Guides

Gift Lab: Tell Us A Story

April 23, 2012

Background Research

While I may be a mild-mannered writer for UncommonGoods by day… by night I’m a swashbuckling writer of Broadway musicals! Except for the swashbuckling part. And the Broadway part. But I do write musicals; you just haven’t heard of them yet.

Have you ever wondered why so many musicals are adaptations of a movie, or book, or something else? One reason is that writing a musical well is extraordinarily complicated, even without having to come up with a story from scratch. So writers like adapting existing material because it gives them a foundation on which to build.

The problem for new writers? That foundation can be pretty expensive — just imagine how much it costs to get a movie studio to agree to let you use one of their films! So as a writer, it would be a real asset to have a tool that helps me come up with exciting, original stories.

Hypothesis

Among our writing products at UncommonGoods, we have two that are specifically designed to help you generate stories. The Storymatic uses a large deck of cards with prompts on them, and Rory’s Story Cubes are a set of dice with evocative images on them.

One of my favorite games has picture dice like the Story Cubes, while on the other hand, I feel a little intimidated by the size of the Storymatic deck. So my hypothesis is that the Story Cubes will be my most effective story-making tool.

Experiment

Rory’s Story Cubes, $7.50

Using the Story Cubes is pretty intuitive. You open the box (which has a magnetic cover that swings open like a book) and inside is the set of nine dice. Dice are pretty self-explanatory: you simply roll them and see what turns up.

First to catch my eye are images of a fountain and a castle tower. I immediately picture the two together, in European style piazza where people chat and soak up the afternoon sunlight. There’s the image of a cane: I picture an old man who comes to sit by the fountain each day. Then there’s a strange image of arrows pointing out in all directions. I think, maybe the old man isn’t there today. Maybe someone is wondering where he is. I see the image of a lock—maybe someone locked up in the tower has been watching the piazza every day and realizes the man isn’t there.

I write the dialogue of a scene between two women up in the tower, and it comes pretty easily. One feels compelled to find what’s happened to the man, while the other tries to reason with her. The other dice images prompt specific lines of dialogue, or provide unexpected twists to the story that would be interesting to learn more about. The tone is mysterious, with a lot of room to spin the story into something longer.

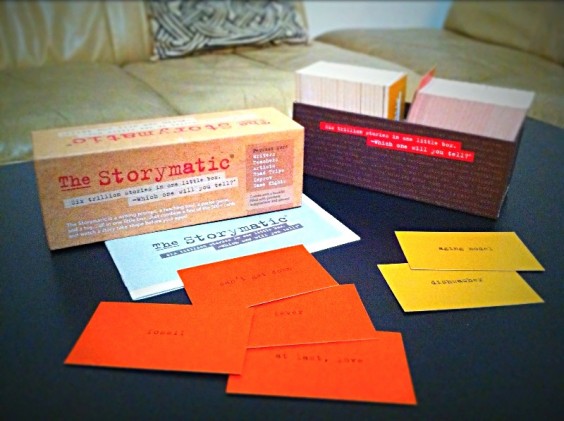
The Storymatic, $29.95

The box holds two different colors of cards with words on them, and what looks like a pretty involved instruction book. Unsure what I’m supposed to do, I start reading the instructions and discover that the process is actually very simple. There are “gold” cards that show personal attributes that combine to form a character, and “copper” cards displaying plot elements. The instructions look long because contain a number of ways to use the cards, but they all basically boil down to this: “Draw a couple cards of each color. Build a story around them. If you get stumped, draw more cards.”

For my character cards, I draw “aging model” and “dish washer.” Awesome. I can picture a once-glamorous woman reduced to working behind the scenes at the kind of swanky establishment she once patronized herself.

My plot cards are “can’t get down” and “fossil.” Hmm. I started by thinking literally, imagining a kind of adventure story where she’s climbing a ladder and gets stuck, but finds a fossil. That didn’t really appeal to me. So I started thinking more figuratively. I thought, maybe she really wants to leave the kitchen and join an event happening below. I wasn’t sure if that was stretching “can’t get down” too far, but I was the only one playing, so no one complained. I pictured her boss, who has no sympathy for her, and thinks of her as a fossil. Between the two of them I could picture some good dialogue.

When I ran out of material, but still felt like there was more to the scene, I started drawing more cards. The first I drew was “midnight in a graveyard.” Yikes. Wrong story. At first I felt like I was obligated to find a way to use it anyway, but once again I realized that I was free to make my own rules, so I kept drawing. I drew “fever,” which prompted my ex-model to try an excuse to get out of work. “At last, love” was a tough one, but it prompted a great little sarcastic rant, spinning off the idea of “where have you been all my life?”

You can listen to my stories here:

Cinderella
Featuring the voices of Rinnell Curry & Brandon Chu

Rumpelstiltskin
Featuring the voices of Melanie Majewski and Cassie Tweten Delaney

Conclusion

In the end, both sets helped me create intriguing stories with lots of potential.

Rory’s Story Cubes is simpler and feels more like a game. I can picture using them with friends just for fun. You could also do them as a travel activity, using the box to hold them when you roll. Because all you’re given are pictures, I felt like these were really liberating.

Storymatic feels more specifically like getting writing prompts, but they’re really interesting prompts, and combining them creates a huge variety in the results you’ll get. Because what you receive is so much more specific, I ended up investing more thought into the process of making the pieces come together, which in the end resulted the script that I liked better of the two.
With the Storymatic I found myself thinking about my characters in greater detail, while with the Story Cubes I felt like I was able to move more quickly into the action of my story. Both are effective ways of starting out, and I will most definitely be using them again.

The Uncommon Life

Can Diana F+ Come Out and Play? by Alli of Kisses & Chaos

March 28, 2012

Photographer and blogger Alli wrote about her Diana Camera on her blog, Kisses & Chaos, not too long ago. We loved her tips and stories so much that we asked her if she would kindly share her experience with you.

I have recently had the pleasure of partnering with Uncommon Goods…purveyors of all things quirky and awesome. If they don’t have it then you don’t need it… there’s a little something for everyone. They have amazing gift ideas for women. Have a hard to shop for man in your life? They’ve got you covered with great gifts for him too…but I’m getting away from the point and my point is a good one…

A few weeks ago they were kind enough to send me the Diana F+ camera kit (which I have been wanting for ages) with some Lomography 120 black and white film (I already had the color film), asked me to go play and then tell you guys what I think. Seriously? You don’t have to ask me twice, no sir. So play I did.

The instruction manual was actually helpful! Say what? I know! A helpful instruction manual? Bust out your ice skates ’cause hell froze over. It’s short, sweet and to the point. That’s my kind of instruction manual. No long explanations – just quick and easy. It explained the settings and (surprising) features. A toy camera with features? Yup. You heard right. It has the basics you find with any toy camera with one exception: it has a pinhole setting. It’s like someone getting their peanut butter in my chocolate. This camera is Bruce Wayne by day and Batman by night…your average toy camera with vignetting and saturated colors but then BAM! it also has this secret pinhole identity which creates dreamy photographic goodness. This revelation brought about the infamous “Alli Happy Dance-Dance-Dance of Joy and Happiness™.” +1

property of Kisses & Chaos
(Good god, I’m an idiot.)

Ok. Playtime details:

I have other toy cameras (Holgas, quad cams, polaroids, etc) but I have never had the chance to play with a Diana. Though really lightweight it felt sturdier than my other toy cameras. I was impressed that the back plate actually has a good locking mechanism so it doesn’t accidentally pop off and expose your film. (I have had this happen with my Holga -which is why it is now held shut with electrical tape- and it is very frustrating to have a roll of film ruined due to poor construction…I’m just sayin’…some people say it’s part of the “charm” of a toy camera…I think those people must have a lot of disposable income cause I get m-a-a-a-a-a-d when my film gets ruined in the name of “charm.”) Safe and secure film makes Alli a happy camper. +1

The film was easy to load (unlike my Holga, which you have to man handle and knock around) : +1. The locking back plate, lens and other accessories were easy to get on and off : +1. As I wound the black and white film I noticed that I had to strain to see the exposure number on my film and it was a VERY bright sunny day. I initially thought this was a flaw with the camera, but after shooting with a different brand of film I discovered the fault actually lay with the black & white film I was using. (The extremely dark paper made it impossible to read the film. Boo.)

So as I traipsed around the countryside taking photos of cows’ butts, camera around my neck, I discovered that the lens cap had fallen off somewhere amid the tall grass. I spent the next 5 minutes retracing my steps trying to find it (which I did). Loose lens cap: –1.

I decided to try out the pinhole feature using the bulb setting (which means the shutter stays open until you release it). The Diana comes with this little, well, to use the technical term, thingy-ma-bob that you pop into place to keep the shutter open for long exposures. Brilliant idea! I didn’t have to hold the shutter release manually which can cause camera shake. Fantastic! +1. But it was awkward to use and kept falling out…which subsequently caused camera shake. Damn! Hopefully it will be easier to use with practice but for now it counts as a –1.

above and below: playing with the pinhole settings

Since the camera is a toy camera, the film has to be advanced manually. This has its advantages and its drawbacks. Drawback? If you forget to wind your film you wind up with double exposures. Advantage? The film doesn’t wind automatically so you can have double exposures. I like to play with double exposures, so for me this was a total perk. +1

I would love to try the Diana with a flash and shoot indoors. The kit, sadly, doesn’t come with a Diana flash…it has to be bought separately (-1)…of course you can also buy a hotshoe adaptor which means you can a non-Diana flash if you like, but I think I will, since I am all anal & matchy-matchy, buy the Diana flash (and the adaptor because I’m a weirdo like that).

The kit did come with a hardback book – Diana F+: More True Tales & Short Stores, which is a collection of essays and images of, you guessed it, the infamous Diana camera. I doubt I would ever buy the book separately, but I enjoyed skimming it (even if I think the book’s claim of being filled with work by “Diana masters” was over-selling it a bit… Okay…totally overselling it. I think the “shoot from the hip” photo movement is absolute rubbish and an insult to photography. It’s best not to get me started). +1

So let’s tally up the score. The Diana F+ camera receives a grand total of…*drum roll please*… 4 points! What does this mean? Absolutely nothing. I have no point scale… but here are my final thoughts:

I will not use the film again… between the dark paper making it impossible to read the frame number and what I consider to be poor quality film I’ll be sticking with my Kodak 120 for all my medium format photographic needs. I must say, however, that I do love this camera to bits and it will likely replace my Holga as my toy camera of choice. It was fun and easy to use. Thank you, UncommonGoods for giving me such a wonderful new toy! (And to dear friends and family who are reading this: I know what I’m getting you for your birthdays… whether you think you want one or not. You’ll thank me later. The great and powerful Oz has spoken.)

Kisses & Chaos,
Alli Woods Frederick

image/video credits: image #1 © uncommon goods

all other images © 2012 Alli Woods Frederick. all rights reserved. use without express written permission is prohibited.

Gift Guides

Gift Lab: Stackable Lunch Pot

February 22, 2012

Background Research: The Stackable Lunch Pot is a sleek, chic, airtight food porting device comprised of two containers that fit together in a quite nifty manner. The larger of the two holds 18.6 ounces; the smaller, 10 ounces. A fashionable matching spork is included.

Hypothesis: Some people–cough cough (me) cough cough – have trouble restraining themselves in the presence of tasty food, and need help with the dreaded “portion control.” Can the Lunch Pot help me keep a lid (har har) on my appetite despite the temptation of homemade risotto?

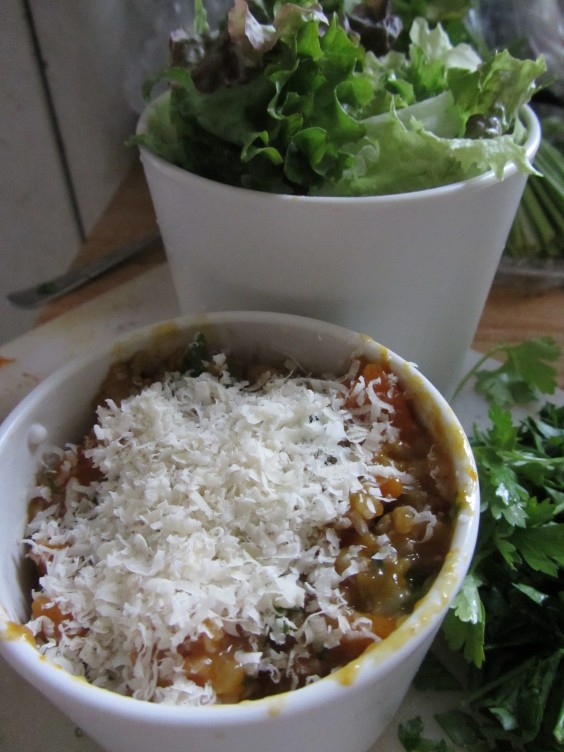
Experiment: The first phase of the investigation required the making of risotto that was delicious enough to be a formidable temptation. The following recipe yielded more than adequate results.

Pressure Cooker Brown Rice and Kabocha Risotto
-Notes:
-All measurements are approximate; risotto is very forgiving.
-You can use any winter squash — butternut, pumpkin, or acorn, but the beauty of kabocha is that the skin is edible so you don’t have to peel it.
-Recipe is adaptable to a rice cooker or ordinary pot, but
1) A pressure cooker does the best job of making brown rice become creamy the way Arborio does, and
2) If you don’t use a pressure cooker, you have to pre-cook the squash.

Ingredients
2 T butter, 1 T olive oil
1.5 cup short-grain brown rice (I used sweet brown rice because that’s what I had on hand)
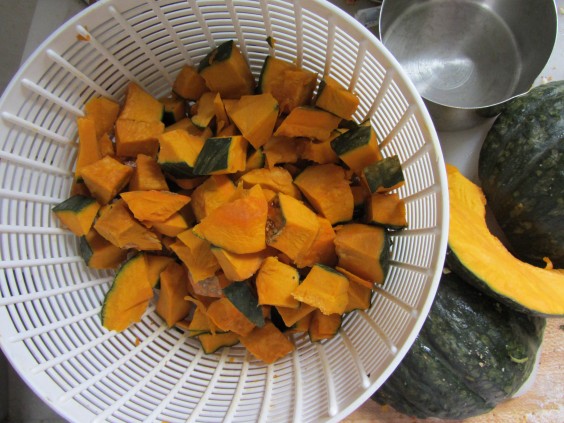
1 small kabocha squash, washed, seeds, pith and stem removed, cut into evenly-sized 1” pieces
1-2 T dried sage leaves
3 ½ – 4 c chicken or vegetable broth
Large handful chopped parsley (Flat-leaf is a stronger taste)
Large handful shredded Parmesan, Romano or Asiago cheese
Salt and pepper to taste

Melt fats over low-medium heat in pot of pressure cooker. Add rice and stir until coated with oil. Add sage and kabocha, stir. Pour in broth, stir. Put lid on pressure cooker and bring to full pressure. Lower heat as much as you can without losing full pressure. Cook anywhere from 18-40  mins (depends on the kind of rice you have; try 18 to start and if that’s not enough, bring up to pressure again and check after another 5 minutes. Lather, rinse, repeat if that’s not enough. Next time you try it, you won’t have to guess).

Turn off heat and let pot sit for 5-10 minutes, then use quick-release method to let off pressure.

Stir in parsley, and salt and pepper to taste. Sprinkle individual servings with grated cheese.

The risotto-cooking phase of the experiment having been completed, the next step entailed filling the smaller of the two containers with the tempting substance, and larger one with salad makings (dressing was put in a separate small container from my motley collection).

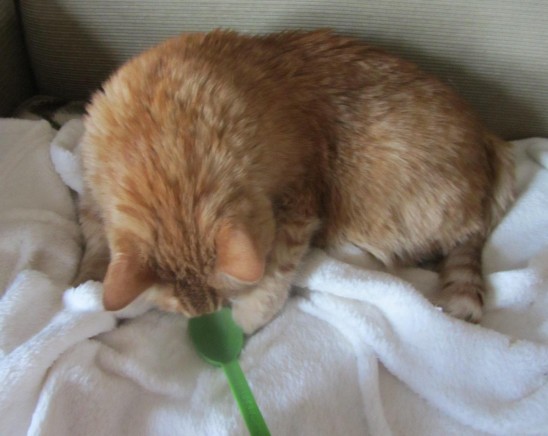
I should confess that the thought of bringing only the small container of risotto goodness to work caused me some momentary sadness. My lab assistant, Rusty Marmalade, distracted me by conducting a spork inspection.

Despite my misgivings, when lunchtime rolled around at work the next day, the contents of the 10-oz. container were satisfyingly filling. Moreover, the container’s volume limit did, in fact, prevent me from eating too much.

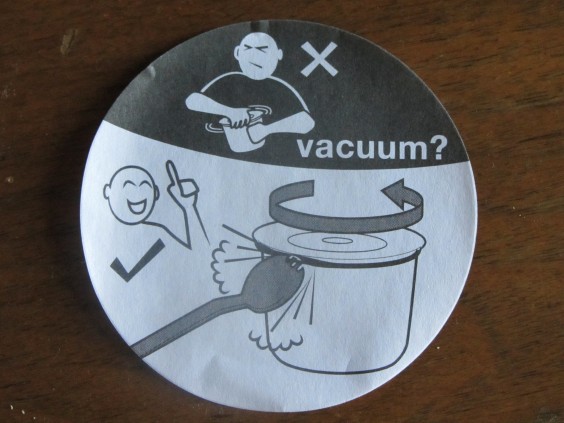
Unanticipated Challenge: The Lunch Pot’s rubber gasket creates a vacuum seal that prevents air from getting in and leaks from getting out. It also prevented me from being able to open it the first time I closed it (fortunately before I put any food in it). There is a cute little instruction diagram inside the lid showing how to open it when the suction is too great for your strength.

However, I didn’t understand it. I tried to pry off the lid by pushing the spork upward, with no results. I tried a metal spoon–no dice. I emailed our vendor. They sent me this helpful video, which didn’t help me.

Finally, pushing the lid up with all my might, I managed to break it. My more intelligent co-worker, Cassie, noticed that the lid was meant to be screwed off. Not pried. Mystery solved.

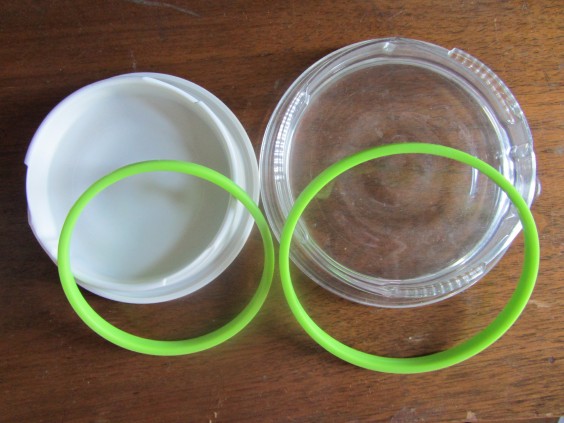
Gasket Corollary: The green rubber gaskets come off, making it easy to thoroughly wash away any lurking food or bacteria.

Conclusion:
1) The Lunch Pot is a wonderfully-designed device both functionally and aesthetically.
2) The smaller container is the perfect size for a correct portion of any main dish, and the larger, for salad.
3) I am not an engineer. But I can cook all right.

Gift Guides

Gift Lab: Moss Terrarium

February 16, 2012

Hypothesis: I’ve killed every houseplant I’ve ever owned. But the moss terrarium is so green and cute, so I want to give my green thumb one more try. Can I keep this fellow alive and maybe even flourishing?

Experiment:

First off, I need to create my terrarium. I grabbed a mixing bowl, a spoon and a squeeze bottle from my kitchen and got to work. Most everything I needed was included in the kit– dirt, moss, bottle & stand. But it did take a little bit of dexterity to get my terrarium up and running. Some assembly is required!

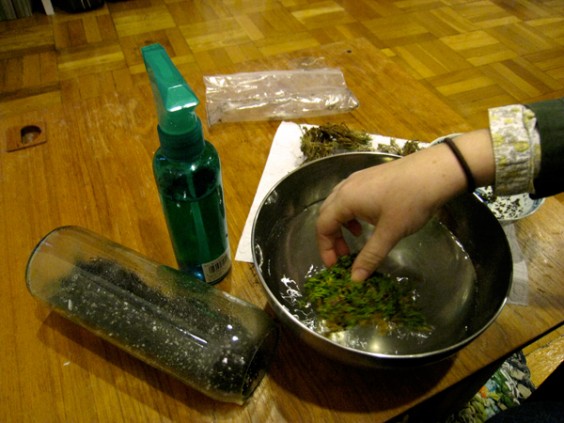
I activated the moss with in a quick warm water bath.

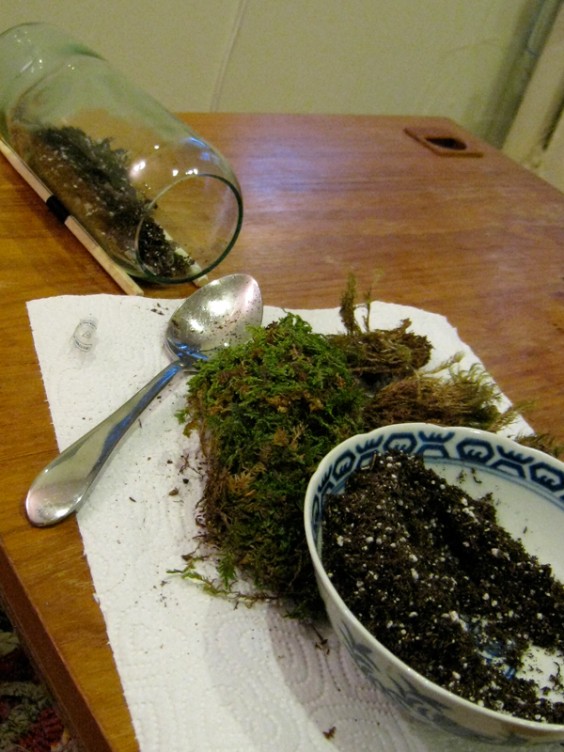
Gave the dirt a quick mix. Doesn’t this look like the beginning of a cake recipe? I know, I know… you just got totally grossed out. But Martha Stewart’s got a pretty impressive dirt cake recipe

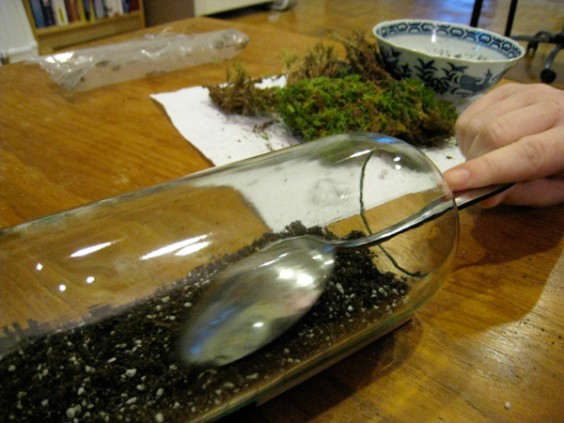
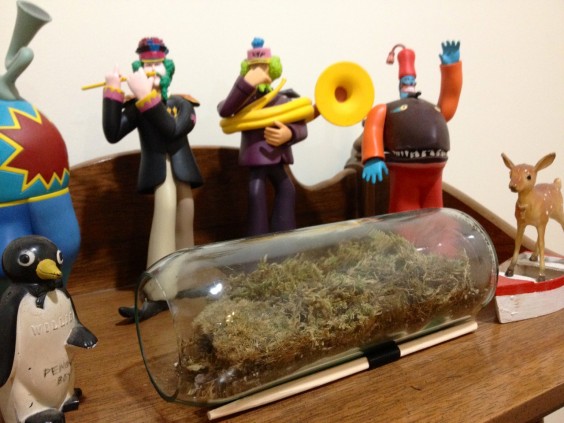
Then I used my mixing spoon to spread out the dirt along the bottom of the wine bottle, and layered the moss on top with the included pair of chopsticks.

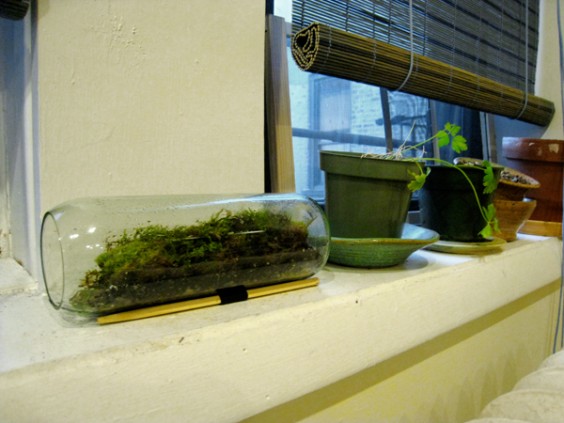
Here’s my finished terrarium, hanging out next to the last lonely tendril of parsley.

Results: Since the time this picture was taken, my parsley has since died. But my beautiful moss terrarium has stayed green, and I only need to spritz it with a spray bottle a few times a week. I did move my terrarium away from the window. I missed those instructions to keep it out of direct sunlight, and now that it’s hanging out with my favorite Beatles action figures, my terrarium just might make it through the winter.

Conclusion: If you’re worse at gardening than I am, don’t despair. The moss terrarium kit is a chance to redeem yourself and bring a bit of nature indoors.

The Moss Terrarium Bottle is $38, and you can dress yours up with handmade terrarium creatures, $34.

Gift Guides

Gift Lab: Soup & Sandwich Tray

February 10, 2012

Background Research
The Soup & Sandwich Tray Duo is an UncommonGoods classic with a glowing reputation. Based on photos and reviews, it is the perfect size for a classic tomato soup and grilled cheese sandwich. Customers have left comments describing the innovative meals they have served on the tray such as cereal with a muffin and cake with ice cream.

Hypothesis
My idea of a comforting meal to warm up cold bellies on a January day is an Italian alternative. I hypothesize my favorite meal of spicy tomato & chickpea soup with Stromboli will fit just as perfectly on the Soup & Sandwich Tray Duo.

The Experiment
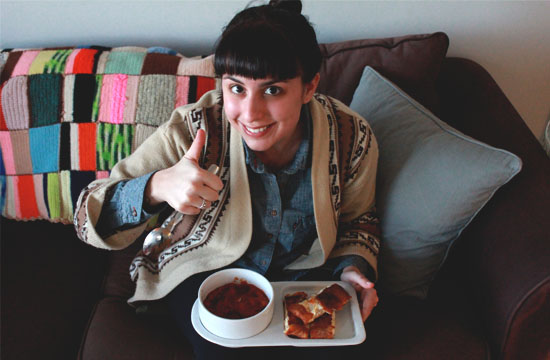
Sunday January 15, perhaps the coldest day so far since last winter. The wind is howling outside and there is nothing my boyfriend Mark and I would rather do than turn up the heat and have a movie marathon.

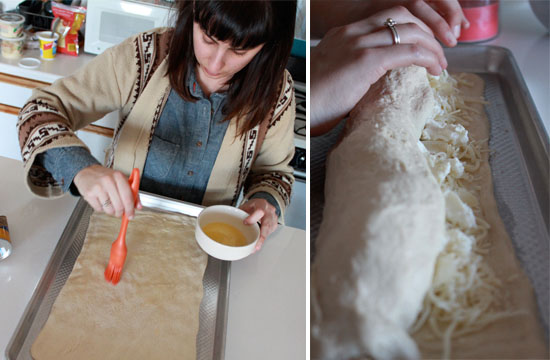
In the freezer are two servings of tomato and chickpea soup, a simple crock pot recipe that I made two weeks prior. It’s a thick soup that I spiced up with a lot of cayenne pepper and paprika and saved for such a chilly occasion. I have the ingredients to make my mom’s famous Stromboli– a favorite from my childhood. I roll the Stromboli, put it in the oven and heat the soup on the stove.

While the food is cooking, I take my Soup & Sandwich Tray Duo from its box to clean. I am surprised at the weight of the plate and bowl- it’s very sturdy and larger than I imagined. I especially appreciate that the plate and bowl are not attached and nest on top of each other for easy storage, a huge bonus for this apartment dweller. The bowl is very big and deep, I don’t know if I could ever eat that much soup!

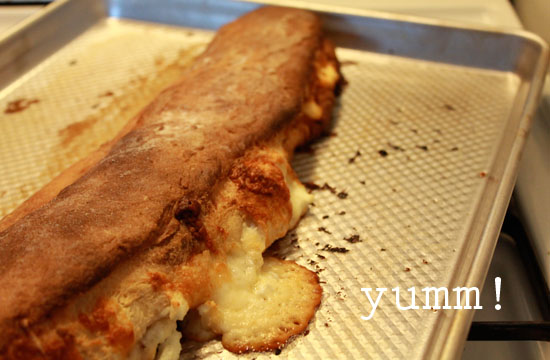
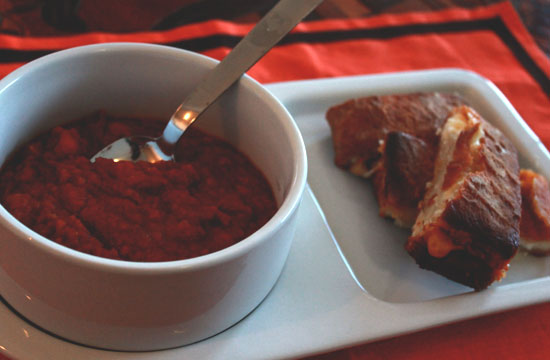
The soup is warm and the Stromboli is baked to cheesy, oozy perfection. Although my Stromboli slices are not the size or shape of a grilled cheese, they fit better on the plate than I predicted. Mark and I sit at the table for a couple of minutes enjoying the convenience of eating soup and Stromboli from the same tray. When it comes time for a soup refill, we are grateful that we can take the bowls and not travel with the entire tray.

We decide it is time to put on The Big Lebowski and take our trays to the sofa. I dread eating on the sofa because it’s usually so messy but the  tray fits so perfectly on my lap, its size and weight make it a sturdy and level table. Since the bowl is so large, it only needs to be filled halfway to provide a healthy serving so spilling is not a concern. We can eat without crumbs or spilling while laughing at The Dude.

Conclusion
My hypothesis proved true, a meal slightly alternative to grilled cheese and classic tomato soup fit on the Soup & Sandwich Tray Duo. In addition, the tray proved to store well in a cabinet and create a spill-free sofa experience. I can’t stop thinking about all of my favorite recipes that can be served on the tray…

Gift Guides

Gift Lab: A Paw Print is Forever

January 11, 2012

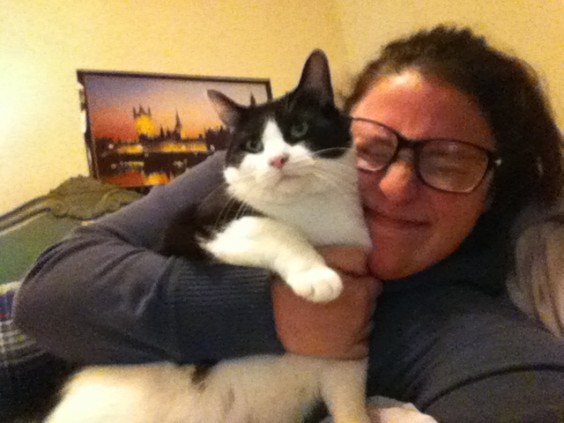
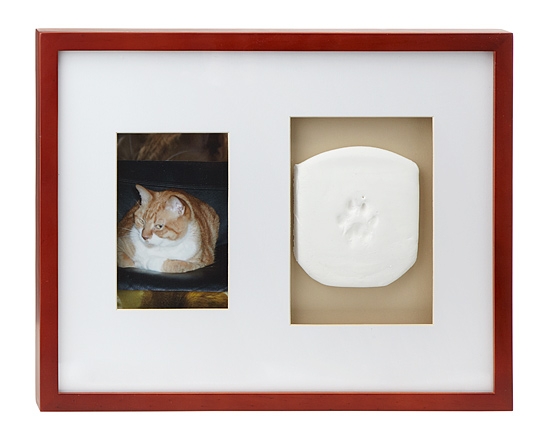
The first time I saw the Paw Prints Keepsake Frame, I knew I needed to have it! The only problem? I have 5 cats! How am I to choose the lucky kitty that gets their paw print hung on the Wall of Fame?!

Background Research:

Meet my 5 wunderkitties, in order from oldest to youngest:

Fatty
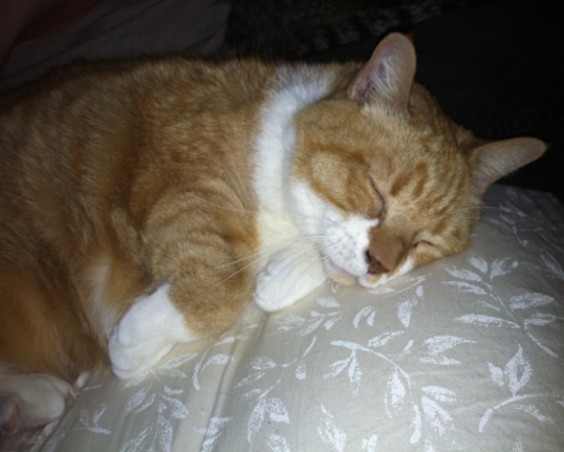
What a docile, wonderful orange blob of a cat. He appeared outside my house on the night of my 16th birthday and never left (best present EVER)!

Pixie

Our neurotic sweetheart, and the only female in the bunch. Joined the household when I moved back home after freshman year of college.

Lynard & Skynard

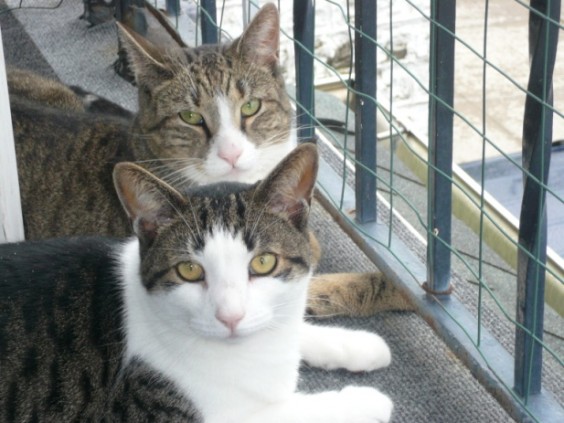
Brothers! My best friend and I brought them home to foster in the beginning of the summer of 2007. I am still “fostering” them, haha.

And last, but certainly not least…..Buddy!

I adopted Buddy last April from the Animal Care & Control Center in Brooklyn. He is absolutely insane, but that is why he is awesome.

I have to pay homage to Harley. Harley was my first cat, joined the family when I was 11 years old. He passed away 3 years ago, but he’ll always be the king of our jungle.

How does one choose which paw to take a print of? Well, it was actually easy to choose.

Hypothesis:

Fatty is the oldest of the bunch, and the most cooperative. My thoughts are that he will be the easiest to get a steady paw print from. Getting the paw print and putting together this frame might require some extra time to get just right since a live animal is involved in the process, but it will be well worth the memory that is being created.

Experiment:

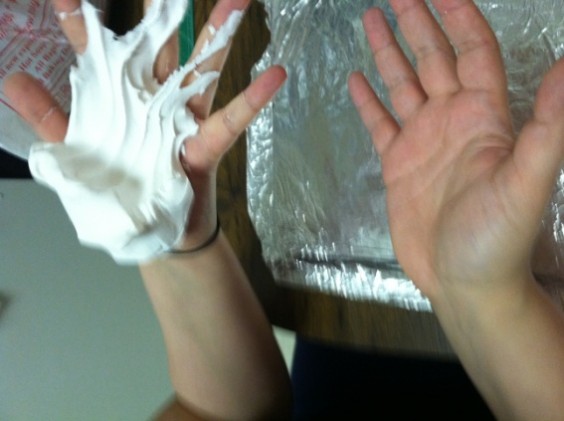
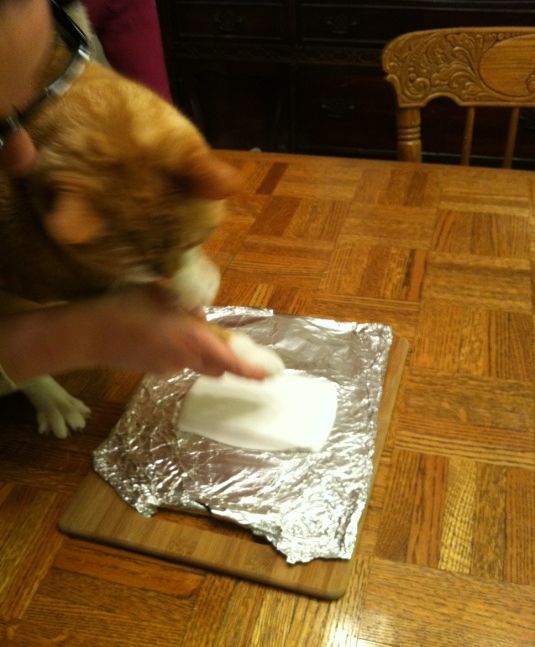
This project looks easy, but looks are very deceiving. When opening the dough package, it subsequently stuck to the inside of the package it came in and it took a good 5 minutes to get all of it out of the package, along with out from under my fingernails.

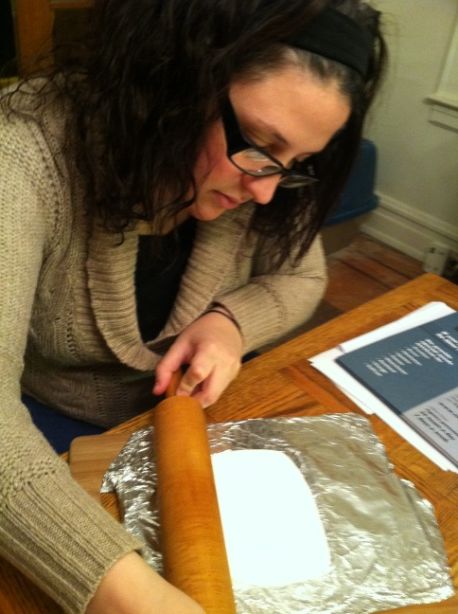
The rolling pin that this product came with is a tiny cylindrical piece of wood that you cannot even grip, and the dough gets stuck on when you try to use it. I had to use my mom’s good cooking rolling pin instead.

Getting this dough into the right shape and having the right consistency was not fun. It took about 20 minutes to get it to the right shape and size, and to get any air bubbles out. I was not satisfied with the first (second or third) prints that I took, so I needed to roll the dough out again and… and AGAIN.

Finally, on the fourth attempt, I got the golden paw print! My Fatty was not as happy as I was at this point, but after some smooshy hairy kisses, he was fine.

Conclusion:

The end result, in my opinion, is certainly worth the effort and work that has to be put in to obtain the paw print.

I will treasure this print for the rest of my life and always have it hanging on my wall. I will certainly be getting the rest of my kitties’ paw prints at some point in the future and more of these frames to put them in!

The Paw Prints Keepsake Frame is $30.

Gift Guides

Gift Lab: Jingle All the Way

December 8, 2011

Background Research:
Kim: When I first saw this item, I immediately remembered the recorder that I had when I was six. The only songs that I knew were ‘Hot Cross Buns’ and ‘There’s a Hole in the Bucket’, but I felt nostalgic nonetheless.

Kayla: I was so excited when Kim told me that we would playing the recorder for gift lab because in the fourth grade I had a recorder and even though I have no recent practice at all, I thought it would be a fun experience to live out childhood memories from a long time ago.

Hypothesis:

Kim: This could potentially be an epic failure, because I have no recollection of how to do this. I do, however, think it will be hilarious.

Kayla: The recorder appears to be a really simple instrument but I have no musical talent in my blood whatsoever and getting involved in this could mean huge embarrassment for me.

The Experiment:

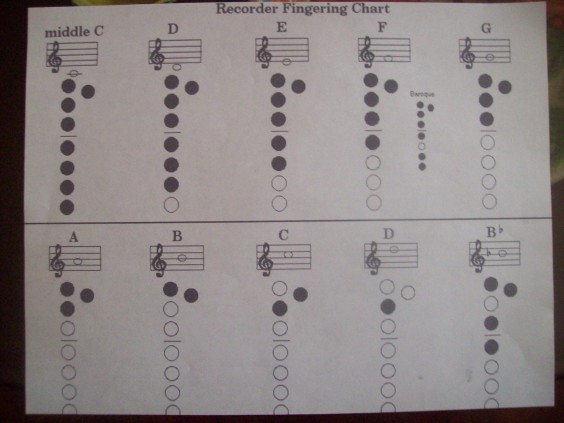
Kim: Upon opening the item, I saw that there were no instructions on how to play the item. The one that I had as a child came with a book of songs and how to play them. I was starting to think that this might not be as easy as I had hoped. Thank goodness for Google.

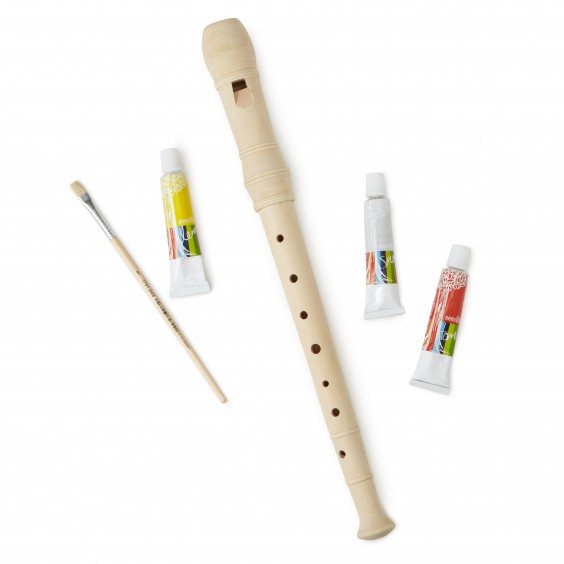
Kayla: When we first opened the box together, I got even more nervous than I already was. I assumed that the item would come with a list of notes and how to achieve said notes, but the main idea of the project was actually centered on painting it. I was excited to find this out, but was still unsure of how I would ever learn the song ‘Jingle Bells’. At least Kim knew was she was doing.

Kim: Not entirely! The pictures of where to put your fingers for the notes are just different colored circles. Logically, the black circles are where your fingers go, but I wanted to be sure, so I consulted YouTube.

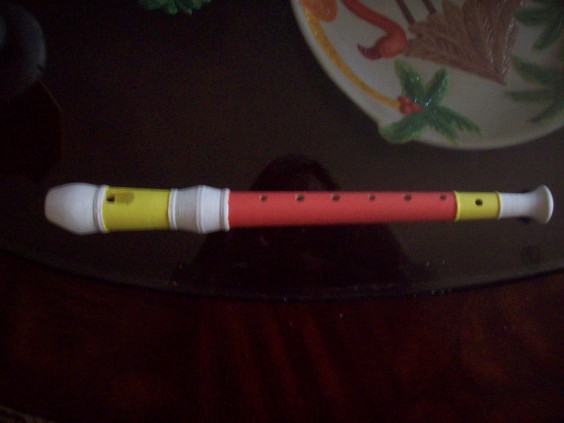
Kayla: But before we got to playing, we had to paint the recorder. We both enjoy pink, so we cheated and mixed the red and white… as it comes with white, red, and yellow. Our “pink” was more of a coral since we also needed white to pale our yellow – you know how picky girls are.

Kim: I was a little sad at first that the pink wasn’t the shade we were aiming for—a nice pastel—but the coral grew on me after a minute or so.

Kayla: We got done figuring out which paint colors would go where and went at it, too excited to sneak in a photo before we painted it. We were so focused on our video that we missed a lot of visuals. The recorder turned out to be very beautiful however, so we were doing okay in that department. Now the difficult part of the adventure…

Kim: The video was definitely the most difficult, but the most fun, as you can tell from our laughter. We weren’t entirely sure how we were going to make this a two-man job, so I grabbed a bell and my dog, Bebe, while Kayla practiced the song. We were hoping that the bell and the dog would deter people from our horrible playing.

Kayla: Thankfully, I picked up the song pretty quickly. It was a lot easier than I thought and I was really happy with the turnout. Yet, I was still embarrassed to play on film, as I am very self-conscious.

Kim: Personally, I think she was awesome. It was definitely better than my attempts. I’ll stick with my bell.

Conclusion

Kim: This was a really fun project. I had a great time doing it. I was also really inspired by some of videos on YouTube to learn newer, more modern songs. My only advice is to keep in mind that this is designed to be a one-person project, so it only comes with one paint brush.

Kayla: I had a blast with this as I love to paint and decorate things. Even learning to play one simple song was entertaining because it reminded me so much of being a kid again. This is a fun project for children or adults who want to act like children/remember childhood.