Browsing Tag

Gift Lab

The Uncommon Life

Gift Lab: Boombox Touch Speaker

July 2, 2014

Boombox Touch Speaker | Gift Lab | UncommonGoods

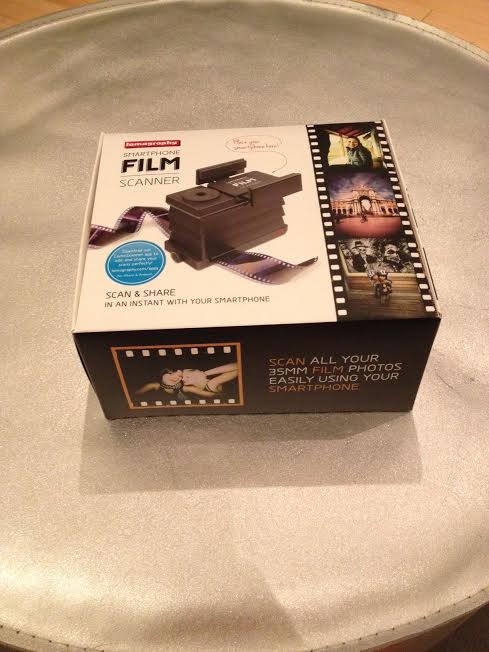
Product: Boombox Touch Speaker, a portable speaker that’s cord free and will blast out your tunes by simply setting a smartphone on top of it.

Research: 
I love to jam out (preferably to Motown, MJ, or the Rent soundtrack ) while taking my morning showers, prepping dinner, or cleaning my apartment. And although I could play music out loud with my iPhone, it’s never quite loud enough. As a temporary solution, I used to walk around with my iPhone in my back pocket and wear headphones in my apartment, but that quickly became a nuisance. So I decided to search for a convenient speaker that I could use with my iPhone. I wanted something that I could easily bring from room to room without a hassle of setting up or constant plugging and unplugging.

Then I discovered the Boombox Touch Speaker while browsing UncommonGoods at work. I have to admit when I heard that this speaker could play music if I just simply placed my iPhone on top of it, I was definitely skeptical. Trust me, I’m usually a glass-half-full type of gal, but I felt like this little tech discovery was too good to be true. The description claimed that there was no need to set up Bluetooth® and no cords were needed. For such a great price, what exactly is the catch? Poor sound quality? Needing to download a $3 smartphone app? Will it break easily?

Skeptical and hopeful at the same time, I’ve decided to test it out on my own to get to the bottom of this mystery.

Boombox Touch Speaker | Gift Lab | UncommonGoods

Hypothesis: 
I was sure that the product would work, but definitely with a couple of setbacks. I was expecting to hear a bit of static or that the music wouldn’t be as loud as I would want it to be. (And super loud Billie Jean is always better than I-could-kinda-hear-you Billie Jean.)

Boombox Touch Speaker | Gift Lab | UncommonGoods

Experiment: 
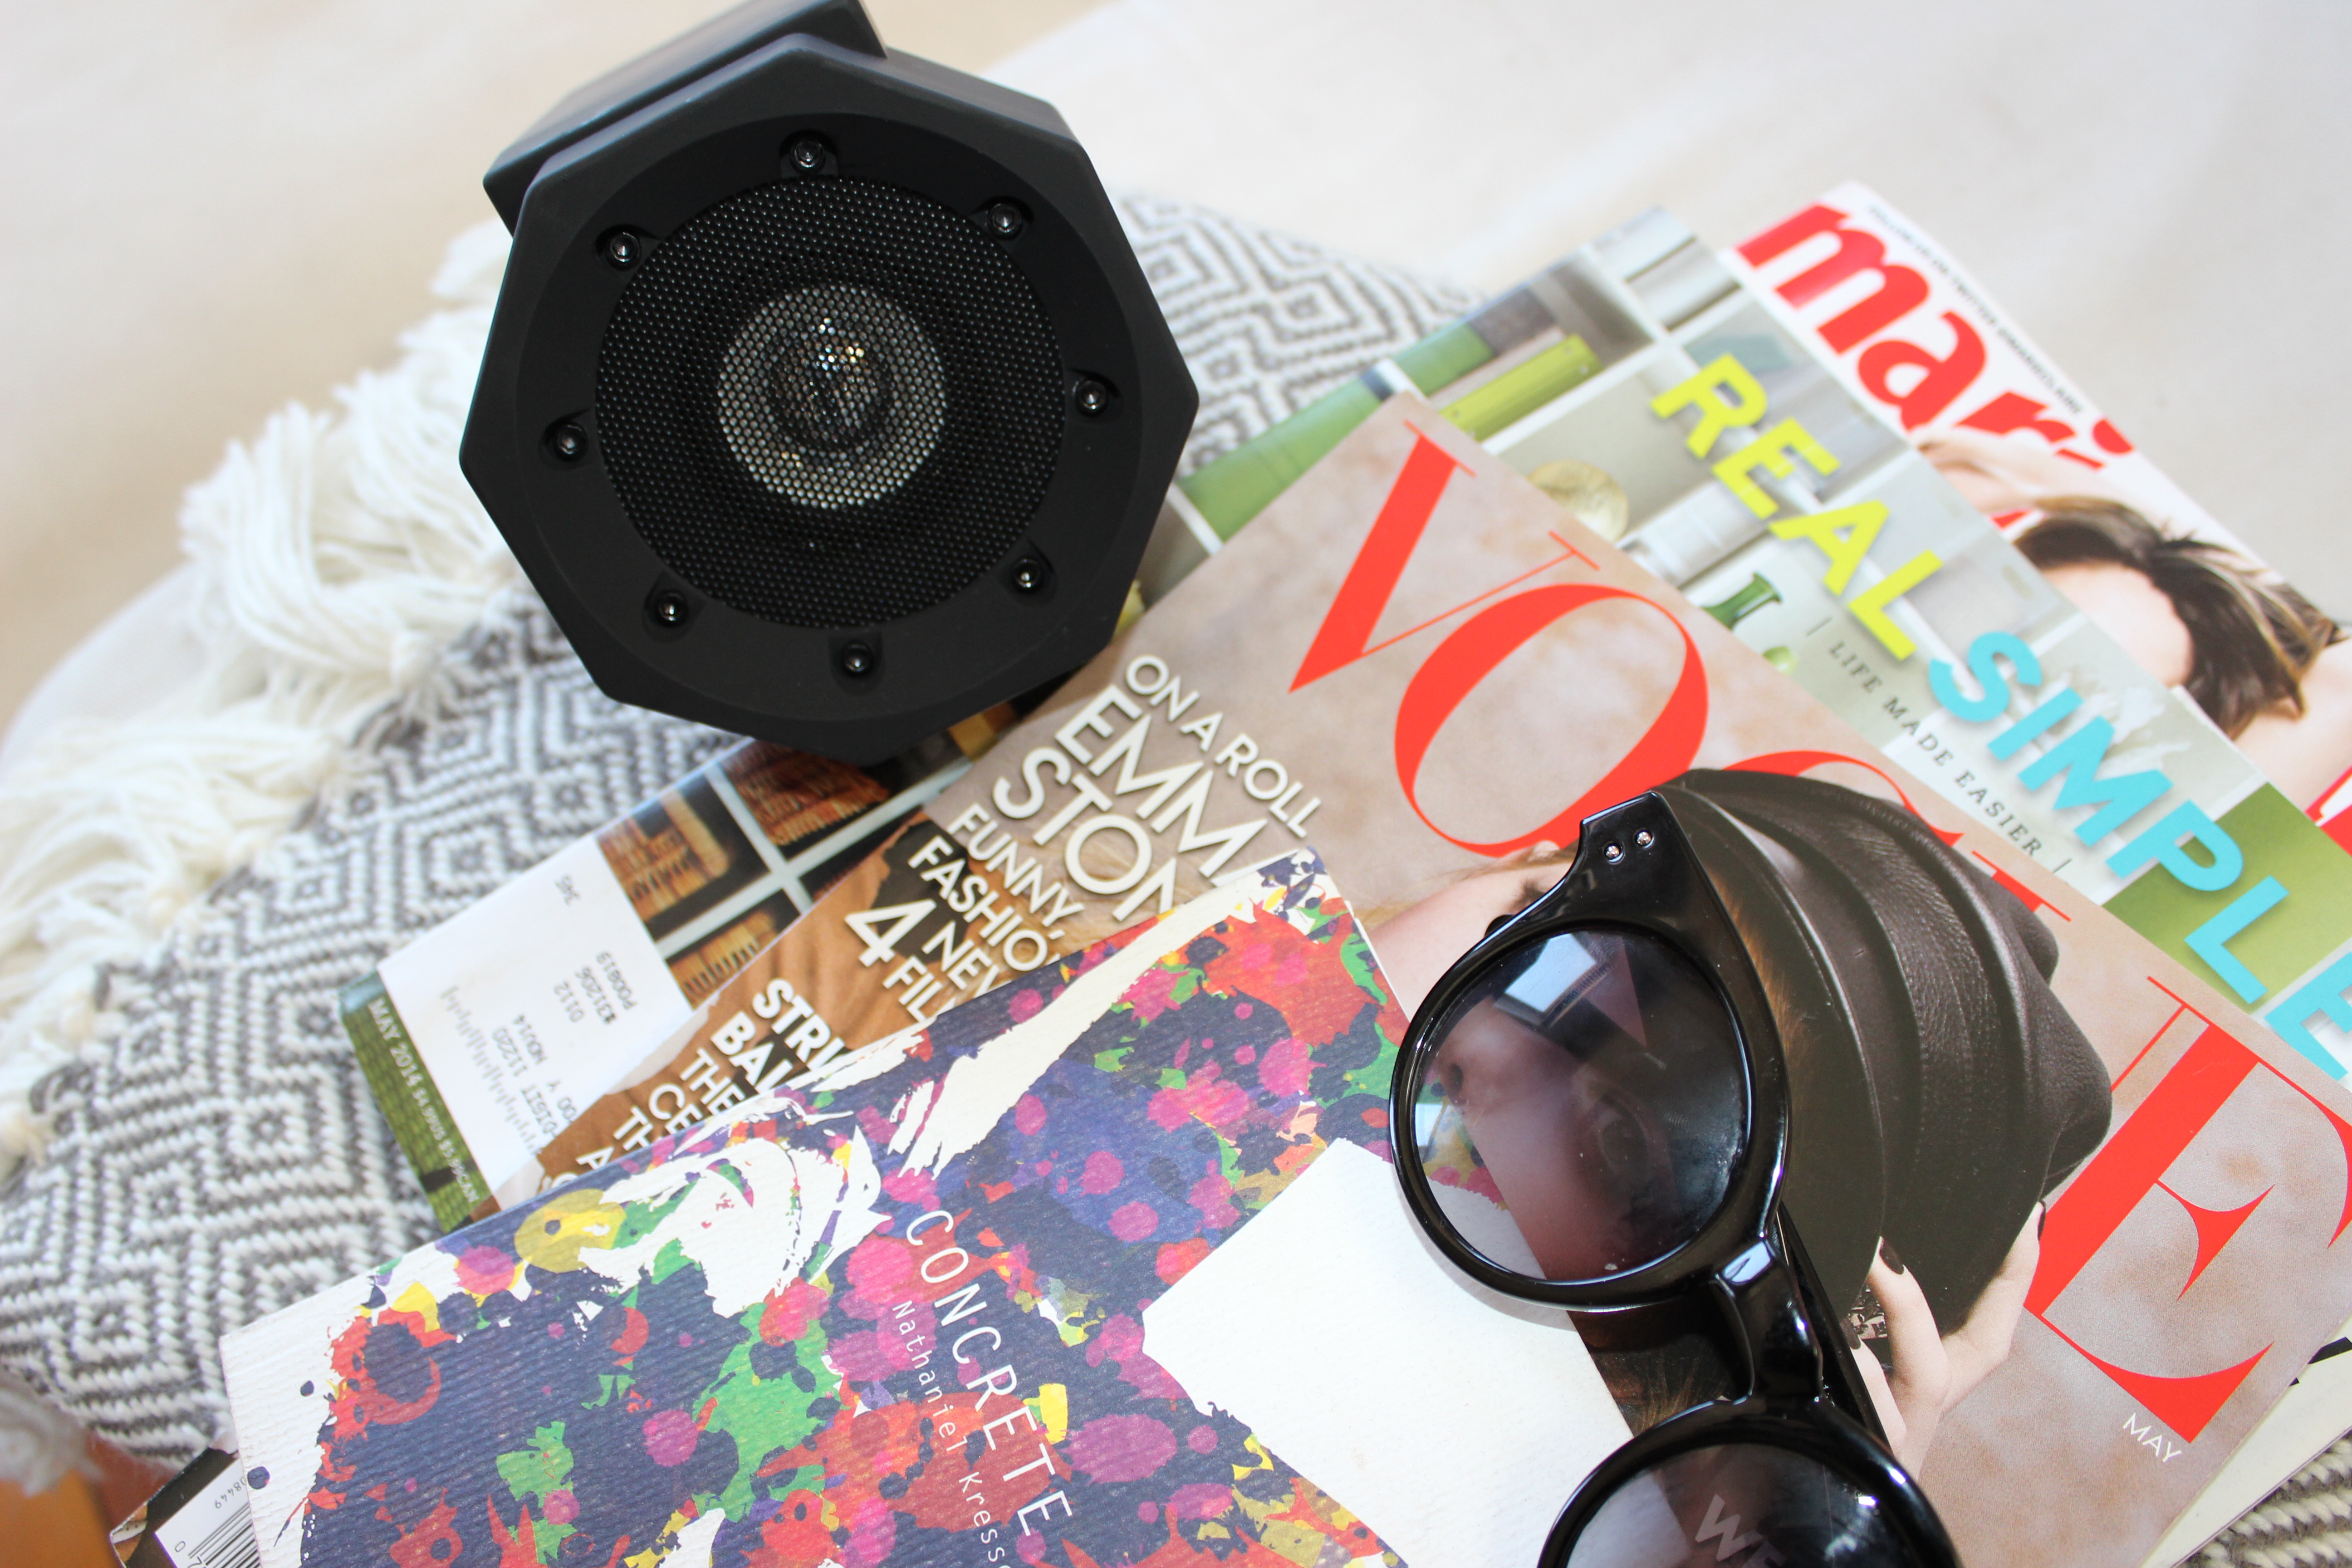
I planned to test out the Boombox Touch Speaker at my neighborhood park for a nice little lazy Sunday. Nothing at the time sounded better than flipping through fashion magazines, snacking on guacamole and chips, and chit chatting with my good friend, Christina, while listening to a few Motown favorites in the background.

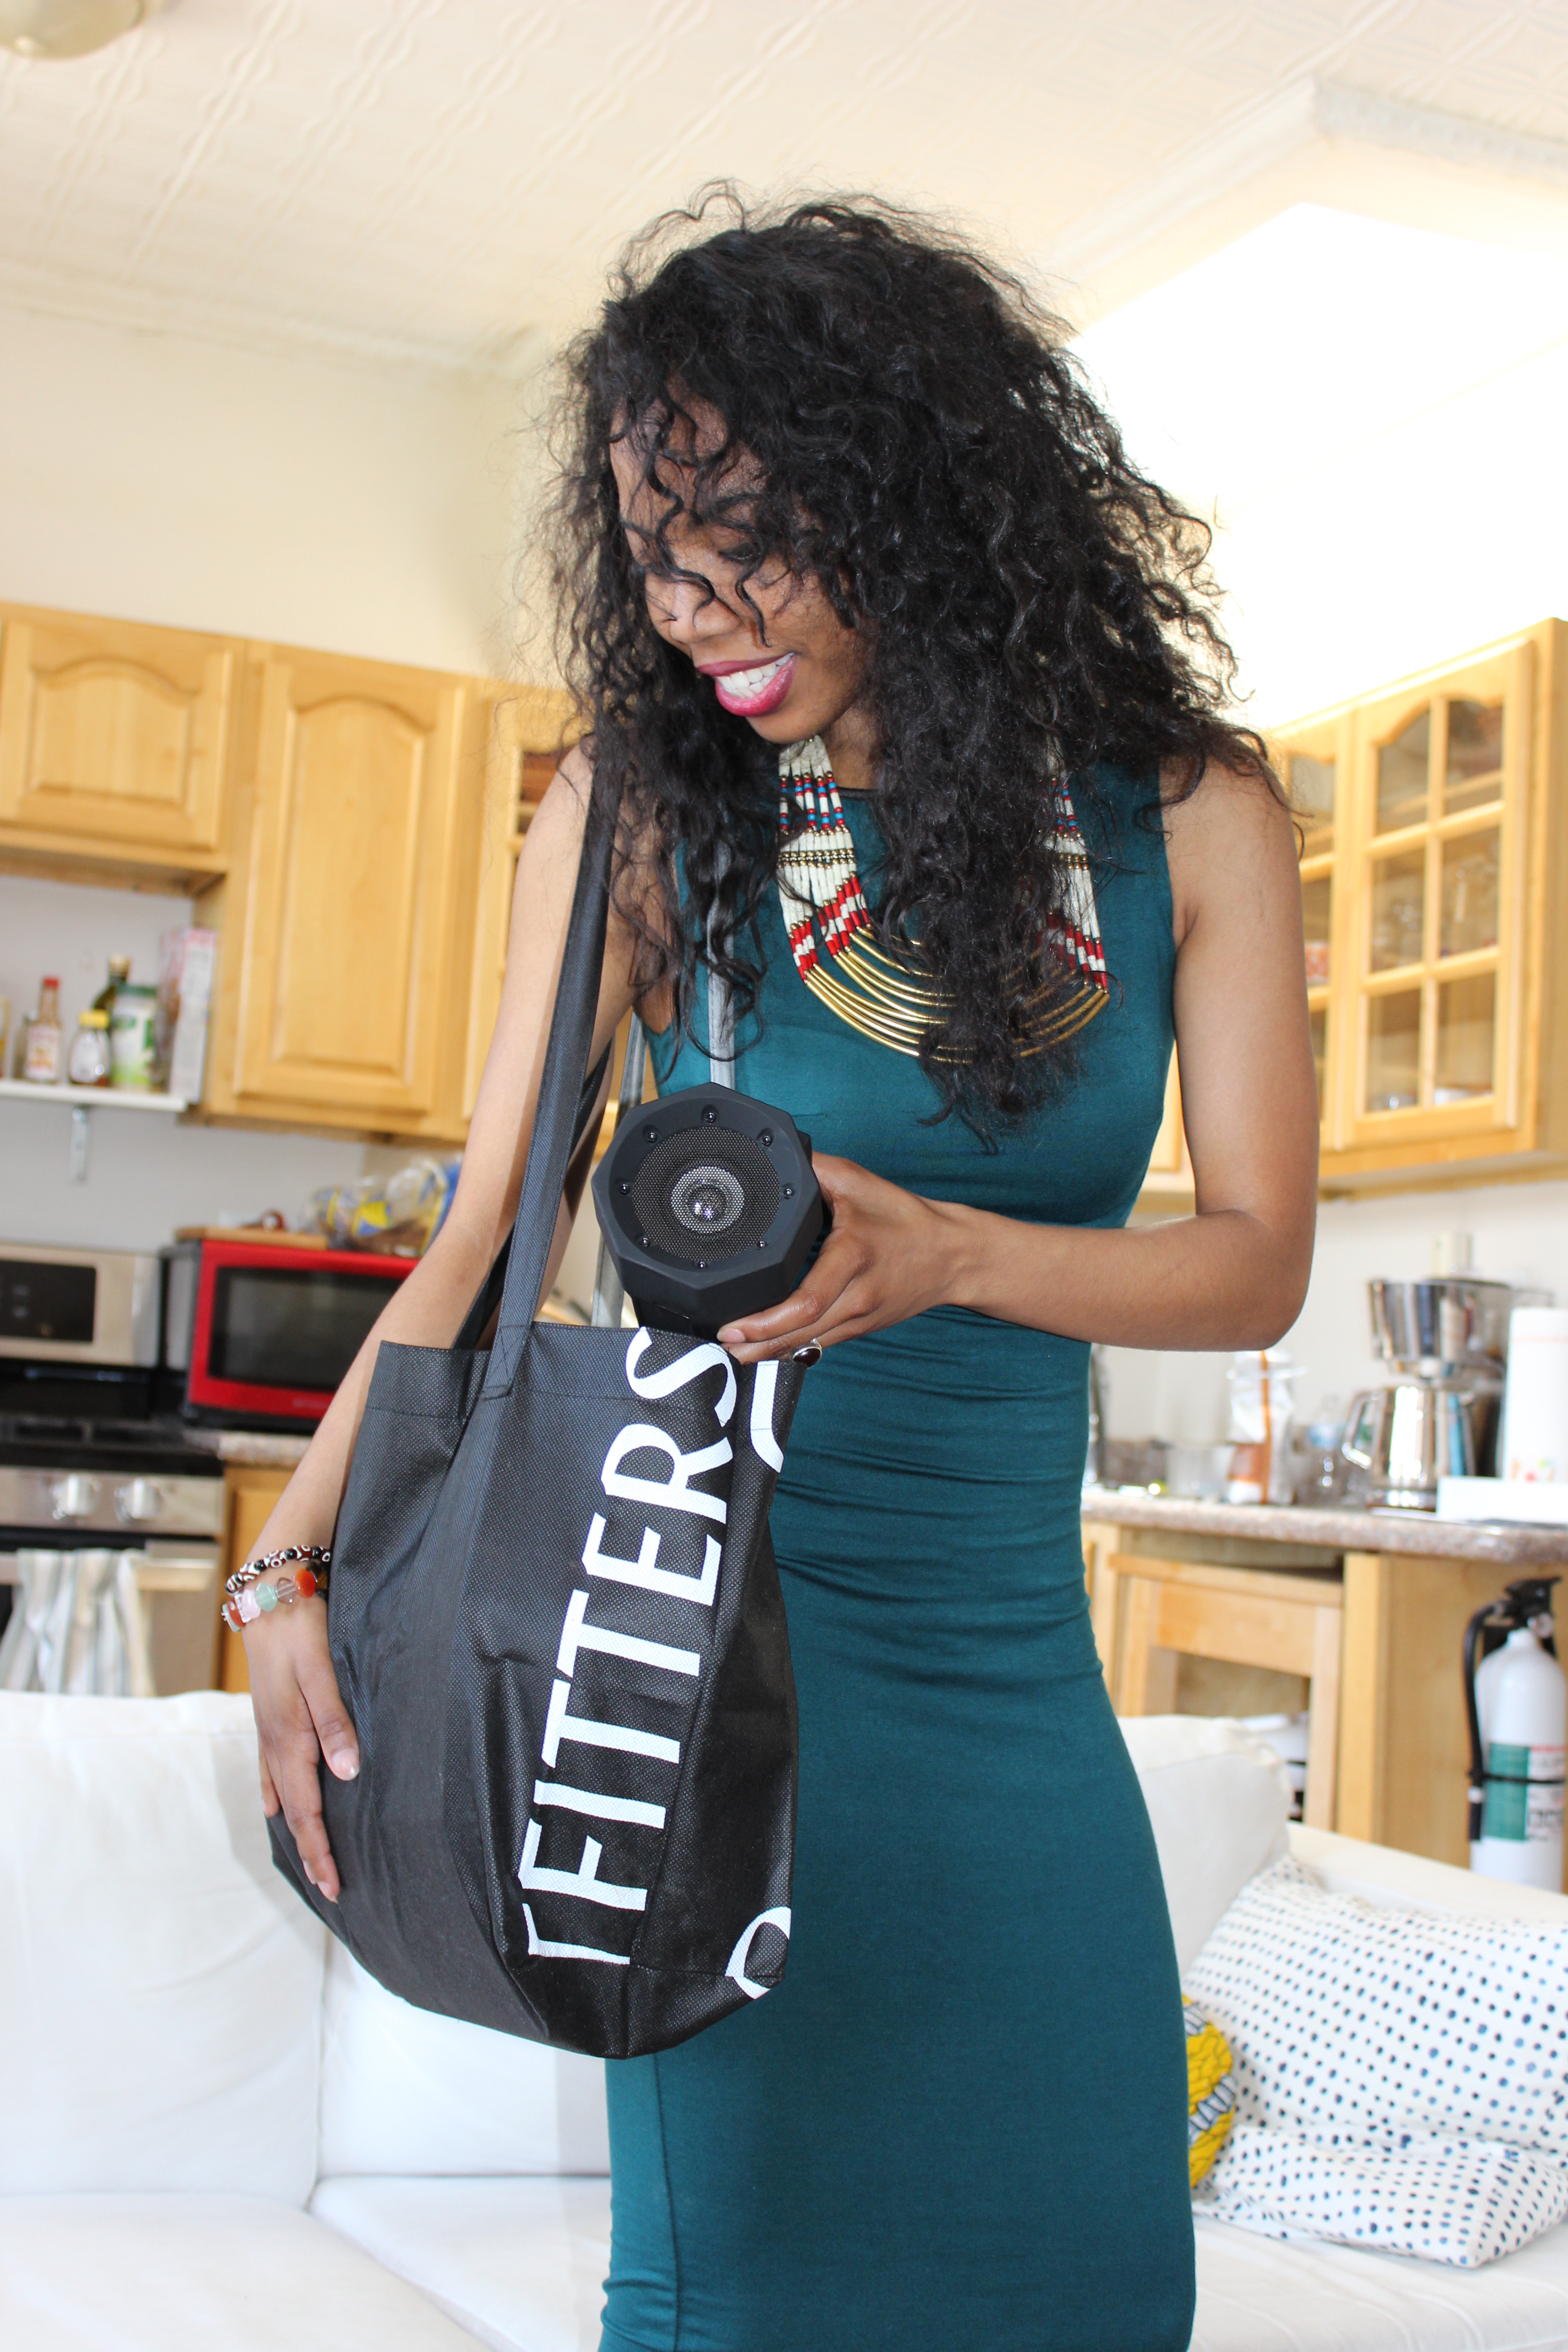
When I got the speaker I was immediately surprised by three things: the size, the weight, and the feel. I expected it to be bigger because in my mind “big sound equals big speakers.” But I guess we’re not living in the ‘80s anymore and this doesn’t necessarily need to happen anymore. It was nice to know that I could pop it into my tote bag and still have room for other gadgets and gizmos.

Boombox Touch Speaker | Gift Lab | UncommonGoods

Boombox Touch Speaker | Gift Lab | UncommonGoods

The weight was lighter than I expected as well, even after seeing its small size – I thought it would still be a bit heavier than it was. That was a relief because it would have been a hassle if I had a heavy speaker weighing down on my shoulder during my commute or if I had to complete errands. I hate being slowed down!

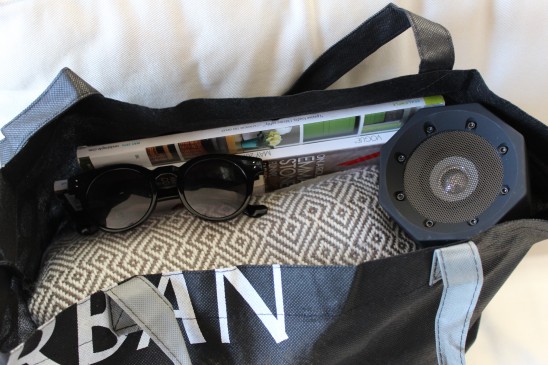
The last thing I noticed was the feel of the entire speaker. It’s surprisingly soft, smooth, and easy to hold and carry around. I could place it on my nightstand, fireplace mantel, kitchen counters, or on the shelf in my bathroom. I love that it’s so versatile and doesn’t necessarily need a specific spot to live in my home. So far, I was definitely impressed. (But still skeptical!) I was ready to test the speaker! Off to the park we go.

IMG_1110

IMG_1125

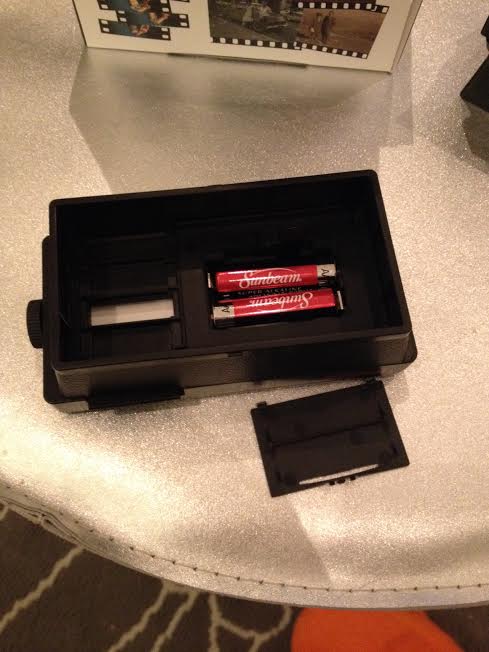
The next step was simply to just turn on the speaker. I turned it on from the switch in the back, and a blue light popped up. I was happy I didn’t need to charge it or place batteries in.  I was like a kid opening up her birthday gifts. I wanted the toy to work – no time for other nonsense!

In the photo below I was so excited that the speaker weighed less than the bag of tortilla chips I was holding!

IMG_1121

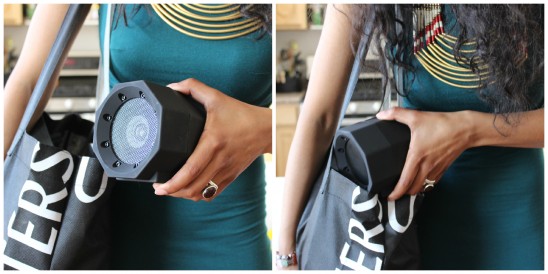
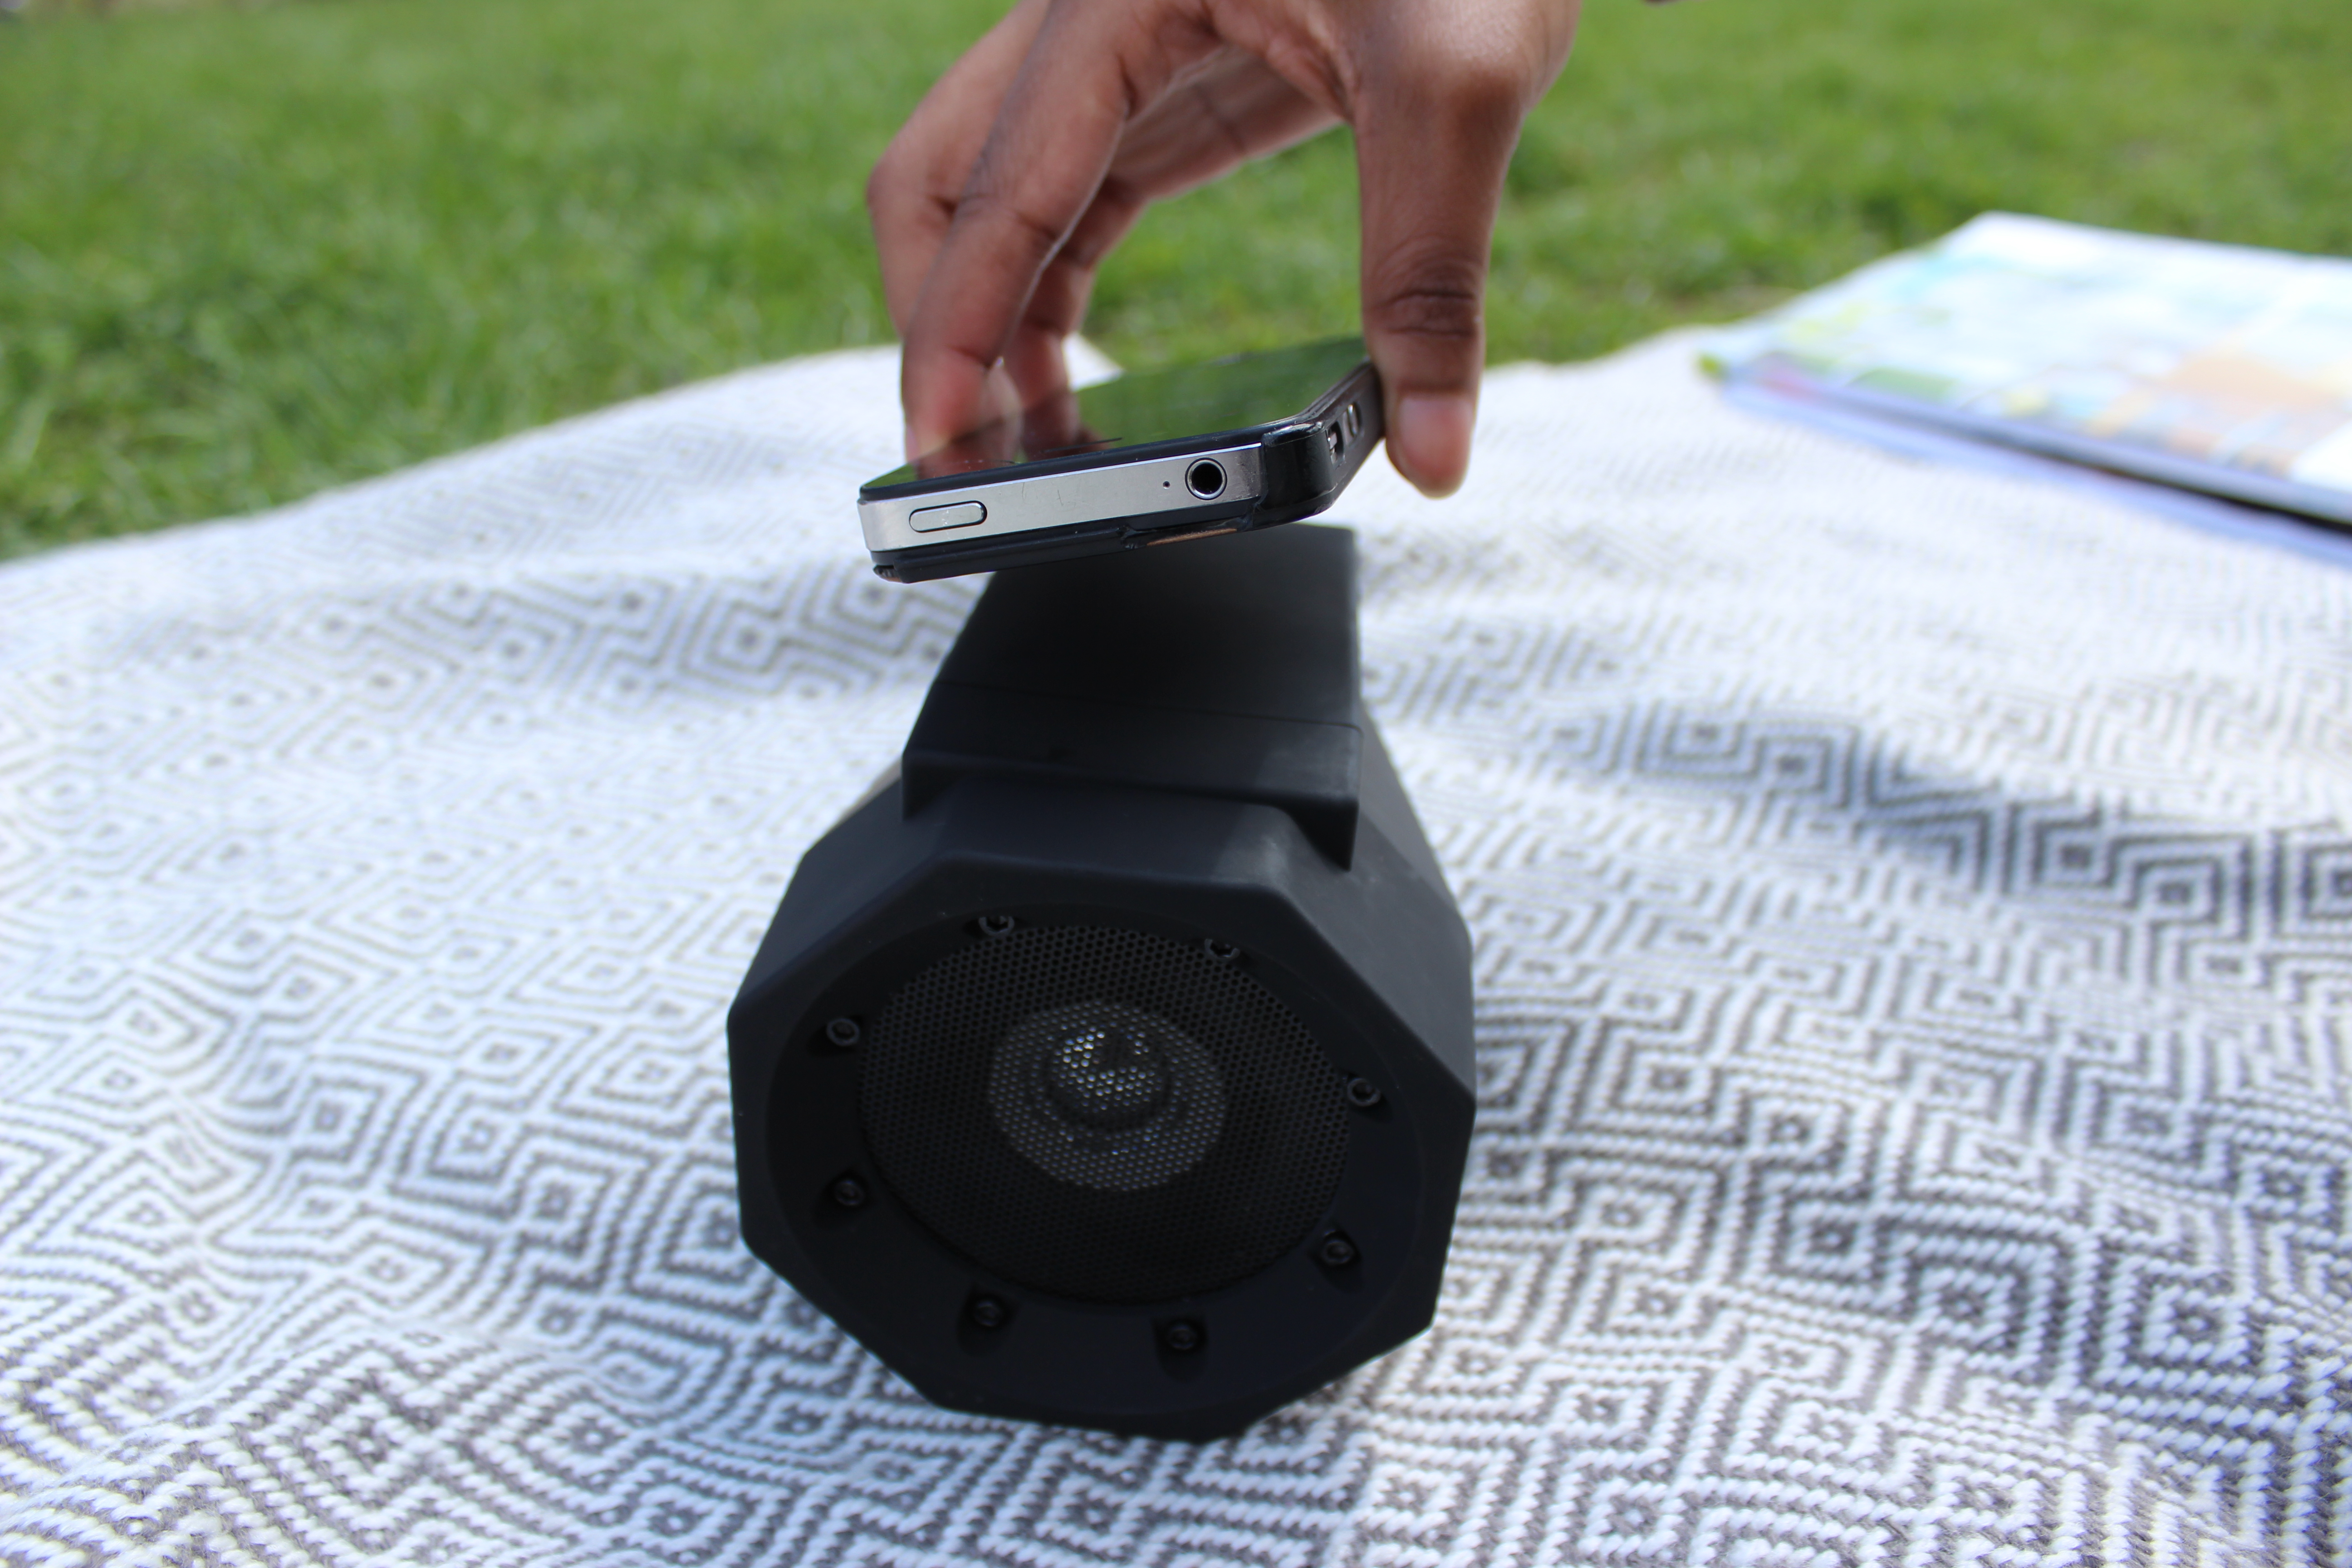
Now, for the moment I’ve been waiting for! Without reading directions, I placed my iPhone on top of the speaker… and….I didn’t hear one sound come out of the speaker. I knew it! Too good to be true! I turned the switch back on and then off. Tried again. And again. And again. Nothing.

But right when I turned the phone around, I heard good ol’ Marvin Gaye crooning loud and clear, literally. The sound quality was amazing. Success! It was a lot louder than I expected it to be and I actually had to turn down the music through the volume control on my iPhone. (Although, I’m sure others at the park wouldn’t have had any objections to Marvin being a part of their Sunday!)

Boombox Touch Speaker | UncommonGoods

Boombox Touch Speaker | Gift Lab | UncommonGoods

Conclusion: 
I’m glad I was very skeptical of the Boombox Touch Speaker because I feel if I wasn’t, I wouldn’t have been as eager to test it out. I’m 100% happy with it, and would recommend it to any music lover. (AKA: everyone!) My only tip is to make sure that your phone is facing the right way. For the iPhone, make sure the top of the phone sits closest to the speaker, its screen facing up. (Seen in the photo above.)

Now I am able to listen to loud music at home in any room (headphone free!). Also, it’s always a fun to bring out  and show off to my friends on any of our rooftop parties or afternoon picnics. I honestly had three people ask me in absolute awe “How is that even possible?” And just as the description advises to do here, I shrugged and said, “It’s magic.”

Watch me test out the speaker and bust a couple of moves in the video below. Happy grooving!

Gift Guides

Gift Lab: Breakfast For Your Face

June 19, 2014

Gift Lab: Breakfast for Your Face | UncommonGoods
Product: Breakfast For Your Face, a set of three all-natural powders for concocting different face masks.

Research:
I have a confession: I am a beauty product junkie. For the past 9 months I have been addicted to BirchBox (they just emailed me to remind me of our anniversary) which means a bounty of new cosmetics every month, and numerous orders in between. I was the kind of kid who would rather spend her Saturday night perfecting a smokey eye or dumping a bottle of Sun-In on her hair than go out with friends. As an adult I approach finding the best eye cream and dumping my paycheck at the Dry Bar with the same enthusiasm.

I am going home to spend a weekend with my cousin Annie in New Jersey. Annie is 14 and has Down’s Syndrome–we’ve been best friends pretty much since she was born. Although she is a veritable mini-me and loves everything I love, I’m not completely sure if she will enjoy slathering something strange on her face.

Annie chose the Cafe Mocha mask | Breakfast For Your Face | UncommonGoodsHypothesis:
There are two parts to this hypothesis–how the experience will go over with Annie and what I will think of the product itself. I knew selling this idea to Annie will be a test of my marketing skills. I should tell her we were going to have a girly sleepover with music, movies, snacks, and face masks. Special needs children can be fussy and I anticipate she might not be down with something strange on her face, so I hope the tactile experience of picking her mask and mixing it herself would make it less strange when we apply it.

When it comes to me, I am hesitant about the mask itself. I have had reactions to masks in the past–the worst resulting in a huge burn on my face the night before my first modeling shoot (I have one of those moms). However I have learned a lot about my skin at recent facials and think I am better at making decisions on what my dry skin can handle. Also, this kit is all natural–I can literally see all the ingredients–which makes me trust it even more.

Gift Lab: Breakfast For Your Face | UncommonGoods
Experiment:
I pull out the almond milk, honey, coconut oil, and yogurt from the kitchen as these seemed to be the ingredients we will be using to mix our masks. Each mask has suggestions for how to mix the mask for different skin types–normal, oily, and dry. I already prepare to mix whatever Annie picks for normal since her skin tends to be very reactive, and the ingredients for dry skin for myself. I let Annie chose which mask she wants to make–not surprisingly she chooses the Cafe Mocha (it looks and smells delicious!). This leaves Yogurt and Oatbrasion for me. Since I am in the midst of an oil-pulling detox (told you I had an addiction) and my face is broken out, I choose the Oatbrasion mask which is exfoliating and can offer me a fresh layer of skin.

I pour Annie a tablespoon of Cafe Mocha and some almond milk and tell her to mix. The bottle didn’t tell me how much almond milk to use and it turns out I poured too much. I add more powder but the mixture is never anything but runny. I clean out her bowl and add yogurt this time which works out a lot better and I imagine it will have the same hydrating properties of milk.

Annie mixing her mask | Breakfast For Your Face | UncommonGoods
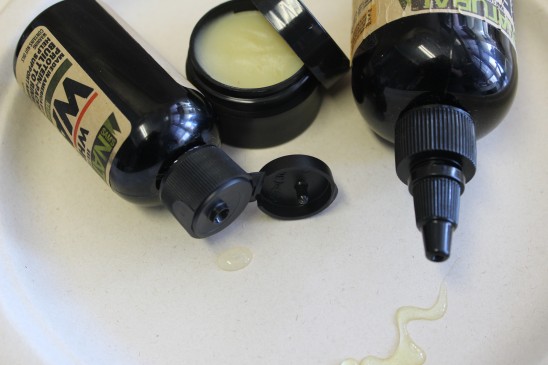
In my bowl, I pour a tablespoon of Oatbrasion, a teaspoon of coconut oil, and a glob of honey (I have a bad habit of not measuring honey when I bake so I figured why start now). Mixing this reminds me a lot of the all-natural face scrubs my mom used to make when I was a kid. It smells amazing and although I give most pleasant-smelling concoctions a taste test (like these in a sample meeting, which was a mistake) I refrain since the bottle is one step ahead of me and suggests that it not be eaten. Okay, bossy bottle, you win this time.

Now for the fun part–slathering this all over our faces. I apply the mask on Annie’s face since I foresee lots of messes if I leave it to her. She giggles incessantly at how cold the yogurt is and steals glances in the mirror to see her face transform into a mud monster. I’m barely done when she runs away to show her brother her face. My mask is a lot less noticeable–there are some clumps of oat bran but overall it’s a really clear mixture. I was feeling a little lazy, and proud of my blow-drying skills, so I didn’t pull my bangs back to apply the mask onto my forehead.

Silly faces | Breakfast For Your Face | UncommonGoodsWe wait for ten minutes while the masks do their thang. In case you were wondering how to measure ten minutes–it is approximately 7 selfies, or four “Let It Go”s.

Some selfies | Breakfast For Your Face | UncommonGoodsAfter our ten minutes is up, we go upstairs to the bathroom to wash our faces. I clean my face first to show Annie how it’s done. The mask comes off very easily, but I scrub a bit to take advantage of the exfoliating properties of the mask. Annie’s is a lot tougher to remove since it dried a lot more on her face than mine did. I help her with a washcloth but the coffee grounds in the mask are kind of a pain to get off her face.

Breakfast For Your Face | UncommonGoods
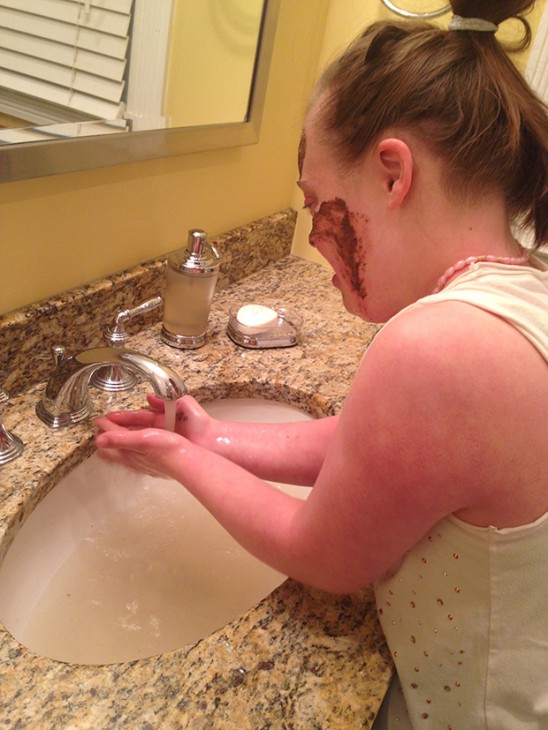
We head back downstairs for the rest of our sleepover activities–strawberries and cream, Monsters University, and texting boys (well, only I do that last thing). Uncontrollable giggles commence once she realizes I am texting a boy, and I can’t help but wonder if her energy is at all caused by the tablespoon of coffee that just soaked into her face.

Conclusion:
Breakfast For Your Face definitely created a successful girls night. We had a project and a beauty treatment all in one. Mixing was easy and fun for Annie which makes me believe girls of all ages, and developments, would really enjoy doing this too.

Fresh-faced after Breakfast For Your Face | UncommonGoodsI loved the way my face felt after I removed the mask. It was smooth and fresh. I totally wish I had pulled back my bangs because I could feel how different my forehead felt (umm, gross)–I got them wet anyway. My worries were for naught–no terrible reaction to my mask. However, I wouldn’t consider the Oatbrasion mix a mask, it definitely is more of a scrub. My aunt loved the way Annie’s skin felt after the mask, which was a relief, so I left the Cafe Mocha and Yogurt mixes for them to enjoy.

This product gets my two gel-manicured thumbs up!

Gift Guides

Gift Lab: A Guy’s Guide to Beard Grooming

June 7, 2014

Beard Kit |UncommonGoods

Product: Beard Pack

Research:

A beard care kit isn’t something I’d heard about until recently. I generally keep facial hair so I was intrigued, but I wasn’t sure what it would be good for. If it made my beard grow slower or faster, I would have been sold right away. Upon reading the box I saw that the kit contains Whisker Wax, Moustache Wax, and Beard Oil.

Beard Pack | UncommonGoods

Hypothesis:

I’d gotten away without these grooming products for so long, I thought that if I were to add them to my daily routine they had better be good. The ingredients in the beard oil included rosemary oil and vitamin E, which sounded like they might make my beard softer and healthier. The moustache wax also contained rosemary and vitamin E, but also had natural oils and wax. If I were to use any moustache product, I’d want it to be all-natural, so we were all set there. Finally, the whisker wash ingredients sounded as though like they would smell great–which is important since your whiskers are all right below your nose.

Men's Grooming | UncommonGoods

Experiment:

As I had never used these products before, I took them down to the barber shop below my Brooklyn apartment for some assistance.

Matt's Beard

The barber Brent, I was disappointed to discover, had never heard of these products either. After some convincing he agreed to partake in my grooming adventure. Naturally, we started with the whisker wash. Brent made a good point that he didn’t know if it was working since it didn’t foam up very much. Even after using twice the recommended amount it didn’t foam up a bit. We decided that the low-foam characteristic may have been a result of the all-natural ingredients and that although it may get some getting used to, it is probably better than anything you’d find in the average beard soap.

Beard Wash

After the wash my beard definitely felt cleaner and smelled nice. Then Brent dove right into the beard oil, massaging it into my freshly washed and rinsed beard. The result was that my beard got much softer and smelled vaguely of fresh and natural oils. It was really nice.

Beard Massage

Lastly, to truly try out the moustache wax, I needed a moustache so I asked for a quick shave around my moustache. We put in the wax while twisting and sculpting to get a good hold. Even with that effort we really weren’t able to transform my ‘stache into a work of art but it was fun nonetheless!

Mustache Wax

Conclusion:

After using these products for the first time it became clear that the beard oil was the best part of this kit. I didn’t know my beard could be so soft and hippy-smelling (in a good way, of course!). The whisker wash was nice and probably better than alternatives, but it didn’t do anything new for me so when it runs out I probably won’t replace it. The moustache wax was the least effective on my facial hair, because even after using different amounts, sculpting and adjusting, it really didn’t deliver that perfect ‘stache shape I was hoping it would. Despite that, the moustache wax was fun to try out as I was my first time. Overall, I would recommend this kit for those seeking to improve their beard using natural, pleasant-to-use products.

Beard Kit Result | UncommonGoods

Gift Guides

Gift Lab: Tea to Go

May 21, 2014

Tea to Go | UncommonGoods

Research:
Do you know that person who wakes up with just enough time to brush, shower, and dress and barely catch the train? Well that’s me. I’m all about getting things to go, in order to save time – typical New Yorker, I know. Hence the reason I chose the Tea to Go for my experiment, figured it would make the difficulties of staying warm on the go, a thing of the past.

Hypothesis:
I am hoping that this keeps my tea warm without burning my hand, as well as keeping it hot for at least an hour. With public transportation being as unpredictable as it is, this would be a big thing for me.

I’m going into this with no knowledge of how the glass apparatus would hold up against the traditional metal thermos that I’m used to. The plan is to use the Tea to Go all the ways that it has been advertised and to see if it meets the needs of someone who’s the definition of a person on the go.

Experiment:
First, I got everything prepared: a kettle of boiling water, 1 peppermint tea for those frigid mornings, 1 peach tea with ice for the playful days, and some loose White Riesling tea for those sleep-in mornings that you can only dream of.

Tea

The body consists of very a thick glass tube and a heavy duty rubber grip. The inner body includes a small perforated section for the tea, then a long portion where the liquid will flow through. I didn’t realize how tall it was until I put it next to my jar of Linguini noodles and, as you can see, it’s right up there.

Tea to Go | UncommonGoods

According to the instructions, I poured the hot water through the small compartment for the tea bag – that was a no go. The water took really long to fill up the tube and I wasn’t about to wait. It made sense if you had to time to allow your tea seep and brew a stronger tea, which wasn’t what I was going for. Instead, I filled up the tube from the larger side and things went smoothly. After letting it sit for 10 minutes, I gave the bottle a slight tilt to allow everything to diffuse evenly and off we go.

Making Tea | UncommonGoodsHot Tea | UncommonGoods

The rubber grip was hotter than I expected, but definitely manageable. After being out of my house for 20 minutes the tea was still extremely hot, and I had to implement the blow-and-sip method, which worked just fine. After being in public transportation for an hour, my tea kept hot (and this is with me keeping the top off so in order to drink). It didn’t really cool down at all, I still had hot tea after an hour and half – that’s a plus.

Loose Leaf Tea

I also gave it a try with loose leaf tea. From looking at the perforations you can tell that large loose tea leaves are the best choice, so that you don’t have leaf residue floating around. I didn’t take that into account until much later. Even though some of the excess tea got in the drinking tube, it was not a big deal. But it’s just something to keep in mind for those who don’t like things floating in their drinks.

The Tea to Go certainly holds up for hot tea 100%. NY Winter – here we come!

Iced Tea to Go | UncommonGoods

Next I gave the bottle a try with iced tea. I let the Peach tea bag seep in a little bit of boiling water before adding filtered water. The water was still relatively warm so I decided to add some ice cubes, which quickly melted but were able to provide me with a cold drink. Took my book, iced tea and an orange and enjoyed the break from freezing temperatures and read for a few on my stoop.

I came back in after an hour with very little tea gone (Harry is just that captivating!), and I was amazed to find out it was still very cold, like a beverage right out the fridge.

Conclusion:
Being a person who lives in New York and has experienced the wonders of Jack Frost first hand, the Tea to Go has become my accessory for those cold rushed mornings. It’s a pretty simple but effective device that will keep my hands and tea warm.

Not only is it good for those frigid mornings we’ve come to love, but it’s versatile enough to keep tea cool for those strolling days. I’m thinking it’s going to come in handy as summer approaches, since it has officially been added to my morning check list – keys, metrocard, money, and Tea to Go.

Gift Guides

Gift Lab: Get Ready to Grow with the Gardener’s Compost Container

April 24, 2014

Kara | UncommonGoods

Product: Gardener’s Compost Container

Research:
I’ve decided to test a new product our Product Development team created, the Gardener’s Compost Container. It’s an earthenware compost bin used to collect food scraps in your kitchen, while keeping away odors and flies with its two piece charcoal filter. I was excited to try this product because throughout my experience of using compost bins, I’ve never managed to find one that offered the functionality and aesthetic that I was looking for. I was hoping that this one would fit my criteria. I’ve been getting ready for summer by preparing my rooftop garden and so this composting project will be a main component of that.

Gardener's Compost Container | UncommonGoods

Hypothesis:

Based on my research, I suspect that this compost collector will perform very well as a bin that eliminates odors and keeps away the flies. In the past, I’ve tested other charcoal filters in my bathroom and in other areas of the house with great success. They not only do keep away odors, but they also reduce moisture. Since composting tends to create a lot of moisture, I’m hoping that this filter will keep the moisture to a minimum and help prevent any mold from growing in the bin.

Experiment:
I began my experiment by setting up the compost bin in my kitchen. Even though I would have loved to display this beautiful compost bin on my counter, I have very limited counter space so instead I placed it under my sink. I had a little trouble when I first placed the bio bag in it. The bio bag that comes with the product isn’t a perfect fit, so the edges of the bag did not fasten securely to the sides of the bin. It was an easy fix, though! In order to keep the sides of the bag from slipping, I used a rubber band to fasten the bag around the edges of the bin. Once the compost collector was set up, I was ready to start testing.

Open container with bio bag
Bio bag with band

For the next couple of weeks, my roommates and I put our food scraps in the collector. Our food scraps included fruit, vegetables, breads, pastas, tea bags, coffee grounds, processed foods, and more. Since meat and fish are typically geared for backyard composters and not indoor compost bins (as they are likely to attract pests), we did not put this in our compost.

Full Compost Container

When we filled it for the first time, I ran into a problem when trying to empty the bin. When I tried pulling the bio bag up and out, it ripped due to the weight of the compost, leaving a mess of food scraps at the bottom of the bin. To remedy this, I recommend not waiting until it’s completely full to change the bag. Since my bag was so full, I had to dump the compost into a grocery bag, carefully avoiding any spillage. Not only was this a hassle, but it defeated the purpose of avoiding regular plastic bags, which will need to be thrown away in the trash because they are not compostable.

Removing compost bag

Throughout these weeks of composting, I constantly checked the bin with no signs of odors and flies. My roommates had confirmed that they had not noticed any odors or flies in the kitchen either since the start of this experiment, which is a good indication that the charcoal filter is functioning as it had been described it would. In addition, I did not see any mold growing inside of the bin, which indicates that the filter is doing its job of reducing the moisture created by the compost.

Conclusion:
In conclusion, I found that the compost collector performed very well when it came to eliminating odors, reducing moisture, and keeping away the flies. The charcoal filter functioned as it said it would, leaving me and my roommates very pleased with the sustained hygiene in the kitchen. Through this experiment, I did come across a couple of problems that I did not expect to run into. The bio bag that came with the compost collector isn’t specifically made for it,so it’s not a perfect fit. It also tore when I tried to lift it out of the bin.

5 - under sink

When I use this bin in the future, I’ll look for other alternatives that would function better. One solution could be to go bag-less and use Bokashi-style composting in order to keep the compost manageable. Bokashi style composting is a method that uses a bran (which consists of a mix of microorganisms) to cover and ferment food waste to decrease odor and flies. Without the bag, people may be concerned with the hygiene of the compost bin, but Bokashi is a great way to solve the bag problem while keeping the compost collector sanitary. Without the reliance on bags, the compost process is naturally more environmentally sustainable as well. However, this solution also creates inconvenience for those who need to carry their compost to a drop-off at a local farmers’ market or community garden. For those who would prefer to use a bag, I would suggest that they use a small, fitted burlap bag, which is sturdy and can be reused over and over again without the concern of wear and tear. These bags are also breathable, letting in plenty of air to help keep the compost from smelling. Most community gardens and farmers’ markets do not accept bio bags, so this makes for a great solution.

Kara with Compost Collector

Overall, the beautiful design and charcoal filter feature make the Gardener’s Compost Container a functional design without sacrificing aesthetic. With a few adjustments to the use of the bin (eliminating the bio-bags for a more practical alternative), it makes a perfect compost collector. NYC Recycles is piloting an organics collection program where they will be picking up compost in my area this summer. So I look forward to using this to collect lots of food scraps, especially in the upcoming months!

Gift Guides

A (Snow?!) Day at the Beach with the E-tablet Sounds Speaker

March 20, 2014

When I first heard about the E-Tablet Sounds Speaker, I don’t remember being impressed. Considering that the description explaining the two capabilities of this case is 1. It protects any standard sized tablet from water or sand and 2. It functions as a speaker for the device inside, I think it’s more factual to say that I wasn’t slightly fazed.

To be honest, I figured this isn’t amazingly revolutionary for a society with flying drones and glass lens’ sized computers but I see how this would make the day of an iPad touting, Beach going enthusiast. Nevertheless, I being none of those, didn’t care.

But here it was, included in the group of products that my colleague, Adam, and I were mulling over and brainstorming product demonstration ideas for. That’s when he says something along the lines of, “You know what’s funny, Merchants want me to make a video for this beach product now and it’s the middle of winter… especially this winter.”

[Light bulb clicking on sound here.]

But first.. let me explain this winter. Over the last few months NYC has gotten smacked with Mother Nature’s back hand. Snow, sleet, heavy rains, ice, hail, flooding, polar vortexes, perfect spring days… we’ve seen a lot this season. That day was no different. As we met, snow was accumulating outside and forecasted to continue until 5-7 inches of fresh powder joined us on our commute home.

Conditions were even worse the following Thursday. Downpours of rain, snow and hail made an exciting combination. The lines between sidewalks and roads didn’t exist and the game of guess-which-puddle-is-actually-a-lot-deeper-than-you-think was in full swing. Nonetheless, E-tablet Sounds in hand, Adam and I made our way to Coney Island Beach.

They say a picture is worth a thousand words right? Well, the video above offers pages about the results from our experiment. Throughout all of the activities, the E-tablet Sounds provided the soundtrack needed to pump up the volume out there and keep my thoughts off of how much snow made its way in my boots. Once we’re able to experience dry beach sand in the Northeast again, I easily see a follow up trip happening where the only place I expect to see ice is in my drink.

Gift Guides

Gift Lab: I Think I Scan

February 6, 2014

Angie | UncommonGoods

Product: Smartphone Film Scanner

Research:
I take pictures. Lots and lots of pictures. I own approximately seven cameras. While most of us now have a camera in our pockets, along with our bank books, train schedules, maps, concert tickets and everything else smartphones have condensed into portability, I still appreciate photographic film. I have appreciated it over the years to the tune of a box full of developed negative sleeves.
Negatives
The Makerof the Smartphone Film Scanner, Lomography, has an awesome reputation for designing super-cool photography products that stimulate visual creativity (three of which I already own), so I was excited to test this one.

Hypothesis:
Using my Apple iPhone 4S, the Lomography Smartphone Film Scanner should provide me a way to preserve and use my developed negatives, and add these previously printed photos to my online digital albums.

Smartphone Film Scanner | UncommonGoods

Experiment:

Out of the box, the scanner seemed simple enough to assemble; there’s a small instruction manual that points out the key components of the scanner unit, including the stackers, the base, the clamps and the LomoKino Mask (which you must lift and remove, lest your initial scans will be 1/3 of their intended size).

*The fine print: requires 2 AA batteries! (Pause. This launched a house-wide search for fresh batteries.) Battery door is a bit difficult to open; I needed to use a paper clip to lift.

3Batteries

The instructions noted to use only two stackers with an Apple iPhone 4/4S. (Stackers allow you to adjust the distance from your smartphone to the film to maximize the resolution.) So, I removed one stacker and assembled the unit.

4Stackers

Next, the directions were to attach the smartphone to the scanner by placing the phone between the clamp winged platform on top of the scanner. Once the phone is camera-lens side down on this platform, you’re supposed to close the clamp wings to secure the phone onto the scanner, with the lens squarely on top of the scanning chamber. However, while the scanning chamber’s opening is centered, the phone’s camera lens is not; the iPhone camera lens is to the left of the phone. So, you have to manipulate the entire top of the platform to also move left or right, after you’ve clamped the phone in place. This was not immediately understandable from the instructions given. (In fact, I’m not even sure it’s understandable here; just know that you will need to maneuver the platform around a bit to get your phone directly over the scanning chamber, i.e. hole on top where the camera lens must be.)

Clamp

I then inserted my negative strip using the film advancing wheel on the base of the unit and flipped the “on” switch to illuminate the light panel for viewing the negative. I enabled the camera feature on my iPhone, worked on centering the negative with the lens, and snapped a photo. The photo saved to my camera roll. Cool!

Negatives 2

Now for scanning!

The instruction manual suggested visiting a site to get the app to scan.
I logged on to the website:
http://microsites.lomography.com/smartphone-scanner/#app

I initially downloaded the free LomoScanner App EVEN THOUGH there is a bit of a disclaimer on the page about technical issues that have been experienced by early users.

7App

And sure enough, on both my iPhone and my boyfriend’s Android, the LomoScanner apps crashed. (Luckily it was easy to fix, but I decided not to try the app again.)

Returning to the drawing board, I download one of the other many suggestions for apps that were given on the Lomography site. (Not all of them were free, ranging from .99 to $4.99.) The Photoshop Express app (by Adobe) is FREE, and took seconds to download.

Photoshop Express

Nothing to sign into or request to trade your email address for access, the PS Express app simply offered the choice of “take a picture” or “open from camera roll” upon opening. I chose to access my camera roll, where I selected the picture I previously snapped of the negative.

10Dashboard

Once the photo was chosen, it was opened in a dashboard, where all the scan edits take place. First, I chose to crop the image, to rid the photo of the notched side framing. I also rotated it into a vertical portrait. Next, I chose “invert,” which essentially makes a negative out of the negative, “inverting” the original image. Since I started with a negative (the absence of color), the inversion actually deposits color. The result, in this case, was a color photo with a bluish tint. Using the brightness and contrast tools, I “warmed” up the photo, adjusting the tint, vibrance, highlights and other varying degrees of sharpness and clarity to improve the photo quality. But, alas, for some reason, my beloved “red” shiba inu, Kobe, remained blue in the photos. Below is the best I could get. I saved it to my camera roll , but it looks like there’s more I can do with photos in the future to get different results. (Check out this video for some ideas.)  Some more experimenting is required!

BlueKobe


11ahhh

Conclusion:
Overall, what was  produced by the LomoScanner wasn’t exactly what I was expecting–especially after the process of assembling everything and downloading apps, editing, etc., but it does beat my throwback Thursday (#tbt) habit of taking pictures of photographs (which result in a slightly blurry, glassy-eyed view).  As with all Lomography products, the LomoScanner has a loyal, even cult-like fan base, and the Lomographic community even offers tutorials, classes and online support to share tips and tricks. So, if you have the time or are into experimenting with photography, I’d say go for it.While the product is fun, if you just wanted a quick way to rid yourself of a box full of old negatives like I did, this might not be for you.

Gift Guides

Gift Lab: How to Make Cocktail Bitters

December 19, 2013

Morgan | Bitters

Research
I’m a devoted whisky (and occasionally whiskey) drinker and usually enjoy my Scotch like I enjoy the top shelf of my dresser: neat. But I was intrigued to see if bitters might prove an opportunity to salvage a liquor I’ve all but quit–rum. The recipe calls for a high-proof rum, so I picked up one of my favorite antiseptics, Bacardi 151. I also bought an aged rum (to test my bitters in later) that I was hoping might change my opinions of the drink. That rum, Plantation Grande Reserve (note the fancy pants name), was a vast improvement over any rum I could remember tasting (in either direction), in my younger days, so I was looking forward to a different experience, perhaps.
Bitters 1

Bacardi 151? Hello old friend.

Hypothesis
I don’t think I’ve ever tried bitters before, but I’m coming in with a semi-open mind. I like bitter things. There’s something smart-sounding about the word “bitters.” As I have a general preference for straight alcohol, I’m not sure how much this will “add” to the experience, but perhaps since I’m less predisposed towards rum, it may make that drink more enjoyable. (Spoiler alert: I cheated and came up with this last line after the experiment.)

Experiment
Preparing the mixture is actually a good bit of fun, adding the composite spices and ingredients as if your high school science teacher were a part-time bartender. (I didn’t see you and you didn’t see me, Mr. Chard.)

DIY Cocktail Bitters | UncommonGoods

Here I am masterfully peeling an apple and not cutting myself, the skins to be mixed into the jar of rum and spices. No blood! Easy enough.

The preparation requires a morning and evening shake of the mixture in its jar, which is a fun way to interact with your little blooming bundle of joy, and to appreciate the visual richness and beauty of the concoction as it does its thing. Eventually you’ll forget to shake it one morning and you’ll feel guilty for the rest of the day. Just let it go–it’ll be fine.

DAY 1 TEST
Finally, after a long and eager wait, 2 weeks are up and it’s time to open my present! Hold on there just a minute, bud–a few more steps before we’re ready for cheers. First we have to strain through cheesecloth (which doubles as gauze if you cut yourself peeling that apple earlier–try to use the clean portion).

Bitters | UncommonGoods

The liquid is separated from the solid ingredients, which are placed on the stove to simmer with water then cool. This is a good opportunity to be extremely impatient, blow on the mixture, and just dump it in hot anyway. (Again, you’re probably fine.)

Bitters in Process | UncommonGoods

After cooling, we strain the mixture once again. OK, this is your exit solids! In the trash you go! We then get started on simple syrup (a sugar and water mixture that is heated and added in equal parts to the rum mixture). Add to dropper bottle then the big payoff.

I decided on bourbon because, well, I like bourbon and it seems to feature in a good number of bitters cocktails. I could make a cocktail, but I’d rather really taste the bitters here just to see how they work with the alcohol. A bit of bitters drip drop into some Buffalo Trace bourbon.

Drinking Bourbon

Unfortunately, it wasn’t doing it for me. Nope. Had I done something wrong? I don’t think so. Was it last Friday when I neglected to shake the bitters? Were they exacting their revenge? Nah – I don’t think bitters hold grudges (although they are called bitters…). I think it was just the combination. The iconic Buffalo Trace flavor now muddled into something indecipherable and a bit all over the place. I added a bit more but that just added to the confusion. My eyes saw the Buffalo Trace and my mouth was failing to compute.

Give up? No way. We’ll try again tomorrow.

DAY 2 TEST
New shirt, new day, new opportunity to drink.

Back on the saddle and off the wagon with something a bit more compatible, perhaps – rum. Yes, my aged rum would make a late-game, surprise guest appearance in a highly unscientific evaluation.

In one glass – straight aged rum
In the other – that same rum with a few drops of bitters.

Bitters and Rum

This one makes sense. The rums obviously blend well, and this time I’m able to actually taste the spiced apple. Not overpowering, but definitely adds another dimension. Yeah – I get it.

Conclusion
I could see this enhancing a mediocre rum or allowing for a drinker to taste a decent one from a different perspective. I imagine you could mix into a number of different cocktails with different alcohols. (The instruction booklet names a few.)

The highlight for me though was the process. Enjoying a drink usually consists of nothing more than opening a bottle and pouring it. Occasionally this might involve stirring in a few extra ingredients–and sure–there are even bitters you could buy. But there was something very satisfying about the process; in the interaction with all the individual ingredients, in the ultimate unification of those flavors. There was something satisfying in the wait. Alcohol is one of those things that can take longer than anything to get right. We buy liquors that have been waiting for years, heck, decades to taste just right, then we sip them and they’re gone.

This kit represents the process, the time, the care that goes into a good drink. This probably won’t change my lineup of standby drinks or undying love of a good straight Scotch, but it was an interesting ride, I learned a bit, and I have something new to taste along with some of my old favorites. Nah, I ain’t bitter.